Monday, February 23, 2015

2015 Washington Auto Show - The Good, Bad, and Other- Pt. 1

Another year, another car show. Generally I prefer to go to these things on a weekday, so it's not as crowded. You can get into more cars and take better pictures without having people stand directly in the middle of your line of sight EVERY TIME. An cattle prod may help, but then again, other people may want to do the same to me if I'm stopping to take a picture, so we all do the dance. ANYWAY, this year instead of doing a make-by-make rundown of what I saw, I figured I's just run down the good, bad, ugly, weird and whatever that I came across during my trek across the convention center. That way, I may actually finish a post before the spring. Imagine that!

Toyota


- Toyota brought out the brand new Camry for 2015! Same boring Camry since 1997! That may be harsh, but it's true. The Camry is a perfectly fine car that will serve 90% of the public's need for their daily transportation (get where they are going safely, comfortably and reliably). They have nice features and tech packages (hey, Toyota has cars with Qi charging pads built in. That has to count for something). I'd recommend one to my sister. But even with the 'restyling', it's still boring to look at, and likely just as dull to drive.


- As if to make up for their perceived (or acknowledged) boring status in the automotive  realm, given all the Camrys and Prius models (Priuses? Prii? How do you pluralize that?), the Toyota section had a little bit of everything there, from their latest cars and trucks, to some of their NASCAR racing cars, to BAJA racing trucks, to their Mirai fuel cell concept, to a Sienna minivan in full Spongebob Squarepants wrap. It's like the organizers said 'yeah, we know we're boring and all, but look...STUFFS!!'  I suppose something would stick.

-One of the weirder things they had was a mashup of some of their cars with the folks from DUB, which would seem like the last form of corporate synergy you would look for. The 68 year old grandmother who loves her trusty Corolla would likely not be interested in 20" wheels for her car. And yet:


But that wasn't the strangest DUB modified car, no, not by a long shot. Try this Yaris:


- For me, the 2 best vehicles in the Toyota section were the Avalon and the Venza. The Avalon is probably the best looking sedan Toyota has created in some time, even if it's their version of a Buick Park Avenue. At least it manages to look better than the Camry it's based on. As for the Venza, for a crossover it's the best thing Toyota has had since they killed the Camry wagon. Only thing I'd hate would be replacing those 20" rollers. Either way, I'd spend my money on either.

- You know you're old when a Swagger Wagon starts to look like a sensible proposition.

Horsepower Warz

Even with the major push for more fuel efficient cars and downsizing V8s to Turbo V6s and Turbo I-4s, there are still small divisions within the Big 3 (Ford, GM, Chrysler) that either didn't get the memo or set said memo on fire. Each one had some 500+HP offering on display. To wit:


Even though the Mustang GT350R was just announced at the Detroit Auto Show (and the Shelby GT stealing some of that thunder a week later at the Barrett-Jackson auction), the base (?!?) Mustang GT350 is still a huge deal. This is the model that is set to replace the recently and dearly departed Boss 302, a car that handled so well on the track you almost forget there was an iron log that the rear wheels were connected to. With the latest Mustang the live axle has finally met it's demise and an independent rear suspension installed, which works wonders on the base Mustang (V6, GT and EcoBoost) setup. The GT350 does all the usual suspension tweaks and component lightening that any track focused car would do, and will be the first Mustang with magnetic shocks to further tighten up body control. But Ford has added one thing that has motorheads buzzing: a 5.2-liter flat plane V8 (what is a flat plane V8? Watch THIS.) Know who else uses a flat plane V8? Ferrari. Now, does this turn the Mustang into a cut rate 458? Hardly. But the engine should rev to the heavens and have a distinct bark when you floor it. Power numbers haven't been released yet, but they have promised 'over 500 HP and over 400 pound-feet of torque'. This without any superchargers, turbos, NOS, or large displacement engines (looking at you, GM...). The Boss 302 was never meant to be the end all be all of horsepower; rather it was built to cut down lap times on a track. GM countered the Boss 302 with their Camaro Z/28, with it's 7.0 litre (see...) engine, magnetic shocks and huge 305 series tires front and rear. With the GT350, the gauntlet has been tossed GM's way again. Game on


GM has also been making the rounds with it's halo performance car, the Corvette. The Z06 has always been the performance king of the stable, with the base (or Stingray, for the latest models) handling the entry level duties and occasionally the ZR-1 handling the bonkers engine department. Remember the C4 ZR-1 from the 90's, with the  Lotus designed DOHC V8? Probably the most engine tech the 'Vette has seen in decades. But I digress... The Z06's mission has always been to compete with the best sports cars in the world, be it the M3, the GT-R or the all conquering 911. While the car was often greater than the sum of it's parts, there were always areas that the car lacked in (like the seats) or just weren't as polished as it's competitors. It also has the image of an 'old mans' car, the thing you buy when you're having your mid-life crisis. With the new C7 bases Z06, Chevy has managed to fix a few of those issues. Fit and finish have been improved. New seats actually support the driver. And in the engine bay, a 650 HP, 650 pound-feet of torque supercharged push rod (we don't need no stinking DOHC here!) V8 does it's best to melt it's Michelins the moment your right foot gets too happy. While those shopping for Italian or German marques probably won't cross shop the Z06, they would likely be quite nervous if one pulls up beside them at a red light or on the track. Some may hate the fact it can be had as a drop top, or that you can have an 8 speed paddle shifted automatic. Somehow, I think those same folks will get over it in the 3 seconds it takes the Z06 to hit 60mph. Alas, it still looks like an old man's car, just with carbon fiber aero bits.


What if you like the idea of 600+ horses, but need to carry more than one person, and doesn't look like a Mach V? Cadillac has you covered:


This is the 2016 Cadillac CTS-V. Like the -V series cars that came before it, Cadillac takes their 5-Series baiting sedan, rummages through the GM parts book, and slaps the biggest V8 that can fit under the hood. In this case, the same motor that causes all manner of shock and awe in the Z06 is pressed into service for Caddy's latest super sedan. While it does lose some HP to the Corvette, some due to packaging restrictions and some due to GM pecking order, 640 HP is nothing to sneeze at. E63 AMG? M5? They don't stand a chance. Cadillac claims they have also tweaked the chassis to make sure it rides and corners better than their German rivals. With opinion spreading that BMW has been losing the plot for a while, now would be as good a time as any for Caddy to go get some new buyers into the dealerships. Styling, as with everything, is subjective. I suppose those side vents on the fender are supposed to help with brake cooling, but they look like a stick on package from Pep Boys. Not sure you can outrun tacky, but with this CTS-V, you can surely try.

But even with a Corvette engine under the hood, the CTS-V was not the most powerful sedan at the show. This was:


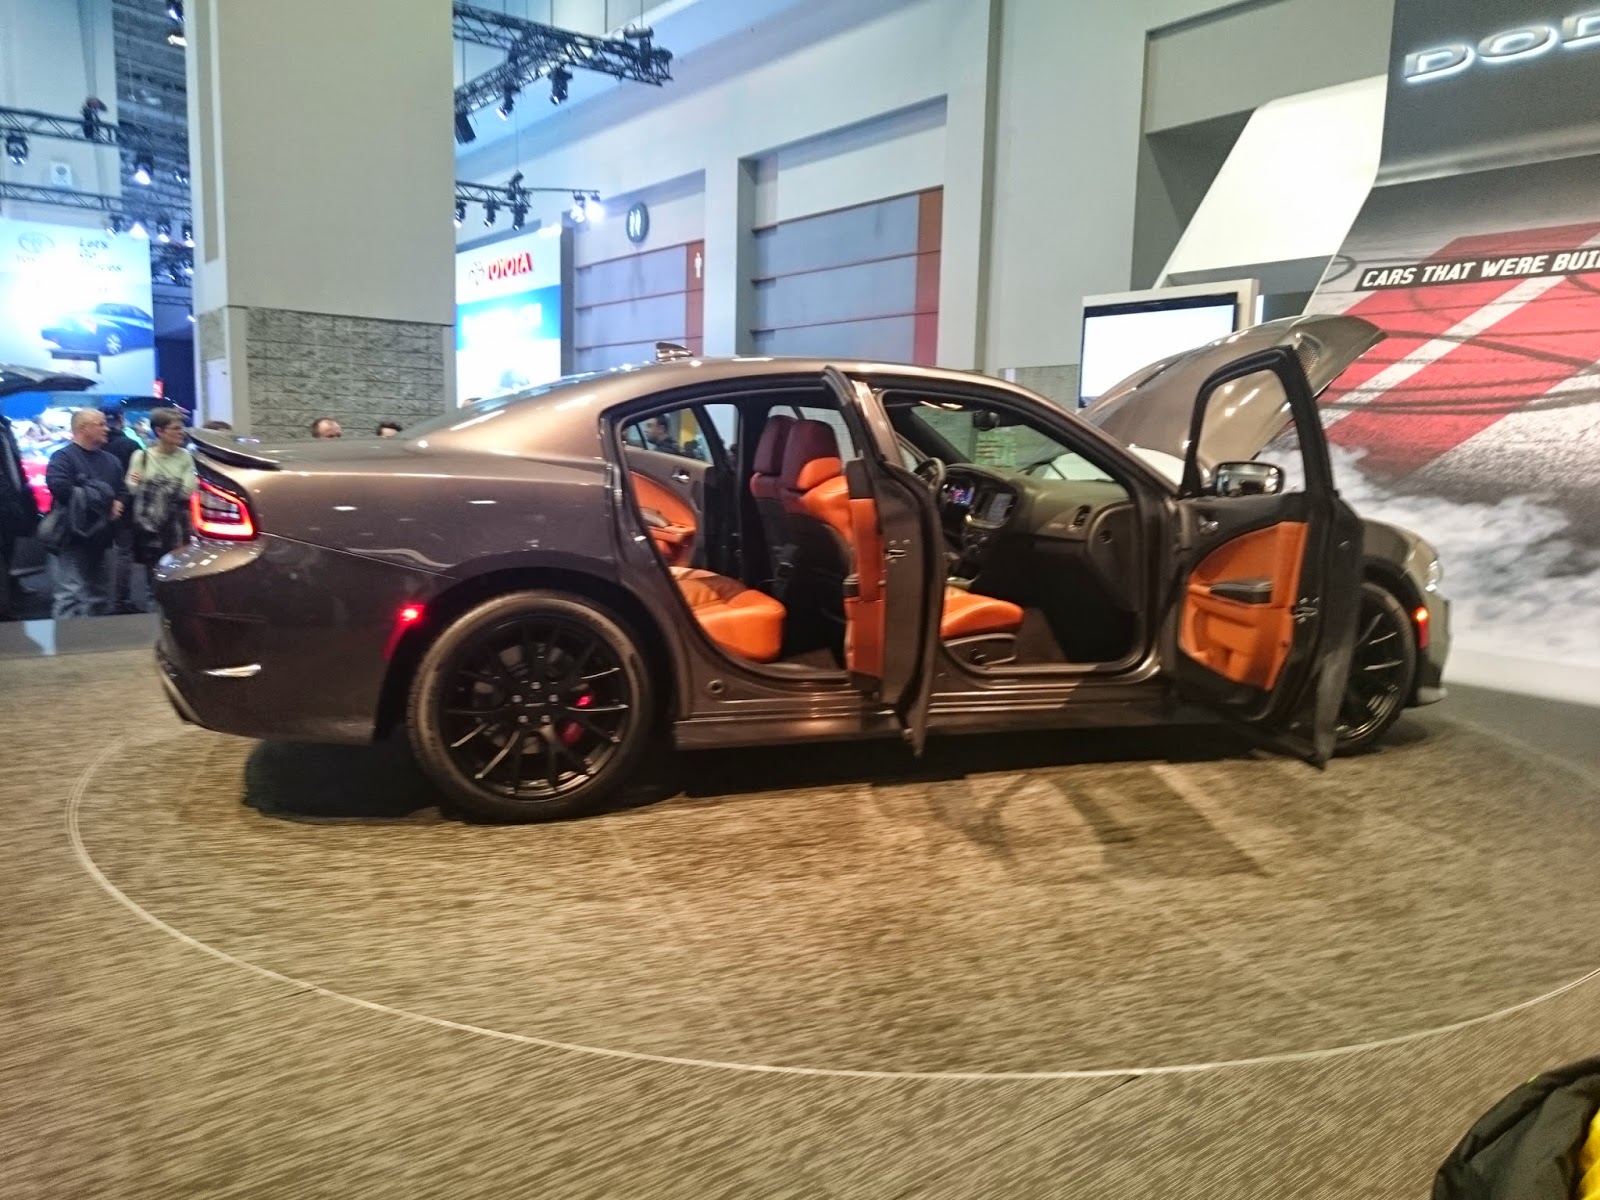
This, ladies and gentlemen, is the Dodge Charger SRT Hellcat. See that symbol on the front fender? That lets you know this is far from the V6 Chargers you may see in the hood (gas is expensive) or the V8 police interceptor that may be roaming the streets. Not even the former top dog SRT-8 model can stand next to it. This full size 4 door sedan has a 6.2 litre supercharged V8 making an unbelievable 707HP. Wrap your head around that for a moment. 707. BMW has nothing for it. Audi has nothing. Even AMG, known for making bonkers Mercedes for years, has nothing this powerful on a sedan. Franklin can take his 'Charger' to any shop in Los Santos and it won't make 707 HP. Find enough road (or an open test oval) and you'll top out slightly north of 200mph. True, even with huge Brembo brakes, 8 speed transmission, and leather and alcantara clad everything, it won't have anywhere near the brand cache as 'zee Germans'. A Charger is still a Charger, even with a ginormous engine under the hood. Still, any misgivings are likely forgotten once you flatten the loud pedal.

Trivia fact: the color of optional 20" dark bronze wheels are called "Brass Monkey". How great is that?


Colorful Sports Cars


Even with 700+ sedans making waves, typically your 2 door sports cars draw the crowds. The low slung body work, big wheels, and big exhausts are pretty obvious these cars are about speed moreso than practicality. But just in case, it's always best to paint them in the shoutiest colors you can for that added effect. For example:


Here we have the 2016 Jaguar F-Type convertible. Beautiful roadster, but so....boring in silver metallic. Great for a sedan, or if you're not trying to be too obvious (though, having a F-Type is pretty obvious by itself). But, if you have money to buy something like this, you likely already have a practical sedan, so why not just go all out:


Much better. This F-Type Coupe comes with a metallic orange (Jaguar prefers 'Firesand metallic) paint job that leaves no doubt this is a car to see and be seen in. Then again, with a list above $75k (and I'm sure this model is a LOT higher than that), I'd probably want to be seen too, so everybody knows how much debt I'm in. But that exhaust note though...

The F Type, like many sports coupes in this range, is trying it's best to take down the de facto standard of the genre, the Porsche 911. They weren't the only ones:


This is the Mercedes-AMG GT-S. Quick background. AMG has been tuning Mercedes cars for decades, churning out bonkers versions of all manner of C, E, SL, CL, and S-Class Benzes that would offer more horsepower and torque than the electronics could cope with (one engine made so much torque it had to be detuned as the traction control would try to compensate through at least 4 gears).
After being bought by M/B and becoming their in house tuning arm (much like the M division of BMW) AMG began to branch out from modifying existing Mercedes vehicles with the Black series to designing their own from scratch. Their first effort, the SLS AMG, was a nod to the iconic 300SL Gullwing, but with a 6.2L, 563HP V8 stuffed under the hood. While the SLS was set to do battle with the Ferraris, McLarens and Lambos of the world, M/B needed something a bit smaller to take on the all conquering 911. Downsizing the SLS chassis and engine, AMG has given us this electric banana colored (not the real name, but it works...) 4.0 L, twin turbo V8 that delivers 503hp and a properly sorted 50/50 weight distribution. While traditionally Mercedes products weren't exactly known for their handling prowess, AMG believes this vehicle has cracked that nut. Porsche may (or may not) still rule the roost, but they can't quite rest on their laurels.

Mercedes' country mate and heated rival, Audi, decided to play it a bit safer with it's sports car offering:


The Audi R8 V10 may be getting along in years (it's been out since 2007) but there's still nothing quite like it on the road. While not a classically beautiful car, this 2 seat mid engine coupe with it's unique carbon fiber 'side blades' is definitely distinctive and still turns heads. While it may not have the absolute grunt or razor edge that its contemporaries have (458, 911 GT3, MP4-12C, or it's cousin the Gallardo), a 550 hp V10 that revs to 8000 rpms and puts the power to all 4 wheels through a 7 speed dual clutch gearbox is nothing to take lightly. The R8 line is often credited with changing the focus of many of the current crop of supercars, making them much more comfortable and usable as a daily driver, while still being able to deliver thrills on an empty road or on a proper track. However, it comes at a price: over $220,000. Hey, that matte silver paint and fabulous Audi interior don't come for free.

Then we have Lexus, which isn't the first brand that comes to mind when the word 'sporty' is used with their vehicles. Tarted up Camry, maybe, but that's another story. Over the last few years, however, they have been making attempts at making genuinely sporty cars, spearheaded by the limited edition V10 powered Lexus LFA. Launching their "F"-series line of cars, Lexus hopes to have their own in house tuning arm like the M-division BMWs or AMG for M/B. Their most recent effort is the RC F, which they brought in 3 different flavors:

Raspberry:

Blueberry:


Or Orange Tang:


 The exaggerated 'spindle' grille that Lexus is grafting onto every model, whether it works or not, is a matter of taste. Either from the front, rear, or side profile, there's always some...unique character line that jumps out at you. Not always cohesive, not a total mess either. Just unique. One things's for sure though: you won't be mistaken for driving anything else. Under the hood lurks a 5.0-liter V8 cranking out 467 HP. While that may not be quite enough to strike fear in the M4s, RS5s or C-Class coupes, especially while hauling around 4040 pounds of weight, it should definitely keep the competition honest. My favorite detail about the car, though, is under the hood:


On the Tang Orange colored vehicle (probably not the real name of the paint color) the intake runners  are painted blue, making for a fantastic contrast (and matching the blue outline of the "F" marque sitting on the intake cover). It may not make the car any better, and many may not care, but it does make the car that much cooler.

Saturday, August 30, 2014

Semi-Pro: BBQ Chicken Pt. 2

Now that the chicken has sat in the brine for a while, its time to season and cook the bird. First, remove the chicken from the brine and discard what's left of the brine (if you notice, you will have much less brine in the container than when you started, meaning the chicken absorbed all that flavorful moisture). Rinse the chicken under cold water and pat dry with paper towels. Next, grab your favorite rub. It can be something from the store, something from a BBQ shop, something you put together yourself, or simply salt, pepper and a touch of garlic. For a great all purpose BBQ rub, try this:
  • 2 tbsp kosher salt (not iodized or table salt)
  • 2 tbsp paprika (sweet or Hungarian if you can find it)
  • 1 tbsp dark brown sugar
  • 1/2 tbsp regular sugar
  • 1 tbsp chili powder (remember, if you can make your own, do it!)
  • 2 tsp ground chipotle chile
  • 1/2 tsp cumin
  • 1/2 tsp black pepper
  • 1/4 tsp cinnamon

No matter what you use, it's probably gonna look like this

As mentioned in an earlier blog post, it doesn't matter what secret combination of herbs and spices you put on your food if your technique is not sound. Don't get too hung up on the exact measurements or ingredients of the above example, or one you try to make yourself. Feel free to add a touch of cayenne of you like your chicken with more kick, or rosemary and garlic for a more savory feel. The most important parts of this cook is brining the chicken and properly grilling the chicken, which we're getting to.

With your rub in hand, generously season the chicken. You can add the rub to a plastic shaker and go to town, making sure both sides get a good dusting of rub. Lift the skin up and shake a bit directly on the meat as well.

Mmmmmm....good stuff

If you have a good amount of rub, and another gallon bag, you could also try seasoning the pieces this way: mix 1/2 cup of extra virgin olive oil (EVOO for you Rachel Ray fans) with 1/2 cup of your rub until you have somewhere between a slurry and a syrupy consistency. Add the chicken to the bag, pour the mixture over the chicken, seal the bag, then shake to evenly coat the chicken.

Looks like spicy syrup

You'll go through plenty of bags doing BBQ. It's worth it though

However you season the chicken, let it rest for 30 minutes or so while you get your cooker set up. For a chicken cook, I always set up the cooker for  indirect cooking between 325-375 degrees. This will give pretty even cooking and a nice crispy skin once all is done. Using my chimney starter, I use a full load of coals and get them red hot and ash over. Once they are ready, the coals are piled to one side of the grill, making a high heat zone. I like to add a nice chunk or two of hardwood (hickory, pecan, apple, etc) for some extra smoke flavor. The chicken will go on the opposite side of the grill, where they will get the heat from the coals, skin side up, but not be directly on top of them to keep from burning. If you have a lot of chicken to cook, place a layer of  fresh coals on the bottom of the grill before pouring the lit coals. They will ignite as the lit coals burn down and keep the heat going.If you are using a dedicated smoker, set your vents so that the temperature in the smoker climbs to the 350 degree range. If you're using a gas grill, light one or two of the burners (depending on your setup) and have the chicken on the side of the grill with the unlit burner. You can either use a foil packet with soaked wood chips over one of the lit burners or if you have a dedicated smoke box, use that.

Coals to one side folks

Don't forget to oil the grates!
The charcoal could be piled higher on one side to give me more room

I let the chicken cook for 45-60 minutes, depending on if I've got light or dark meat on the grill, turning the chicken over maybe once during the cook. Depending on how your coals are set up, you may want to rotate the chicken once, moving the pieces closer to the coals a bit further back, and those that were already back a little closer to the heat. Some people like to place the chicken skin side down directly over the coals for a minute or two to get the skin extra crispy and extra grill marks for presentation sake. 

Those thighs look GOOOOOOOD

That's a lot of wings...
If sauce will be added to your chicken, start brushing it on (or dip the chicken in sauce and place back on the grill) within the last 10-15 minutes of the cook, and keep an eye on it. If you brush it on earlier you run the risk of the sugar in the sauce burning, which we don't want . Use your thermometer to check the temperature of your chicken to know if it is done. We're shooting for 170 degrees at the thickest part of the chicken. Please DON'T just use the old adage of cooking the chicken 'until the juices run clear', as the chicken still may not be done. If you go over that target temperature, don't worry too much. Since the chicken is brined, you  seriously reduce the chances of overcooking and drying out your chicken. Once done, pull the chicken off the grill and let it rest for a moment or two. Then, dig in.


BBQ chicken isn't hard to do folks. As long as you find a rub you like, cook indirectly and brine your chicken, you are guaranteed to turn out chicken you can be proud of and have people clamoring for more. Enjoy!

Wednesday, July 16, 2014

Semi-Pro: BBQ Chicken Pt. 1

Chicken has to be one of the most versatile pieces of meat around. You can bake it. Broil it. Fry it. Boil it (though, yuck!). Trim it into pieces 9 ways to Sunday. Season it with every spice known to man. One of my favorite things to put on the grill is chicken. A good piece of BBQ chicken can change your life. Well, maybe not that serious, but it sure is a wonderful thing. Cooking that good piece of BBQ chicken, though, requires a little bit of effort. You could easily turn out chicken that is undercooked, burned, dried out, or just plain bland. But with a few simple techniques and a bit of patience, that's not going to happen. This post is focusing on bone-in, skin on chicken. Some of the techniques are the same whether you have bone in or boneless, but there are a few differences with the actual cook for boneless that I won't spend too much time on. Shall we begin?

Note: For the cooking professionals, there is a difference between 'BBQ' and 'grilling'. BBQ is usually low temperature (225-250, possibly 275 depending on who you ask), indirect heat, with lots of wood smoke. Grilling is usually at temps 300-375, and can either be indirect heat or direct heat. Technically this post would be grilled chicken, but many people use the terms interchangeably, so that's what I'm going to do here. Any problems, contact my manager

- First things first. Get yourself some chicken. Doesn't matter if it's drums, wings, thighs or breasts. Preferably the chicken is at least refrigerated (fresh is good, but not necessary) but not frozen. Personally I prefer thighs, but whatever floats your boat.

This pack came from Sam's Club. Perdue usually has quality chicken

The one thing I don't like about thighs, though, is how they are cut before they are packaged. Often there's a lot of extra skin and fat that may be still attached to the thigh, or pieces of cartilage from the joint when the bird was cut apart. Now, you could just give the pieces a quick rinse and call it a day, but I like to trim the thigh into something a little more presentable. I set up my work area with my cutting board, the pack of chicken, and a container to put the trimmed pieces in once they are done.


Next comes the messy part. Each piece of chicken is laid on the cutting board and inspected. I lay the skin side down and try and spread the skin out so I can see exactly how much needs to be cleaned up.


With a sharp knife, I cut off any really big pockets of fat and square up the skin so that it looks a little cleaner. Any bone or cartilage fragments are also removed. Once finished, the thigh looks like this:


The thigh then moves to the container and is repeated for every piece until the pack is done. There's going to be a nice size pile of nastiness that can be tossed. It's a little time consuming, but it's worth it


On the competition BBQ circuit,the preparation is even more extreme. The thighs are usually trimmed so that the piece is as close to symmetrical as they can get it. It cuts away good portions of meat, but it makes the presentation to the judges better. The skin is then peeled back from the thigh, sometimes totally removed, and scrapped with a sharp knife to remove all of the fat on the underside of the skin, then wrapped back around the trimmed pieces before they are cooked. This is quite time consuming and extremely messy, but it does help achieve the 'bite through' skin the judges are looking for. Since this isn't a competition cook, I wouldn't bother with this step.

Of the parts of the chicken, the thigh is probably the most time consuming to clean up. If you rather not have that much work in store, cook some wings. Most of the time all that would be needed for those is to trim some of the extra skin around the drum part of the wing.

Cover the chicken and place it aside for the moment in the fridge or cooler. Now it's time for probably the most important part of the chicken prep: BRINE YOUR CHICKEN. Do not pass go, do not collect $200, do not skip this step. Why is it so important? Brining your chicken does 2 things. First, it adds moisture to the chicken. That way, the meat will not dry out during the course of the cook. Dry chicken breasts are now a thing of the past. Second, a brine can add flavor to your chicken, be it spicy, savory, slightly sweet, or anywhere in between. 'Well, why not do a marinade instead?', you may ask. Yes, a marinade is a quick way to add flavor to your meat. However, while a marinade uses acid (vinegar, wine, citrus juice, etc) to break down some of the proteins in the meat, it does very little to add moisture to the food. Also, a marinade penetrates just the  top part of the meat, while the flavor a brine can introduce will penetrate all the way to the bone. A marinade can also start to break the meat down and make it mushy if the meat is left in too long. The biggest downside to using a brine is time: the chicken needs to soak for a few hours to be effective. The benefits just can't be beat, so the extra time is worth it, in my opinion. If i don't have time to brine my chicken, I won't grill chicken. Once you tried it yourself, you may share my sentiment.

So, what is a brine anyway? At it's most basic, it's a mixture of water and salt. Sugar is also found in your most basic brine mixtures. Why does brining work? The ratio of salt in the brine mixture is greater than the ratio of salt in the meat. Through osmosis, the meat will absorb the brine until the ratio of salt and water is equal inside and outside the meat (who said you'd never use grade school science in the real world?) A good ratio to start with is 1 tablespoon each of kosher salt and sugar to 2 cups of water. Even if you left the brine with this basic mixture, you will greatly improve the juiciness of your chicken. But why stop there? You now have the opportunity to add further herbs and spices to your brine, which will carry into the chicken. Go for some peppercorn, paprika, garlic, poultry seasoning, honey, chili powder, etc. Let your tastebuds be your guide. You can also find premixed brine seasonings like THIS, which I have tried and have had great success with. One of my personal favorites is a spicy apple chai brine, which has been my go-to brine for the last few years. Leave a comment or e-mail me and I may send the recipe to you to try. Depending on your ingredients, you may need to bring the brine to a boil in order for everything to dissolve. If so, let it cool before you add it to the chicken. You don't want to cook the chicken just yet! You can also make the brine before time and sit it in a container in the refrigerator until you need it. Just be sure to have the container marked, lest someone grabs a glass of salty spicy brine instead of apple juice (like my father in law once did!)

I wouldn't recommend drinking this. Leave that for the chicken.

With the brine done it's time to soak the chicken. One of the easiest ways to do this is by placing the chicken pieces in a gallon (or larger) sized freezer bag, then pour the brine over the chicken, making sure all the parts are submerged. Squeeze the bag slightly as you close it to push as much of the air out as you can, then pop the whole thing the the refrigerator for at least 2 hours (I prefer at least 4, or even overnight if I have the time). If freezer bags aren't handy, you can also add the chicken to a large bowl, pour the brine over the chicken, cover the bowl with plastic wrap then place in the refrigerator.


Let the chicken soak in the brine for at least 2 hours, longer if you have the time. Next step? The actual cook. Stay tuned...


Friday, May 30, 2014

Semi-Pro: BBQ Ribs, Part 3

Now that the ribs have been prepped and the grill is heated up, it's time to put the two together. Take the ribs and place them bone side down, on the side of the grill away from the direct heat (be it your coals on a charcoal grill or the burner on the gas grill). Some pitmasters will add an additional water pan on the upper grate close to the ribs (but not directly over the fire, as we don't want to boil the water). If you have enough room on the grill, go for it. If not, don't sweat it too much. the pan below will do just fine. After that, close the lid and walk away. We're in for the long haul.


Let them be for the first hour. After that, it's time to check on them to be sure they are not drying out. This is usually done by spraying or mopping the ribs with something. It can be as simple as apple juice or a combination of juices, oils, vinegars and spices. Usually I will end up using one part apple juice and one part cider vinegar, sometimes with a bit of rub dissolved in the mix. Use a spray bottle or a a brush (the silicone brushes work, but the cloth/string mops like THIS are even better for this task). Add enough to keep the ribs from drying out, but not enough to wash the rub off.


Close the lid and repeat every 45 minutes or so until the ribs have been on for 3 hours.

At this point, you could continue to let the ribs cook until they are done in another hour or two. However, a number of pitmasters, especially in competition, will use the 'Texas Crutch', whereby the ribs are wrapped in foil with a bit of liquid to help tenderize and flavor the ribs further. Is it necessary? Probably not. Should you give it a try? Depends on how much time you have. For this cook, I did, with a twist. 

Using grill tongs, pull the ribs off the grill, place in a pan and bring them inside. Using heavy duty aluminum foil, pull a sheet 1 1/2 times as long as the ribs. Now it's time to gather your materials for the ribs:


The Parkay will help tenderize the ribs even further while inside the foil. The brown sugar and honey will add a layer of sweetness that will go between the spice from the rub and the sauce that will be used later. Place the ribs in the middle of the foil, lengthwise. Sprinkle a bit of the rub used on the ribs. Next, squeeze a line or two or Parkay on the ribs. Add a hand full of brown sugar, and follow up with a line or two of honey.

Bring the edges together above the ribs, then fold/crimp them together lengthwise so it is sealed. Do the same for the ends of the foil so that the ribs are now sealed. Alternatively, if you did not want to go the sugar/honey/Parkey route, that is perfectly fine. Wrap the ribs in foil as described above. Before crimping one of the ends of the package, add a bit of juice (apple, orange, pineapple, etc) into the foil packet, bone side down, then crimp the end tight. Once the ribs are done, place them back on the grill for another 45 -60 minutes with the lid closed. Pull them off the grill and remove from the foil packet. Be careful, as the steam may burn like a bag of microwave popcorn. When done, return to the grill for sauce


After 4+ hours, we're just about ready to eat. At this point, the meat should be starting to shrink back from the edges of the bones. The bones should twist just a bit, but should not fall out of the ribs. When held with tongs, the ribs should have quite a bit of give, but should not break in half. We can now add our sauce. What kind of sauce really depends on your preference. Homemade or store bought, mass market or bouquet, whatever tickles your taste buds. Using a brush or mop, add the sauce to the ribs. If the sauce seems too thick, or you prefer a thinner glaze on the ribs, just thin the sauce with some apple juice. Close the lid and let the sauce set for about 30 minutes. After that, it's finally time to pull them and get ready to eat.


The ribs should be tender, but with a bit of pull. The meat should be nice and moist, with a balance of spice sweet and a hint of smokiness. Contrary to popular belief, the ribs shouldn't fall off the bone, which is a sign that the ribs were overcooked. How you serve them is entirely up to you. You can take a knife and cut them into individual rib bones, or serve half or the entire slab at once.

That's it folks. The technique isn't really that complicated, but it does take time. Trust me, your patience will be well rewarded. As stated in the prologue, I am far from a professional. Every pitmaster may not follow the same exact steps as mentioned on these posts. After you try it yourself, you may want to tweak a few things more to your circumstances or liking. Have at it. As long as you can properly prep your ribs and keep a stable temperature you will be fine. Now go out there ans make yourselves some ribs people! Let me know how they turn out.

Until next time...