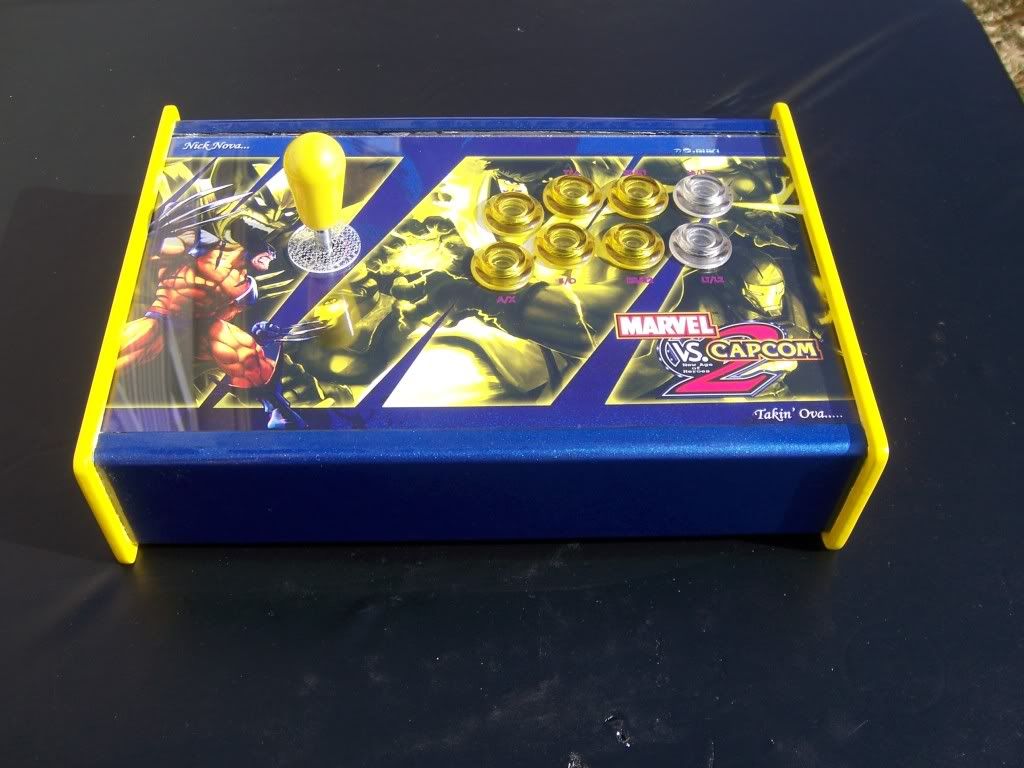
Friday, June 17, 2011

Project: International Slumber – Part 3: Get In Where You Fit In


It was now time to figure out the best way to get all the PCBs in the case. As shown in Art’s Tek-Case video, there are 2 plexiglass pieces that the PCBs can mount to: one with holes drilled to fit a MCC and the other designed to zip tie a PCB to.  With the case assembled, there’s just enough space to mount a PCB above and below the mount, provided you’re creative with your wire connections. The PCB mounts that attach to the support case are offset from the center line, meaning there is more space for the PCB and it’s wiring than the other side, which comes closer to the top panel of the case. Since the MCC and the Sparky Jr. would end up with the majority of the wiring, I decided to place them where they had the most room on the PCB holder. The Master$trike would only have a few wires attaching to it, so placing that one on the bottom seemed reasonable. The MadCatz Fightpad PCB, while wide, is pretty flat since it doesn’t have any analog pots to worry about. It would go on the bottom of one of the PCB holders, but I would have to figure out how to mount it to the plexiglass holder. After some mental gymnastics to figure out what would work best where, I decided to go, from left to right, top to bottom: MCC, Sparky Jr, Master$trike, Madcatz PCB.

After figuring out where to place them it was time to figure out how to mount them. While one of the PCB holders has holes drilled for the MCC, you still need to provide your own post and screws to attach the PCB to the holder. I headed down to Lowes and picked up a pack of ½” and ¾” 4-40 screws and a variety of plastic screw posts that I thought would be long enough to keep the PCB from directly touching the plexiglass holder and allow enough thread for the nut to screw on the other side. For the other PCBs, I’d need to get a bit creative. With the MCC mounted to its holder, I placed the Master$trike on the other side of the PCB holder and traces the outline of the board and it’s screw holes. Then, I removed the MCC and drilled and countersunk the holes under the MCC. That way, I could insert the screws for the Master$trike under the MCC and not worry about the screw toughing or shorting any of the MCC’s connections. I used 2 nuts on the screws: one to secure the screw to the PCB to make sure it wouldn’t get loose and as a spacer to keep the Master$trike off the plexiglass holder, and another nut to secure the Master$trike to the screw post. That setup gave me just enough clearance to attach the assembly to the top and bottom case support brackets.

The other 2 PCBs were a little trickier. Since the other PCB holder had no holes drilled at all, I would need to drill all the holes needed. I started with the Sparky Jr., tracing the board, marking the screwholes, then drilling and countersinking the holes on the opposite side of the PCB holder. The screws were mounted the same way I did for the Master$trike.  The Madcatz PCB would need to have some holes drilled in the PCB, since the holes that were present weren’t spaced in a way I could use them with the plexiglass mount. I measured the width of the mount, then calculated how far apart the holes needed t be drilled on the PCB. Fortunately there is enough space on the PCB where there are no electrical traces running through it that making the holes wasn’t a huge issue. I then drilled and countersunk the holes in the plexiglass holder as I did with the other PCBs.

With the boards mounted and dry-fitted in the case, it was time to work on the buttons. To get the arc eyes to fit in the Seimitsu buttons, I whipped out the trusty dremel and ground out notches in the button casing to allow room to fit the pin headers that would be soldered to the arc eyes. Once that was done, I took the dremel to the sides of the switch where the pin headers would be. That way, once assembled, the headers could protrude from under the button and allow the wiring harness to plug in. I probably could have just drilled holes in the button casing and ran wires from the arc eyes and hardwired everything. But I like to be able to unplug things in case anything goes wrong, so the extra work making the pin headers fit was worth it.
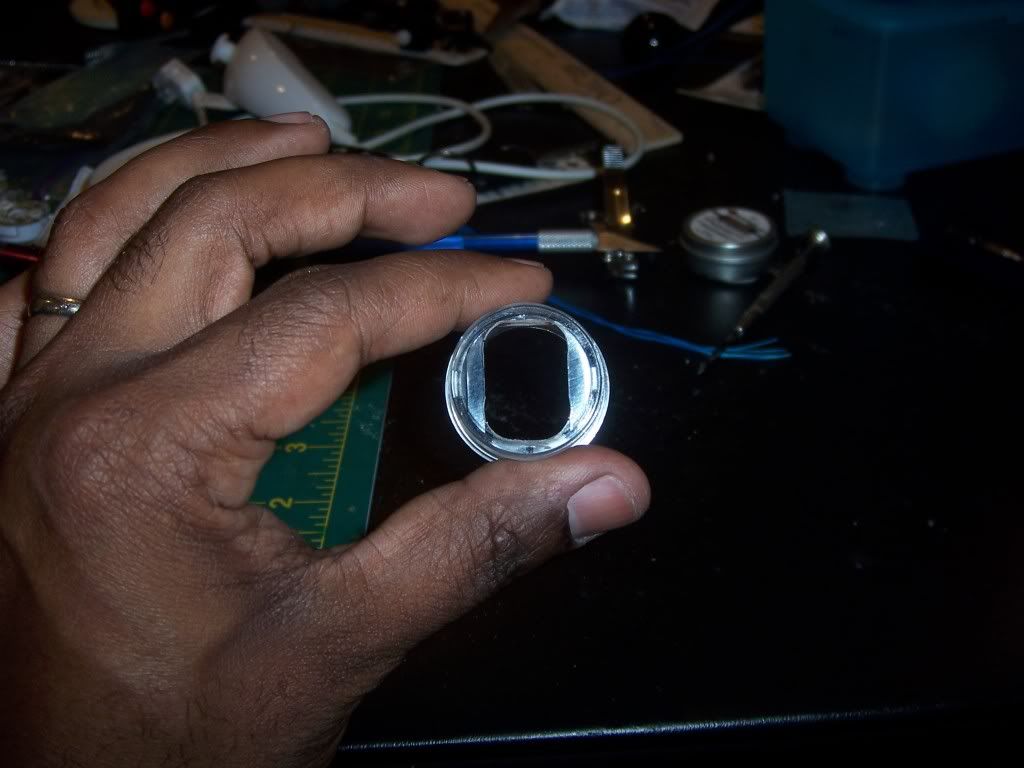
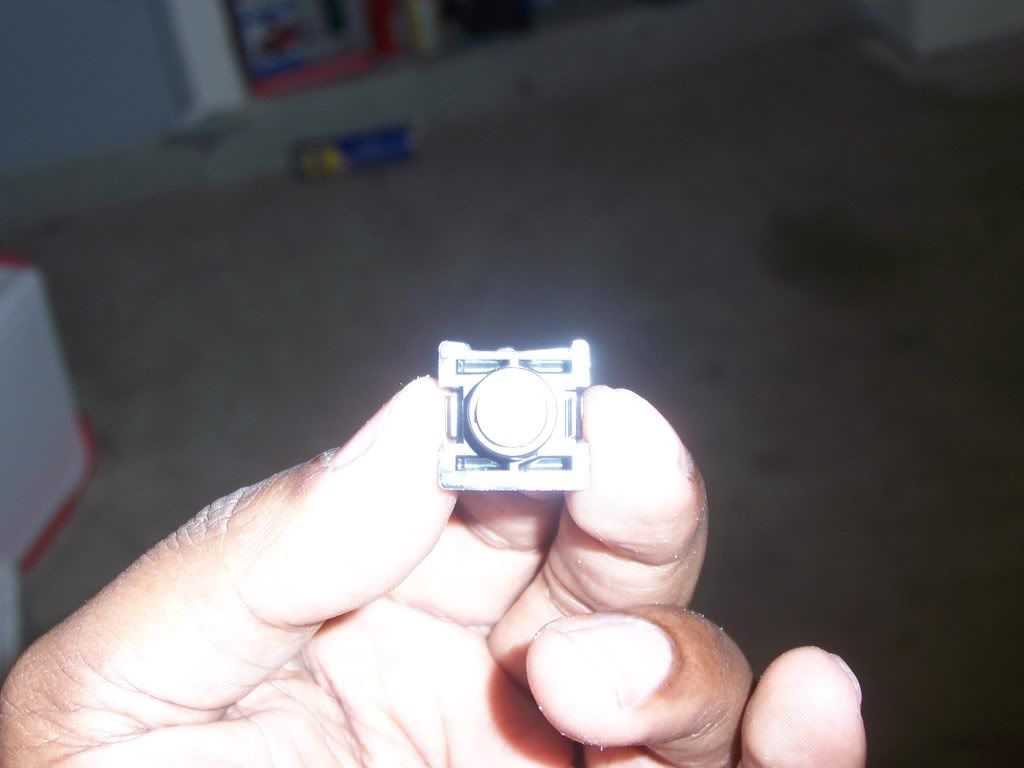
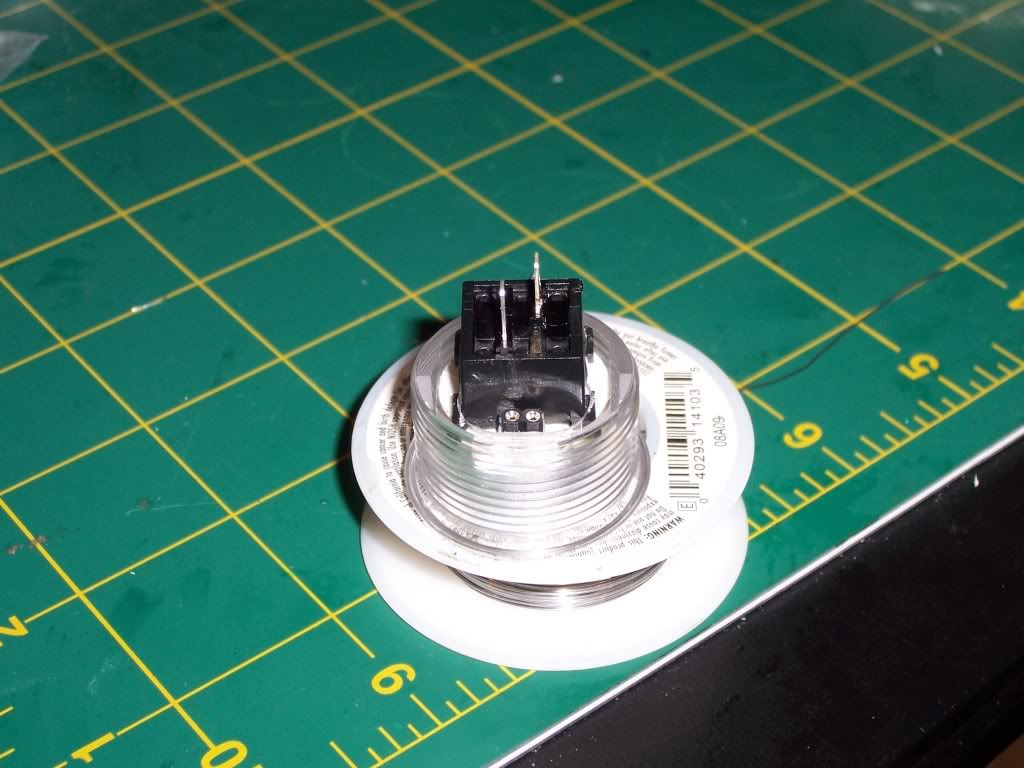


Once the buttons were modified I placed them back in the case to start the arduous task of wiring everything.

Wednesday, January 26, 2011

Project: International Slumber – Part 2: Some Assembly Required

One of the first things to arrive was the Tek-Case. Art has the case unassembled and flat packed to save on shipping. The plexiglass parts were all wrapped in plastic and packed between cardboard and bubble wrap, ensuring that all the pieces arrived undamaged. The 6/32” and 8/32” screws  were bagged and labeled as well. While there were no written instructions in the box, the YouTube video covers everything better than printed instructions could. 


 Flat packed for freshness!


One of the nice things about the Tek-Case are the number of customization options available. Since the case is plexiglass, there are a variety of different colors you can choose from for each panel. Want a clear top panel and a smoke bottom panel?  You can do that. Mirror side panels? Doable. Clear top panel, blue support panels, red name plate, and the ability to have artwork on the bottom panel? Why not.  Want an etched image on the top or bottom panel? You know it. The whole case in Florescent Green and Orange? Questionable taste, but it’s your money…

 Are we clear? Crystal...

Blue ice. Looks like Tron...


Yellow border? I can see that

 
Perfect for BlazBlue


In addition to the color options, you can also specify a number of 6 or 8 button layouts, from a Viewlix layout, Sega Astro City layout, even a straight Capcom 6 button layout or a Mortal Combat style layout. The possibilities are only limited by your imagination and wallet. D3v went with a fairly simple setup: clear case, mirror nameplate, option for artwork on the top and bottom. One of the plexiglass panels between the support layer, the artwork and the top panel had Morrigan’s image etched to it, allowing it to be overlaid on a different piece of art should d3v decide to change the artwork down the road.

Nice etching

 Very nice indeed...

D3v also ordered the optional weight slots with mirror plexiglass, which would allow him to add some ballsat (such as BB pellets) inside the case for more weight.

The piece that makes everything work is the diamond joint. The joints allow the perpendicular panels to screw together with the 6/32” screws and nuts that fit into slots cut into the joints. The top of the joint is threaded for a 8/32” screw, which allows the top panels and support layers to bolt to the ‘frame’ made by the side panels. The entire setup is as simple as it is ingenious.

After a few days, my order from LizardLick came in:

That's just the first wave of parts

Even though I was still waiting for some of the electronics to come in, I decided I’d put the buttons and joystick in the case to get an idea of what the finished product would look like and how much room I would have for the PCBs. Turns out, it looked quite nice:
  So fresh. So clean..


d3v should submit the art to the editor of Big 'Uns....


Like a nameplate belt buckle. But much cooler

Button inserts FTW. Balltop just a stand in for now


Looks like a lot of room in there. That's going to change

As nice as it looked, there was still a lot of work to do. 6 Arc Eyes and 4 PCBs had to be wired up. Time to get busy…


Project: International Slumber – Part 1: The Set Up

The plan for Project: International Slumber, or P:IS, was to have all the parts shipped to me for assembly and testing then to ship the finished product over to d3v. The spec sheet for this project would be rather full: Sanwa JLF stick, clear Seimitsu buttons, a set of Arc-Eyes for lights, a MC Cthulhu dual modded with a 360 PCB for multi console support, and a RJ45 hookup with compatible USB and Gamecube cables. The one thing he wasn’t sure of initially was which case to get. 2 cases were in the running. Voltech’s VAS-HG cases are beautifully crafted, extremely sturdy works of art. While not exactly cheap, they are worth every penny. I’d know, considering how El Guapo turned out. The other choice had been teased for a few months and were finally ready to start production. Art over at  Tek-Innovationshas made plexiglass covers and replacement panels for TEs and HRAPs for a while. His most recent project is much more ambitious: a plexiglass case, complete with options for colors, etchings and button placement. All of the parts fit together with standard screws. If you can put together a Lego kit, you can probably put this together as well.


D3v decided to go with the plexiglass case, which he optioned out to his needs and prepared the artwork, based on Darkstalkers fan favorite Morrigan, to be printed. The rest of the parts I ordered myself. I hit LizardLick up for the JLF and clear 24mm (just released) and 30mm Seimitsu buttons, the MC Cthulhu, and the Neutrick RJ45 pass through jack. I ordered the least expensive MadCatz 360 fightpad from Amazon, since I didn’t care what character I got (all I wanted was the PCB). For the lighting, I had to hit up my Canadian Connection. Purplearms was able to supply me with the Arc-Eyes for the button lights as well as a Masterstrike, which would take care of switching between 3 colors, powering the MC Cthulhu and 360 PCB, and handle USB switching.

Right around the same time 32Teeth, another crazy Canuck, came out with his custom PCB, Sparky Jr. Through the power of multiplexing, this PCB would allow you to assign one of 8 colors to any of your buttons, and would even assign colors depending on how many buttons you pressed (for instance, a color for an EX move, or focus attack). This would be a perfect opportunity to try it out. So, much like the Leo in the Berserker Barrage project, d3v would get a board that I don’t have in one of my personal projects. This means that somewhere down the line I’ll have to make one with a Sparky Jr. myself, but that’s down the road.

With the major parts lined up it was time to sort out the random odds and ends. I hit up Gummowned for a Gamecube /RJ45 cable, since I didn’t want to find one at my local Gamestop. I ordered some 10 color 28 gauge ribbon wire and a 15 foot USB cable from an electronics supply shop online. Since most of my other projects have been wireless (go figure), I had no need for an RJ45 crimping tool. So a trip to the local Home Depot netted one of those, along with a 1 foot CAT5 cable which I would wire to the MC Cthulhu  (MCC from here on out, as I can never spell it correctly!).  With the parts en route all I could do is wait for everything to come in and see what happens. Turns out, quite a bit…

Project: International Slumber - Prologue


Author’s Note: I had intended to do all the build worklogs in order. However, this one is a special project that needs to get done in less than the year it will take me to catch up with the other worklogs. Just consider this a flash forward deal, and any references to past projects and events will be explained in due time. Like reading the script for ‘Lost’, only less confusing…

At this point I had 4 customs under my belt: My OG El Kabong2 stick, the Berserker Barrage MvC2 stick for Nick, the Guile Generations mashup for Germaine, and my lovely El Guapo. Out of the 4 projects, I’ve worked with d3v on the artwork for 3 of them, and tried to ship some people his way for some commissioned art as well. One day I got an e-mail from him about a project he wanted me to work on with him. After doing a number of custom jobs and seeing some of the amazing custom cases available, he decided it was time to get one of his own.  This one would have all the bells and whistles on it, and he wanted me to do the wiring for him. I was honored and intimidated at the same time. This would be the first time doing a custom job for someone outside my immediate circle (I had installed a Chimp in someone else’s stick a while ago, but that was small change compared to this). I had to make sure everything was as neat as possible and that everything worked the first time and every time. Complicating matters was the fact that d3v isn’t exactly local. I’m near Washington DC in the US, d3v is in the Philippines. Any technical support would be nearly impossible. So any stick would need to be practically bulletproof to survive the trip overseas. It would be a challenge, but one I was up for. Thus, International Slumber was born.

Thursday, September 30, 2010

It's Been A Long Time... (c) Rakim

OK, the last 2 months have not been fun guys. I'm 2 completed fightstick projects back, have 3 more on deck, still have to finish my NBA story and have a few other things kicking around I need to get posting up. I haven't even had the chance to post up a funny video. My bad.I'm hoping to get back on track in the next week or two with some of the bigger projects. Hopefully, I'll get a jump on some stuff this weekend.


Keep Hope Alive!

Spen

Tuesday, July 27, 2010

Berserker Barrage: The Marvel Vs. Capcom Stick Saga - Epilogue

The project is finally finished. My goal was to go use this as inspiration
And build a stick with Happ/iL based parts with the same theme:

I say: Mission Accomplished! Then again, I did put it together, so I may be a little bit biased. I definitely learned a few things with this build. First, a wireless dual mod is not for the faint of heart. While it's not the most complicated thing in the world, it does involve a lot of wire, a lot of soldernig, a lot of planning and a lot of time. If you want lights, you're looking at even more soldering and more time. You want it to look neat? Add to the time. Will it take as long as my project took? Probably not. Being a family man, I wasn't able to devote hours at a time to cutting, crimping, soldering, and sheething that would be needed to finish faster. That said, unless you work with electronics as a job, or have done a lot of soldering work in the past, don't expect to knock something like this out in 2 hours.

That's to say nothing of the work I had to do on the case. I'll admit, if I wasn't as dumb I probably could have shaved at least a month off the paint and prep time getting the case to look like I wanted. Not paying attention to whether I was using enamel or lacquer paint, and not ordering the vinyl dye sooner, really slowed things down. The wet sanding, while providing a fantastic finish, is very tedious and time consuming no matter how you look at it. Modifying the case itseld to accept the switches and larger buttons was childs play in comparison. I did have to order some different parts than I planned, but the end result was worth it.

If I had to give some advice to anyone trying a similar project, I'd tell them 3 things. First, Don't be afraid to screw up. Most likely, something is going to go wrong with a custom project like this. Sometimes it's a small thing, like soldering a lead tothe wrong spot. Sometimes it can be major, like inadvertantly frying your PCB. Whatever, it can usually be fixed or replaced. Second, don't be afraid to ask for suggestions or help. Since I still don't have access to the tools needed to make my own case, I had to outsource that. I had to ask a myriad of questions to make sure I was wiring everything correctly. Some questions were intelligent, others, not so much. And there is no way the art would have come out like it did if I didn't ask. Third, get your Bo Jackson on and Just Do It. Roll up your sleeves, heat up the soldering iron, and get to work. It may take a while, and it may not look like other projects you've seen that other more skilled people have done, but with some determination and effort, you can do this. As I said with my first build, nothing quite feels like using a stick you put together yourself.

I must give a shout out to a few people that helped get this project done. I need to thank Physh for building ans shipping the case. The design was wide and tall enough for everything to fit, and the design gave it some flair, making the color choice really work. A huge shout and thanks goes to Gummowmed for designing the leo board in the first place and answering the many questions I had during the course of the build. I actually got a chance to meet him at a tournament in Ashburn, VA and I brought the stick, I should have had him autograph it! And a big, BIG shout to d3v for all the help with the artwork. Everyone that's seen the stick online and in person has been extremely impressed. While I can take the credit for the paint finish, without that custom art it would not have been complete. In fact, d3v and I have collaborated on two other sticks, which I'll probably get around to posting in a year from now, knowing my schedule...