Sunday, May 28, 2017

Semi-Pro: Beef Ribs

Ribs. They are a staple of BBQ. A well cooked rack of ribs is a beautiful (and tasty) thing. For most people, pork ribs, be they spare ribs or baby back ribs, reign supreme, as they are pretty easy to find, relatively inexpensive, and taste wonderful. However, in some parts of the country where cattle is more prominent than pig, beef ribs are the staple. And believe you me, they are something special.

For today's cook, we're going to be doing beef short ribs. The name, however, doesn't necessarily refer to the size, but refers to where the ribs are cut: the short plate of the cow's rib section. Usually, you will find short ribs in your local supermarket cut into individual rib sections a few inches in length, like this:

Don't let the size fool you...
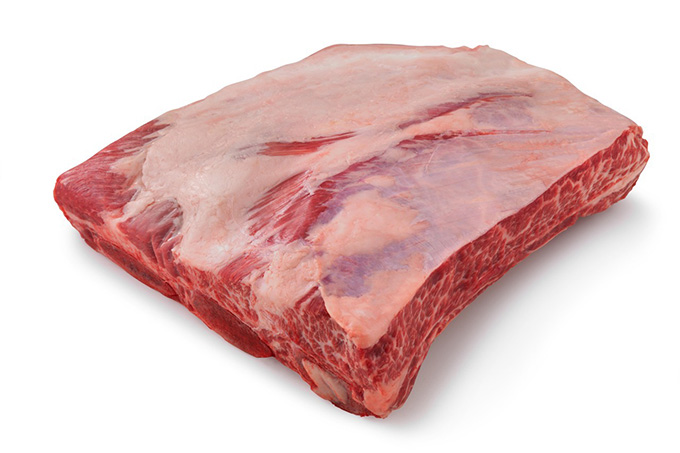
Because of their size, they can be cooked a number of ways: smoked, braised, crock pot, fried, sous vide, etc. For presentation sake, we're looking for something like this:
Looks like a book of meat..


Sometimes these are called plate ribs, or 'dino ribs', because of the size of the bone. Now, I could go on about different cuts of beef ribs and where they come from on the cow, but that will take too long and we've got to get cooking. If you want to know, watch the video below:


With that out of the way, let's get to the business of cooking these ribs. As always, preparation is key, but not very difficult (and really not much different than your pork ribs). First, buy the ribs.


These ribs are usually cryovac'd in 2 to 4 rib sections. I found these at my local big box store (BJ's) but places like Restaurant Depot carry them as well. If you don't see them in the refrigerator case, ask the butcher and see if they have any on hand. Next it's time to clean the ribs up. Set the racks on your cutting board for prep.


 As with pork ribs, there is a membrane on the back of each slab which can be removed. Is this 100% necessary? Depends on who you ask. There's no meat back here, so worrying about a crunchy bit of membrane isn't too much of a concern, as you're not going to eat it. Also, if you're not careful, pulling the membrane could cause the meat to separate from the bone. On the other hand, some reason that the membrane would inhibit the smoke from penetrating the ribs. Your call. For this cook, I'm removing the membrane, as it's not hard to do. Grab your butterknife and slide it between the membrane and one of the rib bones. Once you lift it up, use a paper towel to remove the wax papery film.


Next, flip the ribs over and assess what needs to be done. Again, we've got a decision to make


We've got a ton of fat and silverskin on the top of this rack, and underneath is all the beefy goodness that will make this cook worth it. The decision is whether or not to remove that fat. Now, a lot of people will leave the fat on the ribs as is, reasoning that the fat will render off and baste and flavor the meat during the cook. The fat could also act as a heat barrier to keep the meat from burning over the long cook. Others reason that only so much of the fat will render off, and the rest will simply remain on top of the meat once we're done cooking. The rub would then only be on the fat, as it can't really penetrate through the fat to the meat. Or, as the fat is rendering off the rub would drip away with the fat. While I'm firmly in the latter camp, there are legions of people, including renowned pitmaster Aaron Franklin, who take the side of the former. I won't say which was is right or wrong. You decide on your preference and/or how much time you have . For this cook, that fat is coming off. Much like a brisket, you can spend over an hour removing every little piece of fat and silverskin you see, or you can just cut off the biggest pockets and leave the rest to render during the cook. Totally up to you. A sharp knife makes the job a lot easier.


Once you're done slather the ribs with a binder of your choice (hot sauce, like Mr. Franklin uses, mustard, oil, etc) and coat the ribs with the rub of your choice. Generally any rub that goes good with steak works perfectly on these ribs, as the strong flavor of beef doesn't really need the sweetness that a pork rub would generally have. A simple salt/pepper.garlic/chili powder rub would work wonders on beef ribs. That said, let your personal palate be the judge, not mine. The ribs will taste great regardless.


That's pretty much it for prep work. You can either put the rub on as you're getting the cooker ready to roll or park the ribs in the fridge overnight to 'dry brine' the ribs until you're ready to cook them. Set the cooker up for indirect cooking at a temp of 250-275 degrees. Place the ribs on the cooking grate bone side down and let them roll. The ribs will be on for about 5-7 hours as this temp, depending on the thickness of the meat on the bones. If the cooker runs hot, or if the ribs look like they are drying out, feel free to spritz them with water or beef broth. The cook will be done when the internal temperature hits 203 degrees (I'm not even going to ask if you have your thermometer for the food or cooker, because if you don't by now I don't even know what to say). The probe (or toothpick) should slide through the meat like melted butter. Pull them off the cooker, wrap them in foil for about 30 minutes and let them rest. After that, it's time to feast:


Look at the bark. Notice the smoke ring. give the meat a squeeze and see the juices start to ooze. Not have a bite. It's tender, like filet mignon, but much more flavorful, like a rib eye. It's like brisket on a stick.

Good eats to all until next time

Sunday, January 24, 2016

Semi-Pro: Smoked Turkey


Turkey. The 'other' other white meat. A bit tougher than chicken, but slightly more versatile. Turkey can be sliced thin for cold cuts. It can be ground as a substitute for beef. It can be used as a substitute for bacon (though really, it's more turkey jerky, as if it doesn't come from a pig, it's not bacon. Deal with it people...). Turkey is often the signature dish for most Americans for Thanksgiving. It's sad, really, as turkey is fantastic at ANY point in the year. The two most popular ways of cooking turkey is either in the oven or in a deep fryer. The oven is the time tested method of cooking the big bird, though if it is not prepped correctly, you've got a dry bird. Deep frying has become extremely popular as of late, but unless the bird is prepped correctly and the fryer is set up properly, this method is extremely dangerous, as the number of fires reported around Thanksgiving can attest. But there is yet another method of cooking a turkey, one that's safe, is not likely to dry the bird out, and will produce some of the best turkey you've ever tasted: Smoked Turkey. As with anything, preparation is key, but the results will be so worth it. Let's get to it, shall we?

First off: get some turkey. Usually I will just get a fresh turkey breast, bone-in, as getting a whole turkey for my family may be a bit much. Your needs may vary, as you may have a bigger party to feed or you may prefer dark meat. That's up to you. Alternately, you could choose to get the turkey breast and, say, turkey wings or drums separately. Whatever your preference, fresh is preferred, as you don't have to deal with thawing out your bird, which is a hassle all it's own (and one I'm not going into here). For this post I am going to focus strictly on cooking a turkey breast. The techniques for cooking the whole bird apply, but adjust your cook times


When cooking only a turkey breast, you have a few advantages. First, you don't have to worry about the light meat cooking quicker (and possibly drying out or burning) than the dark meat. Also, there's less to clean, so there's no worry about whether you left the giblets inside the turkey (usually they are in a separate pouch, which you can use for the gravy if you so choose).. Still, you do want to trim up some of the skin and cut down (or cut out) the breastbone do the turkey lays evenly.


One thing to note: See that pop up thermometer? Pull it out now and toss it in the trash. This is not the way to tell if the bird is done. A digital thermometer (which really, if you don't have one by now, why don't you?) is the only way to go. 

Next up, let's talk about the brine

I've said before and I'll say it again, if I don't have time to brine my poultry, I won't cook it. It goes double for turkey. Brining adds so much more flavor and juiciness you'll wonder why people still have dry turkey that tastes like cardboard. Even if you have a simple brine of water, salt and sugar, your turkey will be so much better because of it. Now, I like to use a prepackaged brine like you see above, which has all the salt, sugar, and spices already measured out. However, instead of using water, I like to use apple cider, which adds more flavor and sweetness. Most of the turkey brine recipes will have you boil the brine mixture and the liquid to bring everything together, then let it cool, as you don't want to boil the bird. This step can be done well in advance of cooking the turkey, so it will be ready to go once you have it cleaned and trimmed.

Next, it's time to submerge your turkey in the cooled brine. With a turkey breast, it's pretty simple. Usually a 1 or 2 gallon bag (depending on the size of the turkey breast) is big enough to hold the bird. Simply pour enough of the brine to completely cover the turkey, then place the bird in the fridge. Overnight is the minimum amount of time I like to brine my turkey. 24 hours or more is even better. If you're doing a whole bird, you could use a 5 gallon bag, or a container large enough to hold the bird and the brine. If there's no room in the fridge, a cooler lined with ice works wonders


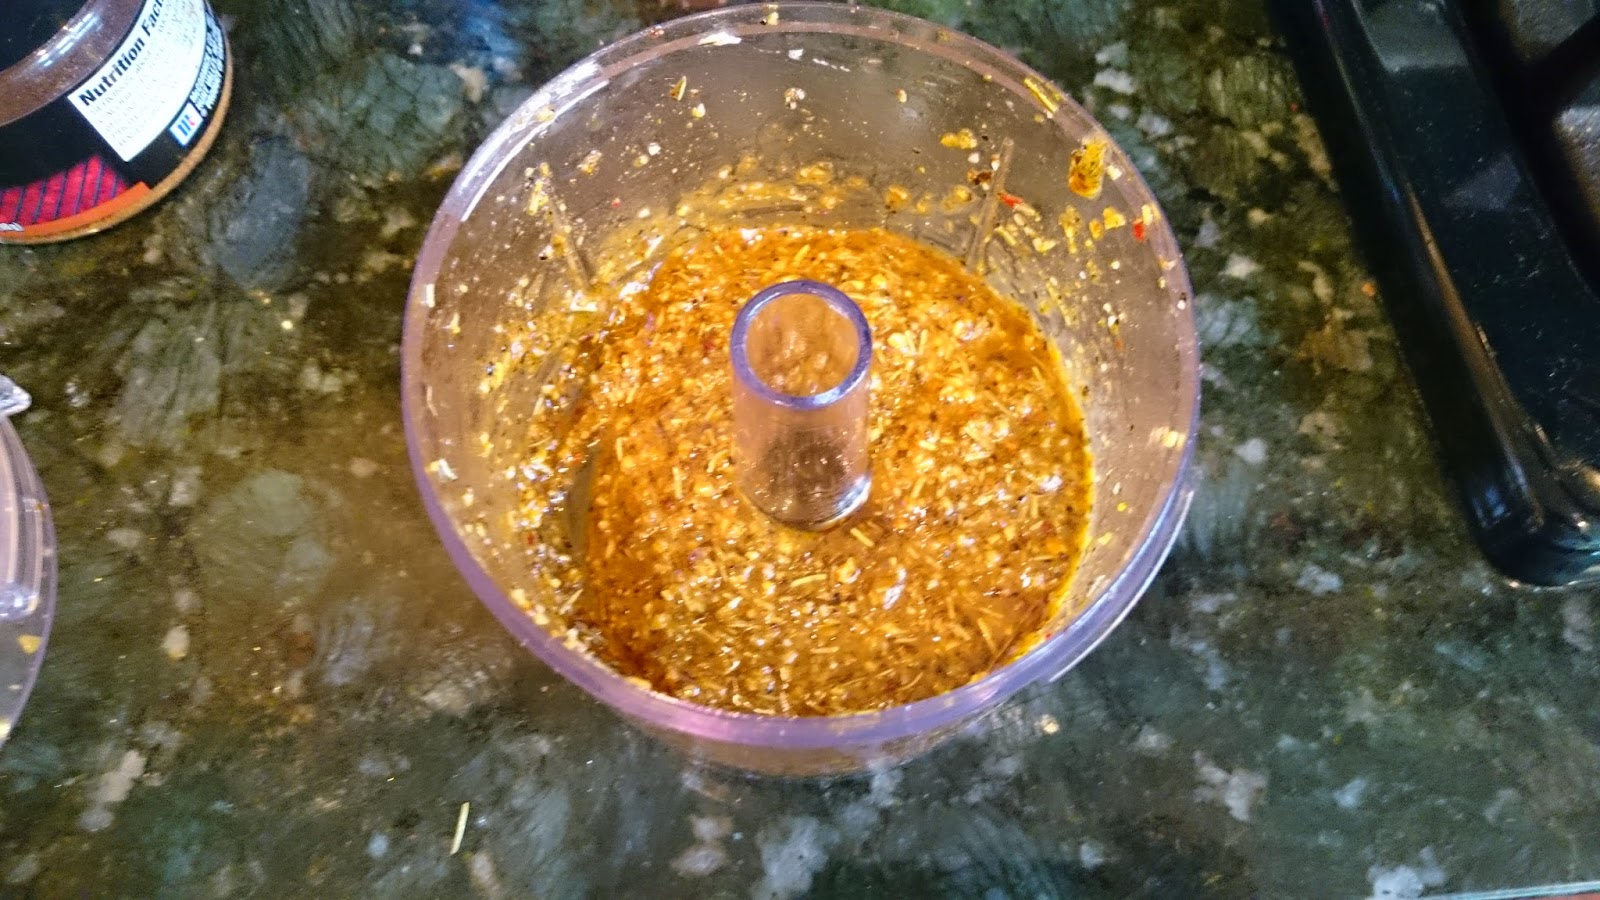
Once it's ready to cook, pour out the brine, rinse the turkey and pat it dry. Now we need to season the bird. What you use is totally up to you. Poultry seasoning? Why not. Your favorite BBQ rub? Sure thing. A simple SPG (salt, pepper, garlic) rub? Keeping it simple always works. I found a nice rosemary, garlic and thyme spice blend at the grocery store that works wonders on poultry. What I like doing is mixing about 4 tablespoons of the rub with about 2 tablespoons of olive oil or butter. Either mix by hand or toss in a food processor for a good blend.


Once that's done we can apply the wet rub to the turkey. Use your hands to loosen the skin and massage the rub between the breast meat and the skin (you could use a spoon to scoop out some of the rub, then use your hands to work the rub across the meat). If you have extra rub, rub some on the outside as well.


For extra insurance and more flavor, melt a stick of butter and mix with 1 teaspoon each of onion powder, garlic powder, white pepper and cayenne pepper (don't worry, your turkey will not be too spicy). Load up your injector (you did get one of those, right? If not, why not?) and go to town on both sides of the breast. Any butter that seeps out just rub on the skin. 


Now for the finishing touches. Stuff the inside of the breast cavity with some aromatics (a quartered orange, sliced onion, possibly celery, sprigs of rosemary and thyme, etc) to give the breast some additional mass, which should help it cook evenly. Place a cooking rack over a broiling pan (a thick aluminium pan would do the trick too)and add some fluid (water, apple juice, beer, etc) to the bottom of the pan. Give the skin one light coating of seasoning, and we're ready to hit the cooker


Two things of note. First, I made no mention of placing stuffing inside the turkey. Don't. Just...don't. Make that separately and avoid a health risk. Second, I made no mention of gravy. Two reasons for this. First, this bird will be so flavorful and juicy you won't need anything on it. Second, there are waaaaaaaay too many recipes handed down by your great-great-grandma that I'm not about to get in the way of. However, if you have to have some gravy just in case, here's what I'd recommend. Mix up some mirepoix (roughly cut onion, celery and carrot) and toss that in the pan. Usually, you would use the bones and trimmings from the turkey to use for the stock, but with a turkey breast there really isn't much of that. Therefore, you'll need some turkey necks or turkey wings instead. Add those to the pan, and a tablespoon  of bouillon. Cover that with your fluid of choice, then add the cooking rack and bird.

Once we're done the prep, it's time to cook. Set your cooker up to cook indirectly at a temp of 325-350 degrees. The relatively high temperatures will help crisp the skin, and with the turkey having been brined, there's less risk of the bird drying out during the cook. Place the turkey pan opposite the heat (coals or burner, depending on your cooker), place the temperature probe in the turkey (again, you do have your digital thermometer, right?) and shut the lid. Check the bird every 30-45 minutes to make sure it isn't drying out. If so, you can either spritz the bird with apple juice or baste it with butter. Once the internal temperature of the turkey hits 165, pull the bird off the cooker. If the skin isn't quite up to the crisp texture you're looking for, raise the temp of the cooker to 375 and cook for 10 more minutes.


Once the turkey has rested for about 10 minutes, transfer it to a cutting board. Look at that turkey. Smell the turkey. Know that the turkey is going to be delicious, but you can't tear into it just yet. If you made the gravy, grab a spoon and scoop the spent vegetables and turkey bits out to the trash. If you have a fat separator, pour the gravy in that and remove the excess oil and fat from the gravy. If not, use a spoon or ladle and skim off as much of the fat as you can.

Using a carving or chef's knife, remove the breast meat from the turkey carcass and begin to slice. If you want to try to carve the breast the traditional way, go ahead. But by removing the breast meat then cutting it, you'll make sure each piece has that nice crisp skin we're worked for. The remaining meat on the carcass can then be pulled with your hands (or just eaten right then and there, depending on how hungry you are.


Tuesday, March 17, 2015

Semi-Pro: Pulled Pork

When it comes to BBQ, one of the most popular items on the menu is pulled pork. And with good reason. You can cook it any number of ways (grill, smoker, oven, or, ugh, crock pot). It's very forgiving temperature-wise, making it a great choice for first time cooks or those still working on the finer issues of temperature control. It can feed a crowd. It goes well with different kinds of sauce, or can be perfectly fine with no dressing at all. It can be used in a variety of dishes or eaten all by itself. It freezes well. And it's relatively inexpensive.

Pulled pork is usually made with either the pork butt (or Boston Butt, as you may see at the butcher) or the picnic ham, which is cut closer to the leg of the pig (and is more commonly used for pernil, which is a fantastic dish I may cover later).

So much pork, so little time

As I have mentioned in earlier posts, BBQ is quite regional. The flavor that you consider to be perfect for pulled pork (or even if the pork is pulled, chopped or sliced, as we will see in a bit) will differ depending in what region you live in.  But the basic preparation and cooking technique doesn't really change much and is quite easy to do. Shall we begin?

First, get yourself some pork.

Most of the butts I have seen in my area range anywhere from 6-10 pounds. This butt that I got from Wegmans was around 9 pounds, which is more than enough for my family, friends and some leftovers to boot. Cut the cryovac pack open and give the pork a quick rinse, the place on a cutting board, fat side up


Depending on what pitmaster you ask, you may get differing thoughts on what to do with the fat cap on your pork butt. Some leave the entire cap on, figuring the fat will help baste the meat as it cooks, and provide a bit of insulation for the meat through the cooking process. Some will try to cut the fat cap down to about 1/4" of fat all around, and others will remove as much of the fat as possible, reasoning that the rub won't really adhere to the fat and exposing more of the meat will provide more 'bark' on the butt once it is cooked.Use your discretion on this one.

 I prefer to cut off as much of the fat as I feel at the moment. There's no real way to get the cut even, or a real need to worry if it is even as the meat will be pulled at the end of the day


Once the fat side is trimmed up, I'll flip the butt over and cut out any big fat pockets I see. I'll also go in and cut out some of the nasty tendons or bloody spots that really don't render off during the cook. If you do the same, just be careful not to cut too much or too deep, as those tendons are what's holding everything together!

If you don't feel like going through all that, you'll be fine; anything that doesn't render off can be tossed once you're pulling the meat. Once you're done, you'll have something that looks like this:


At this point, you have a big decision to make: to inject or not to inject. Pitmasters are pretty split on this one as well, though plenty of competition cooks go the injection route. Personally, I'm with the injection camp, as it does help flavor the butt more thoroughly that just rub alone. If you chose not to, skip this part and go on to the rub. If you are going to inject, read on.

Take the trimmed butt and put it in a pan or plastic container. This will catch any of the injection that leaks out of the meat (since there's no skin to hold the liquid in). Next, prepare the injection. As of late, I've been using a recipe from Chris Lilly from Big Bob Gibson's BBQ:

3/4 cup apple juice
1/2 cup water
1/2 cup white sugar
1/4 cup table salt
2 Tablespoons Worcestershire Sauce
Combine all ingredients and stir until sugar and salt are dissolved.

Next, get your injector:

You can usually find these at your grocery store or Bed Bath and Beyond (That's where I picked this one up). Heavy duty injectors can be ordered on Amazon. Fill the injector with the liquid and insert into the butt, Repeat every 1-2 inches apart, moving the needle around in the butt as you're injecting to spread the liquid around. The injection will start to leak into the container, which is fine; you can suck that back up in the injector and shoot it in another part of the butt. Be careful when injecting, as some of the liquid may shoot out of one of the previous injection spots (and have some paper towels nearby to clean up)


Next up, the rub. Much like my earlier rib post, your choice of rub is totally up to you, as is the choice on whether to use a rub a coating of olive oil or mustard on the butt before applying the rub. Liberally season all sides of the butt.


What time to put the butt on the smoker is another item up for debate. If the butt was not injected, only rubbed, some will wrap the butt in plastic wrap and place in the fridge for a few hours or overnight to let some of the rub set on the butt. Some pitmasters will toss the butt straight on the cooker as soon as it has been seasoned and the cooker is up to temp. Others prefer to let it chill in the fridge for a few hours, the idea that the cooler meat will absorb more of the smoke from the cooker. For me, it depends on if my smoker is up and running or not. If I still have to light the fire, I'll park the butt in the fridge until the temperature on the smoker is stable. If I already have the smoker ready, the butt goes right on the grate. 

Time to get your cooker started. The butt needs to be cooked low and slow, so a temperature of 225-250 is ideal. That said, if the temps go up to 275, you should still be fine (keep it under 300, though. While the butt is quite forgiving the meat will be a bit chewier the hotter you cook it). Generally you can plan for 1 1/2 to 2 hours cook time per pound of pork butt. If you're using charcoal, your best bet is to use the Minion method, which will help maintain a solid temperature throughout the cook, without having to constantly add coals. Once the fire is lit, add a few chunks of wood and let the cooker get up to temperature (you do have that digital thermometer I talked about in my earlier post, right? No? Then go get one. With a long cook like this, you need to be sure your temps are stable, and the thermometer that came with your cooker won't cut it).


 Once your temperature is stable, add the butt to the grill grate. Depending on your grill or smoker setup, place your water/drip pan between the fire and the meat. You can add some more rub is you wish. Then, close the lid. We're in for a long haul.

For the first 2-4 hours, I don't even bother opening the lid or looking at the meat. The only concern I have is making sure the temps are stable (which is why the digital thermometer is so important). After that, it's decision time: to wrap or not to wrap. Some pitmasters will simply leave the butt the grill uncovered throughout the entire cook. While there is a chance the pork will turn out too smokey if you added too much wood (and you shouldn't as a little can go a long way), leaving it unwrapped will allow the creation of a firmer 'bark' around the butt, which is quite prized in some circles. Other pitmasters will wrap the butt in foil or butcher paper to cut down on the smoke penetration and help push through the 'stall', which I'll get to in a bit. The only downside there is the 'bark' around the butt won't be as firm. Others, like Myron Mixon, will take the butt and place it in an aluminum pan with some apple juice, and cover the pan with foil. This will catch some of the juices from the butt as it cooks, which can be used to toss the pulled pork with. This method works for me.

Whichever way you go, now is the time to start checking the temperature of the butt. If you have a thermometer with 2 separate probes (and really, why don't you?) insert it into the butt. We are looking for a temperature of 195-203 degrees (again, depending on who you ask the exact temperature varies. Just go for that range and you should be fine). This is going to take another 4-6 hours. As you check the temperature, you are likely to note when the butt his around 150 and 160 degrees, the temperature is just going to sit there for what will seem like an eternity. After some hours, the temperature will start to rise again. This is called the 'stall', and can be infuriating to a cook, especially if they are on a schedule. This is normal. Do not freak out and try raising the temperature on your cooker. The butt will be fine. If you wrapped the meat in foil, this can help cut down or the time of the stall, but it will likely happen. For more detailed info on what the stall is and why it happens, feel free to look HERE or HERE

Once the butt has reached your target temperature, you can check for doneness by twisting the bone in the meat (use gloves or tissue for this, as it's plenty hot). If the bone twists easily or slides out, you're good. If not, close the lid and check it in 30 minutes. Once it's done, pull the pork off the grill and let it rest for about 30-60 minutes. If you have an clean empty cooler toss it in there (a cooler makes a good bootleg cambro in a pinch), or you can toss it in an oven at 170 degrees (enough to keep it warm, but not enough to cook it anymore). Pour any juice that you have in the pan in a saparate container or pot, which we will use in a bit. Now comes the fun part.


As mentioned earlier, some areas like their pork sliced like a brisket. This makes for more uniform pieces, in a way, with a bit of bark on every piece. Other areas prefer to chop the pork into small bits, which mixes the bark with everything else (this is quite popular in the south when a whole pig is roasted). Personally, I prefer pulled pork, where the individual muscle strands are pulled apart from the butt. Now, some like to use a set of meat claws like THIS, which can work if you have a few butts to pull at once (or just want to live out some bad Wolverine cosplay). Personally I like the joy of using your hands. Get a second pan and grab some gloves. The pulled meat goes in one pan, and the fat and anything that didn't render off is left behind.


When the pork has been pulled, pour the juices back on top of the pan of pulled pork and toss the pieces until coated.


Now, assuming friends and family haven't already started picking at it, you can go to town. If you want to add sauce to your pulled pork, be it sweet tomato based or a thin vinegar based sauce (my preference for pulled pork) feel free. But the pork as prepared will stand tall on it's own merit. It takes patience, for sure, but in the end it's well worth it. 

That's all folks!