Showing posts with label Painting. Show all posts

Tuesday, July 27, 2010

Berserker Barrage: The Marvel Vs. Capcom Stick Saga Part 11 – All Together Now

Now that the artwork was done all that was left to do was put Humpty Dumpty back together again and present the stick to Nick. There were a few small modifications I wanted to make to the case before wiring everything up. In an effort to hedge my bets against that JLW, I wanted to drill holes in the control panel to fit a Happ joystick. That way if the JLW just didn’t feel right, I could swap it out for a Competition joystick. I removed the mounting plate from the JLW and screwed it on the top of the control panel. Next, I marked the holes that lined up with the Happ joystick and drilled and countersunk the holes so the screw heads would be flush.


Just in case...

I installed the Happ Competition (yellow, or course) along with the case bottom panel to make sure the joystick shaft didn’t bottom out or scrape the panel. No problems there. I then had to work on the bottom panel itself. I had bought and cut a piece of plexiglass to replace the particleboard that the case came with. I needed to cut a notch in the plexiglass so I could access the switch to turn the LEDs on and off. I taped the switch in the approximate spot I would mount it during assembly and placed the plexiglass on top, marking he space I would need for the switch and the holes I’d need to drill for the feet. Using a combination of the dremel and a hand file, I cut and shaped the notch for the switch, then drilled the screw holes for the feet. Instead of just having clear plexiglass, I used some automotive window tint I still had around the house and covered the inside of the plexiglass, for a 20% smoke tint look.

Modifications out of the way, it was time for reassembly. I laid the artwork in the case and put the plexiglass top over it so I could cut the holes for the joystick and buttons. Once I finished that, I removed the plexiglass and artwork so I could access the screws for the joystick. Having reattached the mounting plate back on the JLW, I mounted the joystick to the bottom of the case and tightened the screws. I then replaced the art and plexiglass, and installed the buttons, making sure they were all lined up the proper way before tightening down the mounting nuts. I installed the LED boards and the microswitches, then attached the wiring harness for the ground chain, signal lines and LEDs. I used zip ties and zip tie anchors to hold the sixaxis and 360 PCBs in place, and ran the signal leads from the leo to the junction block. After connecting the button leads to the junction block, I made sure all the data lines and power lines were wired to the correct switches on the back of the case. I used some construction adhesive to mount the LED power switch to the side of the case, then wired up all the ground leads and power leads to the small junction block on the left side of the case. Finally, I attached the battery to the junction block, and attached it to the case with a piece of Velcro. At long last, the project was finished. I gave the stick a quick polish with a microfiver cloth and took the completed stick outside to take some pictures of all the hard work.

All Done! Ruy doing his Vanna White impression...


Wider angle shot

It took almost a month, but it was worth it...


This shot was with the yellow bubbletop, in case Nick wanted a balltop


Doesn't exactly match the buttons, but it works

Rear shot showing painted switches, start, home (clear yellow) and select, and USB connector


Bottom plexiglass panel with tint. Ryu scaring away ants...


All the soldering, crimping, and sheething, in it's naked glory


All the signal lines and LED lines. The power junction block is on the left


The signal line junction block, leo board and 360 PCB

Closeup on the buttons with the labels

d3v's logo. First time on a custom. Huzzah!

Yellow paint. Polished to a mirror shine. Took long enough...
THIS is what happens when you take the time to wet sand. Looks better in person

All that left to do no was deliver the goods. I gave Nick a call to tell him his stick was finally ready. He showed up around 8:30 with his Xbox ready to go. After showing off Mass Effect 2 for an hour, he finally opened the box and had a look at the finished product. After admiring the art and craftsmanship, I had him fire up the PS3, which worked with no problem. At this point he didn't realize the buttons lit up. After a few rounds of MvC2, I had him flip the switch to turn the lights on. Needless to say, he was impressed. We then hooked the 360 up to take a quick video of everything in action:


Nick decided he liked the feel of the bubble top more than the bat top, so I made the switch for him. After all it took to get that bat yellow in the first place! I tell you.... But it's his stick so I'm not complaining. We played Mvc and SFIV until our fingers cramped and called it a night.


Friday, March 26, 2010

Berserker Barrage: the Marvel Vs. Capcom Stick Saga Part 7 – Case Conundrums (And Why Reading Is Fundamental)

While I was enduring my massive helping of FAIL with the bat top, I started work on getting the case painted. The first step was to cut the hole for the USB adaptor (which I forgot to do before I painted the first case, if you remember). The edge of the adaptor was much straighter and flatter than the last adaptor I used, so I wouldn’t have to work so hard on shaping the hole to make it fit.

Why is it so hard to find these things?


Once I figured out where I could put the adaptor inside the case where is wouldn’t interfere with anything, I traced the outline on the outside of the case. I then had a few options on how to proceed. I could have drilled a number of holes in the space I drew and used the chisel to clean away the rest of the waste, slowly shaping the hole to the correct size. Or, I could have whipped out the dremel, screwed on the cutting attachment and gone to town.

I have to justify buying this Dremel in the first place, so....

I put the case back in my project vice and set up the dremel. The multicutting bit made relatively quick work of cutting through the material. The only thing is, you really need a steady hand with this thing, which I didn’t have. The lines I cut were nowhere near straight. Had I clamped a straight edge guide to the case beforehand I probably would have fared a little better. No matter. A few more minutes with the wood file and the USB adaptor fit nice and snug. I made sure the adaptor was flush with the case then used some wood putty to make sure the edges were smooth and to fill in the little gaps I saw. Once the putty was dried, I taped up the adaptor plug and sanded it smooth, making sure to feather the edges and make the putty areas as level as possible. Once that was done I set up my paint area in the garage and sprayed on the primer. Once I had enough coats done, I sanded with 200 and 400 grit sandpaper, and wet sanded with 600 and 1000 grit sandpaper to make the primer nice and smooth. So far so good.


With the primer out of the way, it was time to mask off the case for painting. The front and back of the case were going to be painted metallic blue, while the sides were going to be painted yellow. In addition to the Rustoleom yellow that I was using (and failing) with the bat top, I had picked up a can of Duplicolor Metal Flake spray paint.


I used some 3M blue painter’s tape and masked the sides of the case and the edges that would be painted yellow.

Painter's tape is your friend. Believe it...


Very important to get the corners right. A Xacto knife helps

Afterward I wiped everything down with mineral spirits, set up the paint area in the garage and sprayed on about 4 coats of the metal flake, making sure to wear my respirator so as not to breathe in too many noxious chemicals. As the name suggests, the finish had a nice metallic look to it, without looking like someone tossed some glitter into a can of blue paint. Once the paint dried, I sanded it down with 200 and 400 grit sandpaper, cleaned it with the mineral spirits, and sprayed 4 more coats of paint. Once that was dry I repeated the sanding, but this time followed up by wet sanding the paint with 600, 1000, and 1500 grit sandpaper. I started to worry a bit when I noticed the blue was getting duller and duller. However, when I cleaned the paint off with mineral spirits, I noticed that the blue was nice and shiny before the spirits evaporated. So, I was pretty confident that once the clearcoat was applied that all would be alright. Once that was done, I let the case sit for a few days to make sure the paint was fully dry before proceeding.


Sparkly!


See why the tape was necessary?

Once I felt the paint was dry I removed the tape from the sides and applied it to the front and back of the case that had been painted. After I cleaned the sides with mineral spirits to make sure there was no paint residue, I sprayed on a few coats of the yellow paint and let it dry overnight. The next day, I sanded it down with 200 and 400 grit sandpaper, just as I did with the metallic flake. After giving it another mineral spirit wipe, I sprayed on another two light coats. When I went back to apply the next few light coats, to my bemusement the paint had started to wrinkle, just as it had with the bat top. This was becoming insane. So, once that paint dried, I sanded all the wrinkled paint off (which stated to come off in little balls of paint), and sanded the underlying finish smooth again. At this point I had just about run out of the Rustoleum, and really didn’t feel like getting another can, since it appeared I could only get one layer of paint on any given surface before wrinkling started to occur. So, against all recommendations and common sense, I grabbed the can of Krylon Fusion and sprayed that on top of the Rustoleum layer I managed to save (it’s usually suggested not to mix brands of paint, as they may react differently with each other). Less than 10 minutes later, I had a runny, wrinkled and ugly mess. So much FAIL, so little time…


I decided to leave the whole spray paint thing alone and go down another path. The weather was colder, the paint smell hung around in the garage longer than I wanted, I still had overspray I had to clean off my wife’s car, and so far the majority of my attempts at using spray paint had ended in failure. So, I started to look for a pint of yellow paint to brush on the case. I figured since I was going to wet sand the paint anyway, I wouldn’t really have to worry about brush marks showing up in the paint finish. Besides, I would be using a foam roller to minimize any applicator marks. Before I went to the store I went online to try to figure out what was going wrong with the spray paint. It worked fine when I sprayed the lacquer for my first case. This time, not so much. In the FAQ section on the Duplicolor site  I came across this little nugget:

Q. What is a re-coat window?


A. Re-coat windows apply to enamel paints and refers to the time period during which a second coat maybe applied. After spraying the first coat of an enamel, a second coat must be applied with in 1 – 2 hours or wait 5 days for the coating to cure. The paint may wrinkle or lift when resprayed during this curing period. Lacquers do not have a “re-coat window.” Subsequent coats of Lacquer can be applied over a Lacquer finish without wrinkling or lifting due to a “re-coat window”.

This sounded vaguely familiar. Could it be because I used the same information when I wrote my mirror finish paint guide on my first build?

One of the advantages of lacquer paint is that it dries more quickly than enamel and does not have a re-coat window (a time when a subsequent coat must be reapplied). With lacquer, you can spray the next coat once it is dry. With an enamel, you generally have a 1-2 hour time period in which you must spray the next coat, or you will need to wait for the paint to cure, which can take 3-5 days, depending on your brand of paint. Check the instructions on your paint can and be sure to follow those.


I could have worn this around for a week...

This is what I get for not following what I wrote. All that fail could have been avoided. I wasted about a month trying to get the bat top painted, at least a week on the case, all because I didn’t read. Sometimes, I’m not so bright, I tell you…


In any event, the case had to get finished, and I was determined to get it right, come hell or high water. So, back to Lowes I went. This time I picked up a pint of Rustoleum Safety Yellow enamel paint, a foam touch up roller kit (no need for a 4 inch roller on such a small case), a can of paint thinner and some 3M stripping pads. When I got home, I poured a little paint thinner on the stripping pad and started sanding down the yellow paint. My goal was to remove as much of the yellow enamel spray paint as I could, then use some more primer as a base for the new can of paint. With a bit of elbow grease, I was actually able to sand down to the original coat of primer, which looked just fine. I went over the primer with some 400 grit sandpaper to remove any possible residue and wiped it down with mineral spirits. Then, I cracked open the can of paint. The instructions said the paint would be dry to the touch within 3-4 hours, could be handled in 9 hours, and could be recoated in 24 hours. I poured some paint in the roller tray then rolled the paint on the case, making sure to get a nice even layer of paint down. There were a few small air bubbles on the surface, which I went back over after about 15 minutes, but I knew when the paint dried they would go away. Sure enough, the next day had a nice, smooth glossy finish. I sanded the paint down with the 220 and 400 grit paper, cleaned with the mineral spirits, and put rolled on a second of paint. Same results the next day – a nice glossy finish with NO WRINKLES!!! Amazing what happens when you read. Over the next 2 days I put 2 more coats of paint on to make sure I had a nice layer of paint. After the 4th coat, I sanded with 220 and 400 grit paper, then wet sanded with 600, 1000 and 1500 grit sandpaper.


That took soooooo much longer than it should have

I now had to make a decision on the clearcoat for the case. Since my results with spray anything had been less than stellar, to put it mildly, I did not want to use the clear enamel I had originally bought. Instead, I opted to buy a can of Minwax Polycrylic, which is a water based polyurethane top coat. Poly is often used as a protective clearcoat on wood, giving the finish a nice shine. Since the polycrylic is water based, there would be less chance of it reacting with the painted case, and easier cleanup.Of course, nothing had gone according to plan on painting the case, and this would be no exception. The first coat of poly I put on the yellow paint caused the same wrinkling that had occurred with everything else. Sadly, part of me wasn't even surprised. I had actually come to expect it by now. This time, I couldn’t quite understand why. Being water based, it shouldn’t have reacted as badly with the finish (the poly over the blue sparkle paint would have no problem). Plus, the can of Rustoleum said you could recoat within 24 hours. Apparently, that didn’t apply to top coating with another product. After all, I was still was an enamel paint, which requires a cure time. I was determined to lick this once and for all. So, I wiped off the poly as best I could before it completely dried, sanded out the wrinkles once again and painted the yellow sides one last time. Once it dried, I sanded everything up to 1500 grit again and set the box aside for a week. I wanted to make sure the paint had enough time to cure before I attempted to do anything else.


After 7 days it was time to get back to work. Using a natural bristle brush, I went back over the case with the polycrylic. This time it went on with no problems at all. The poly looks like thin milk when brushed on, but once it sets up it dries crystal clear in about 2 hours. After it was dry, I sanded the poly down with 220 grit sandpaper, wiped it clean with mineral spirits, and recoat. It’s recommended to put on at least 3 coats of polycrylic to your project. I decided to go with 6. Since I was going to wet sand the poly to a mirror shine, I wanted to make sure I had enough layers down to make sure I didn’t sand all the way down to the paint by accident.


Glossy!

Just wait 'till the hard work is done...

After all the coats of poly were applied, I went thru my sanding and wet sanding routine all the way up to 2000 grit sandpaper. With each successive grit of paper the surface got smoother and smoother, while the finish looked duller and duller. After the rubbing compound went on, all was right with the world, as both the blue sparkle paint and the yellow paint had that nice, glassy mirror finish. I followed up with the polishing compound and a coat of glaze for that extra bit of shine. After weeks of failure, finally I had the sweet taste of victory. But my celebration couldn’t last too long, as I had to get back to soldering. And there was a WHOLE lot of soldering to be done. Time to get to it…

Tuesday, March 9, 2010

Berserker Barrage: the Marvel Vs. Capcom Stick Saga Part 5 – Paint Woes

I decided to take a break from the soldering for a while and focus on painting. Since the weather getting even colder, I figured that it would be a good idea to get the paint finished, making sure it would dry and that I wouldn’t be spending too many nights in a chilly garage. Since I thought I had learned from my mistakes from the first case, painting this one should be pretty simple. Little did I know how many ‘L’s I would be taking…


As mentioned, the MadCatz MvC stick has a yellow and white button scheme, with a yellow ball top. Since I was putting my own spin on it, I too was going with yellow and white (clear) happ parts with a bat top, just like the American style arcade cabinets. While the JLW joystick does come with a bat top handle, they only come in black, white, blue and red. No problem, I say to myself, I can just paint one. I could even give it a nice shiny finish just like the balltop with a little work (although in retrospect that would probably be super slippery). My only concern was I would be painting plastic, which can be finicky as far as paint adhesion if you don’t do it right. The last thing I wanted would be is the paint would flake off or stain your hands over time. My first choice for paint would be the new Rustoleum Universal paint, which is supposed to adhere to almost any surface.
The only problem is, it seemed no store in my area had it at the time. Home Depot, Lowes, AutoZone, Advance, Target, Walmart –all they had was black, white, silver, maybe a green. No yellow. However, I came across some Valspar Plastic paint, formulated specifically for plastic (duh), with no sanding required.


Not in red, of course...

So I figured I’d buy a can and give it a try. Once I got home I set up my paint area in the garage again. I had to figure out how to hold the bat top steady while painting it. I used a wooden dowel that was close to the diameter of the threads in the bat top, sanded it down slightly and screwed it in. I then drilled a hole in a scrap block of wood I had and placed the other end of the dowel there. Now I had a makeshift stand where I could spray the entire top at one time. I cracked the garage door for some air, applied 2 coats as suggested, and waited for it to dry. After a few hours, it was evident this wasn’t going to work. The paint had started to run and drip off the bat top, leaving the paint too thin on the top and pooling heavily on the bottom. If the weather was a bit warmer, the paint may have dried before it started to run, but this wouldn’t be the case for the middle of winter. So, one can of paint wasted, one ‘L’ for me. I soaked the bat top in some latex paint remover for a day and peeled and scraped the paint completely off. After washing it with cold water and wiping it down with mineral spirits, I let it dry while I figured out what to try next.

I decided I’d try to paint the bat top with a good coat of primer, followed by the yellow paint and some clearcoat for protection and shine. If the primer would stick to the bat top, the paint would bond to the primer and reduce the chance of flaking off. Plus, I could perfectly match the bat top with the color of the case, since I’d be using the same can of paint. So, I went back to the store for a can of Rustoleum.

To aid primer adhesion, I lightly scuffed the bat top with some sandpaper. Once I wiped the residue, I set the bat top on my stand and painted 3 coats of primer. Once it was dry, I wet sanded it with 400 and 600 grit sandpaper until the finish was smooth. Next, I sprayed on the yellow paint. After 5 coats, I had a nice even layer of paint built up and a garage full of fumes. I decided to quit for the day and let it dry overnight. When I got home from work the next evening I wet sanded the yellow paint with 400, 600 and 1000 grit sandpaper. The finish was now nice and smooth, with a rubbery, grippy feel to it. I let it dry overnight with the intent on spraying the clearcoat the next day after work. I was eager to see how this would turn out, since things seemed to be going well so far. So when I got home, I changed my work clothes and hit the garage with the can of clearcoat in my hand. However, not 5 minutes after I sprayed the first coat I knew something was wrong. The yellow paint started to wrinkle as if someone balled up a piece of Saran Wrap. I looked at the can I sprayed and confirmed my worst fear: I had picked up the lacquer clearcoat I had used on my first stick, not the enamel clearcoat I had bought for this project. As a result, he solvent in the lacquer was eating through the enamel paint. ‘L’ number 2 for me. Dejected, I tossed the ruined mess in a container with some paint thinner, determined to clean it off and try again in a few days.

Bat top painting, take 3. All goes just like before. Clean and scuff the bat top. Spray 3-4 coats of primer. Let dry overnight. Wet sand. Spray 5 or so coats of yellow paint. Let dry overnight. Wet sand. This time, I made sure the lacquer was faaaaaaaaar away from me and double checked the label to make sure I had the enamel clearcoat. The first coat of clear seemed to go on ok, but after I the second coat the yellow paint started to take on a textured look not unlike an orange. The paint wasn’t wrinkling as badly as it did with the lacquer, but it definitely wasn’t smooth, and sanding wasn’t going to help. To be honest, the texture looked pretty cool (almost like the texture and look the plastic on a happ joystick has), but it wasn’t uniform, so leaving it that way wasn’t an option. I once again soaked the bat top in a fresh batch of paint thinner as I accepted my third ‘L’ of the project, contemplating what went wrong this time. I thought the enamel wouldn’t react to itself like it would react to the lacquer, so I didn’t think that was a problem. I started to wonder whether or not the paint was fully dry from the wetsanding, and if not would that have been the cause of the wrinkling paint. So, after cleaning the paint off the third time I went through the entire process again. After I wetsanded, I decided to wait 3 days before trying the clearcoat. After the third day, I noticed I had sanded a few spots thinner than I liked, so I decided to spray on a few more coats of yellow. Guess what happened? Yep, wrinkling paint. This was staring to get old…

At this point I decided it was time to try something else. Since I couldn’t find the yellow Rustoleum Universal paint, I did some reading on Krylon Fusion paint, which is supposed to be somewhat similar to the Rustoleum. It’s claim to fame is that it bonds to plastic, dries to the touch in 15 minutes, requires no sanding or priming, and is workable within an hour. Others on the SRK forums have had decent success repainting their MadCatz SE cases, so I figured I would give it a try. I went down to Walmart and picked up a can.


This stuff should work, right?

To make a long story short, history repeated itself. The paint came out much like the Valspar paint for plastic, but runnier. That’s 5 tries and 5 ‘L’s. All for aesthetic purposes.

Now I’m at a loss. Every time I tried to paint this bat top has ended in failure for one reason or another. Not only has this wasted time and money, but the spray paint was starting to leave a dusty film on some things in the garage, like my wife’s car. Fortunately, a cloth and mineral spirits made for relatively easy cleanup. That and the fact she hadn’t washed her car in months made the yellow film unnoticeable to the untrained eye. While racking my brain on what to do next, I called my mother for advice. Her favorite color is purple, and she has been known to dye everything purple, from shoes to bags to cowboy hats (and I wish I was lying…). She mentioned she used spray dye that she found at the shoe repair shop. Unfortunately, they didn’t carry yellow. After a few other suggestions that I told her wouldn’t work, she suggested dyeing the piece with Rit. This sounded like a great idea. People had been dyeing their RC parts in Rit for years to get that custom color to make their car stand out. Why I hadn’t thought of that is beyond me. Then again, this wouldn’t be the first or last time I’d not think of something on this project.


So, back to the store I went. I picked up a box of golden yellow Rit dye. I also ordered a white bat top from LizardLick. I figured the white would take on the dye better than the black bat top I was working with. Don’t ask why I didn’t get a white one in the first place, because I have no clue. Once I had everything together I grabbed my crock pot I use to clean the exhaust pipes on my RC (another post for another time) and mixed the dye according to the directions. Using the dowel I had for painting, I placed the bat top in the pot of dye, checking it just as directed to make sure it didn’t get too dark. 30 seconds. 60 seconds. 90 seconds. Two minutes. Each time I checked, it seemed the dye barely did anything to the bat top. Once I rinsed as directed, what little tint was washed off completely. I tried leaving it in the dye for 10 minutes before pulling it and rinsing. Same effect. Next, I added more dye, figuring I may need a higher concentration of dye on this particular plastic. After 20 minutes, the dye had just barely started to have any effect. The only other thing I could thing of is that my crock pot wasn’t heating the dye up enough, even on high. As a last ditch effort, I took the ceramic bowl with the dye out of the heating element of the crock pot and took it upstairs to the kitchen. Making sure not to splash it anywhere, lest my wife kill me, I placed it on the stove and brought the dye to a rolling boil, then let it simmer for 2 hours after that. The result? You all know what happened, go on, you can say it…’L’. Is that number 6? I’m starting to lose count.

So, plastic paint wasn’t working. Enamel paint wasn’t working. Powdered dye wasn’t working. What else is left to try? Vinyl dye. The dye is formulated to seep into the vinyl or plastic and bond to the material, rather than sticking to the surface like paint. People often use the dye when restoring or customizing their cars, dying the dashboards or seats. This sounded like just the ticket to getting the bat top painted once and for all


Man, this had better work....

However, finding it locally was futile. AutoZone, Advance Auto Parts, even the great bastion of cheesy car customization, Pep Boys- nobody carried yellow vinyl dye. You would think somebody would need it to paint the seats and dash of their 1997 Honda Civic DX bright yellow to go along with the 3 foot wing and 4 inch fart pipe, but no. So I ordered a can online and had it shipped to the house. Two days and $20 later, the paint arrived. One afternoon when the weather got above 40 degrees I took the bat top and painting stand outside, along with the switches I would be using, and sprayed on the dye. Per the directions, I sprayed 3 light coats on the parts, followed by a few heavier coats, all about 10-15 minutes apart. After about 6 or 7 coats I had a nice even coverage of yellow on the top and the switches. Afterward I brought the parts in and let them sit for a week per the instructions. Once everything was good and dry I used a bit of 15oo grit sandpaper to smooth out the edges, and then used some rubbing compound and polishing compound to bring out a nice shine.

Finally, the bat top was finished. Who would have thought that something so small would have taken so freakin’ long to get right? If I had started with the vinyl dye in the first place, I would have saved myself so much time and money. But without the dye being available locally, trying something else proved an extreme exercise in futility. I couldn’t figure out what was going wrong with the regular paint, which bugged me to no end (and I would have my Bill Engvall moment later on once I figured it out). To be fair, many have had great success with the Krylon Fusion line, and had it been a little warmer things may have worked out on the bat top. But at least I got it done for the sake of the project.

Just to show how funny life can be, I went in AutoZone a while after that to get supplies for my oil change. Just for giggles I walked down the paint aisle. A bright yellow can of Rustoleum Universal paint sat on the shelf, mocking me. Apparently, AutoZone decided to start carrying it AFTER I took my repeated ‘L’s. I didn’t know whether to laugh, cry, or knock all the paint off the shelf. Ah well, live and learn. There' sno telling whether that would have worked any better than the Krylon, and I don't really care to find out either at this point. Hopefully, after the huge helpings of FAIL that I had working on the bat top, painting the case should be much easier. Right?

Friday, December 11, 2009

Mirror Finish Paint Guide

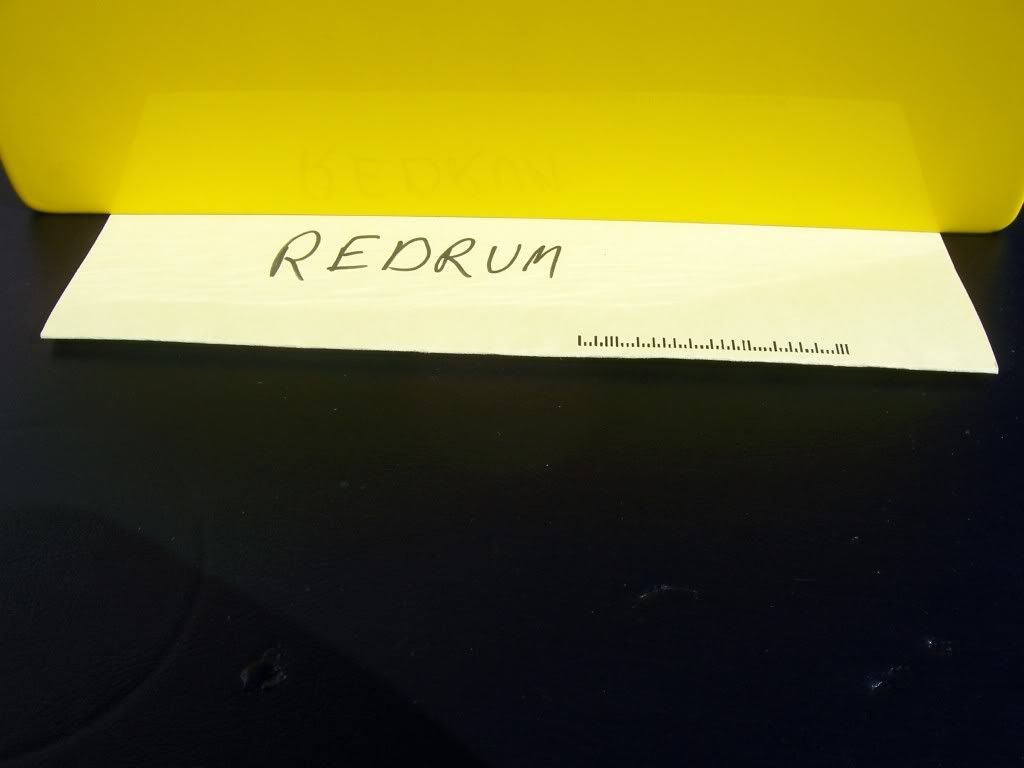
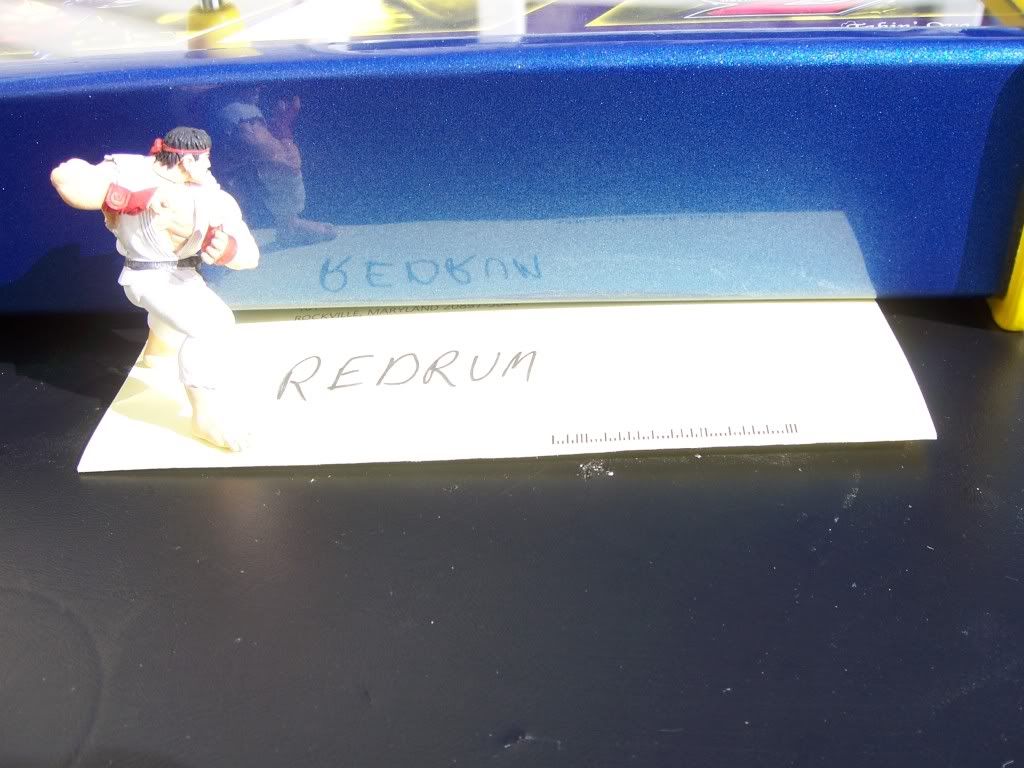
Below is the painting guide I wrote up for the guys over at QCFGaming. After I posted some pics of my work, I guess they were happy with the results. They've tried to add this tot heir website, but it hasn't really worked that well. Since a few people have asked to see the guide, and I have to reference it on Part 5 of my building writeup and don't feel like rehashing anything, I just posted it here. Hope this helps somebody out there....


I’ve been asked to do a write up on my painting technique for QCFGaming. I feel so special! Before we begin, I need to touch on a few things. First, a lot of credit must go to Digital717 over on the SRK forums. His guide was what got me started on my paint job. You can find his info here: MDF Mirror Finish Worklog


Second, consider both write-ups as guides, not etched in stone rules. I am by no means a professional (as some of the pictures will attest!), and I’m sure if you ask different people you’ll get different answers and have similar results. However you chose to go, as long as you have patience, you will have results you can be proud of. Make sure to read the entire guide, look at the bonus points, and decide what will work best for the finish you’re looking for. Now, onto the show….


Congratulations! You just got your QCFGaming case. While waiting for it to get shipped, you no doubt had visions in your head on how the stick will look. You open up the USPS box, dig thru the paper, and are presented with….a rather brown box. How in the world are you going to get that to look like the other custom cases you’ve seen? Fear not, we’re here to help.


First off, you’ll need to get your materials together. Some you may have around the house, some you may need to head to the local hardware or automotive supply store. You will need:

• A filler (wood filler, joint compound, spackle, Bondo, etc)

• Sandpaper (100, 180, 220, 320, 400, for dry sanding, 600, 1000, 1500, 2000 grit for wetsanding)

• Steel wool (000 and 0000 Grade)

• Rubbing Compound

• Polishing Compound

• Wax (optional)

• Spray paint (enamel or lacquer, either seems to work)

• Spray clear gloss (again, either enamel or lacquer)

• Tack cloth

• Terry cloth rags

• Spray Bottle

• Turpentine, mineral spirits, or other paint safe cleaner

• Rubber/latex gloves

• Dust mast or respirator

As we go along, I’ll explain what we’re using everything for. Let’s get to it!


Step 1- Prep the box

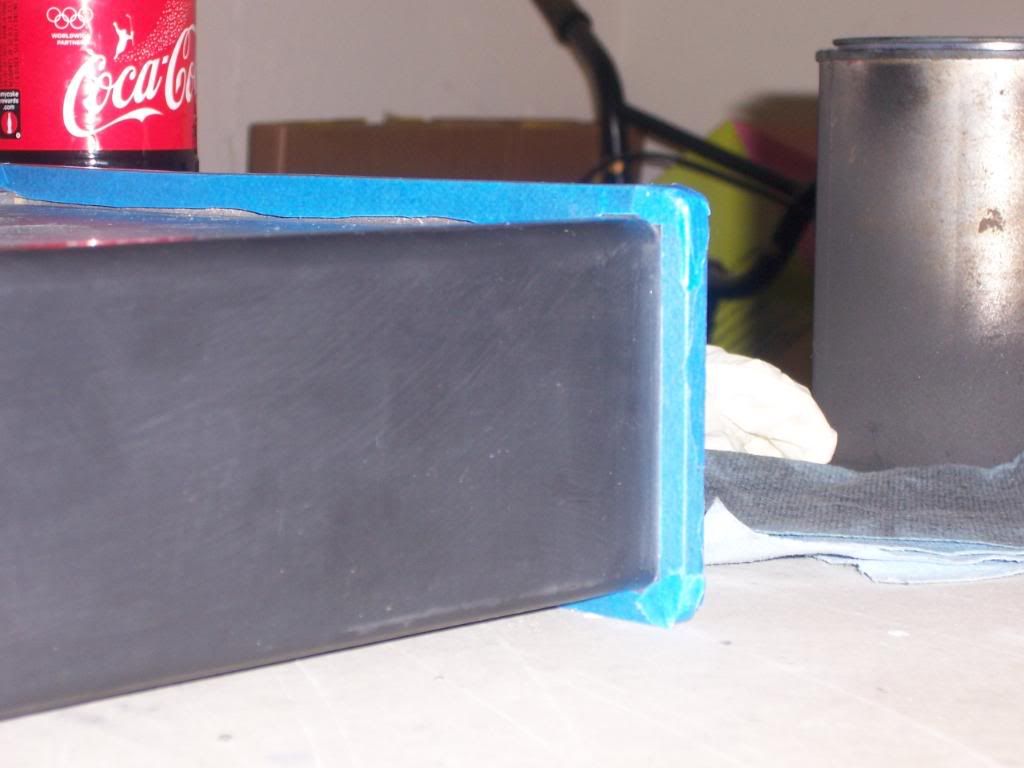
Have a look at your box. See all the fuzzy, unfinished edges where the parts join together and where the routed edges are? Those are the enemy. First off, when you hit them with the spray paint, they will show every joint line. Second, the unfinished edges of the MDF act like sponges on paint. Definitely not what you want. That’s where the filler comes in. What you want to do is spread a nice layer of filler along all the edges and joints until they aren’t visible. You don’t need to use too much. Once that’s dry, it’s time to sand it smooth. Grab the lowest grit sandpaper and sand it as level as you can. Try not to sand into the MDF. Once it’s sufficiently level, move to a higher grit of sandpaper (180 or 220 should do the trick) to get everything nice and smooth. When you run your finger across the spot where you used the filler, you want it to feel smooth and level, with very little peaks or valleys. You should not be able to feel the edge where the MDF stops and the filler begins. If you don’t, it will stick out like a sore thumb when the paint is sprayed on. Once you’re done, wipe the dust off with the tack cloth and use a rag and mineral spirits to remove any fine dust and fingerprints. Use gloves to keep the stuff off your hands.

Bonus Point - Box Prep

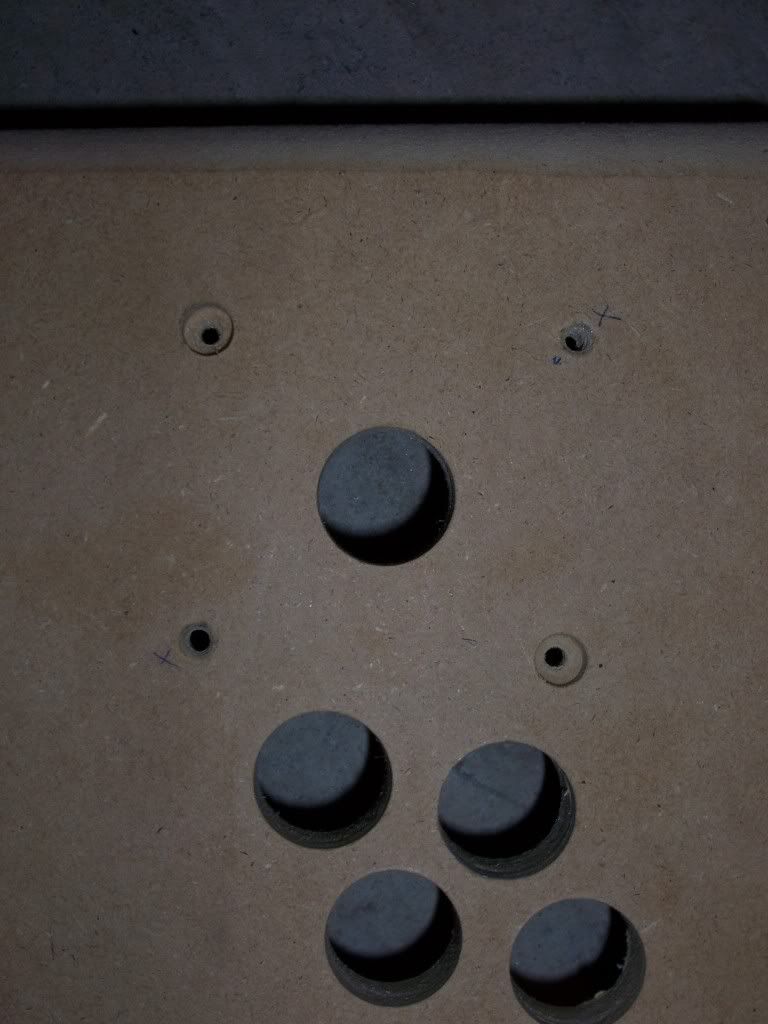
Here’s a tip for anybody with a HAPP style box. Since the joystick mounts from the bottom, you have to drill holes in the top panel and drop the screws in for the joystick. Some people don’t mind the screw heads showing, or use countersunk screws to get the screw head flush with the panel. Personally, I don’t want to see any screws, whether I’ve got art or plexiglass covering it or not. So, I picked up a #12 countersink bit like this:


Mark your holes and use the countersink bit to drill into the MDF so the screw heads are below the surface, like this:


Grab some wood glue or contractors glue and shoot some in the hole. Drop the screws in and use your filler to cover the holes. Then sand and smooth as before. Now, you have a nice, bolt free top that will look like a solid block when you’re done!


Step 2 – Priming and Sanding


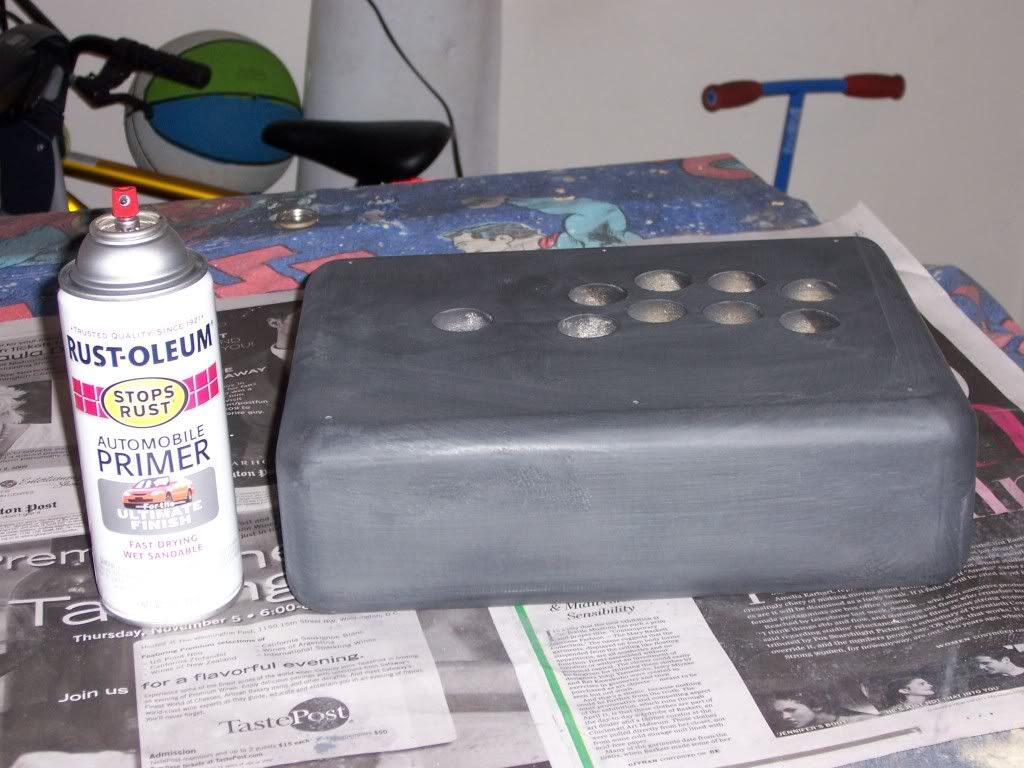
Using primer on your box is very important. Not only will it provide a better surface for your paint to adhere to, but it fills and smoothes any imperfections in the MDF. The color of the primer doesn’t really matter (although if you’re painting the box black, using black primer can help you cheat in case of any screw ups when you’re sanding, as we’ll see later). Make sure your paint area is CLEAN and well ventilated. When using spray paint, spraying a number of light coats is always better than one heavy coat. We’re not doing graffiti! Grab your mask (you really don’t want to inhale this stuff too much), hold the can 10-12 inches from the box and spray in a straight line from end to end. Start spraying before you hit the edge of the box and stop spraying after you are completely off the other side. 2 or 3 light coats about 2-5 minutes apart should do. Then put the can down and walk away. Most likely the box will not have a full coating of paint and the MDF will show thru. That is fine! You will cover it with the subsequent layers. Let the paint dry per the directions on the primer (generally 30 minutes to an hour), then repeat the steps. After you’ve done this 3-4 times, you should have a pretty uniform coverage of paint. Have a look at the parts that you used your filler on. If you sanded them down well, you should notice very few, if any, high spots in the paint. If you do see them, go back with your 180 or 220 grit and smooth it out, then respray that area. It may be a pain to do, but it will look so much better once the paint goes on. Once it’s done, let it sit for 24 hours to dry. If it’s cold or humid, you may need to wait a bit longer to dry.


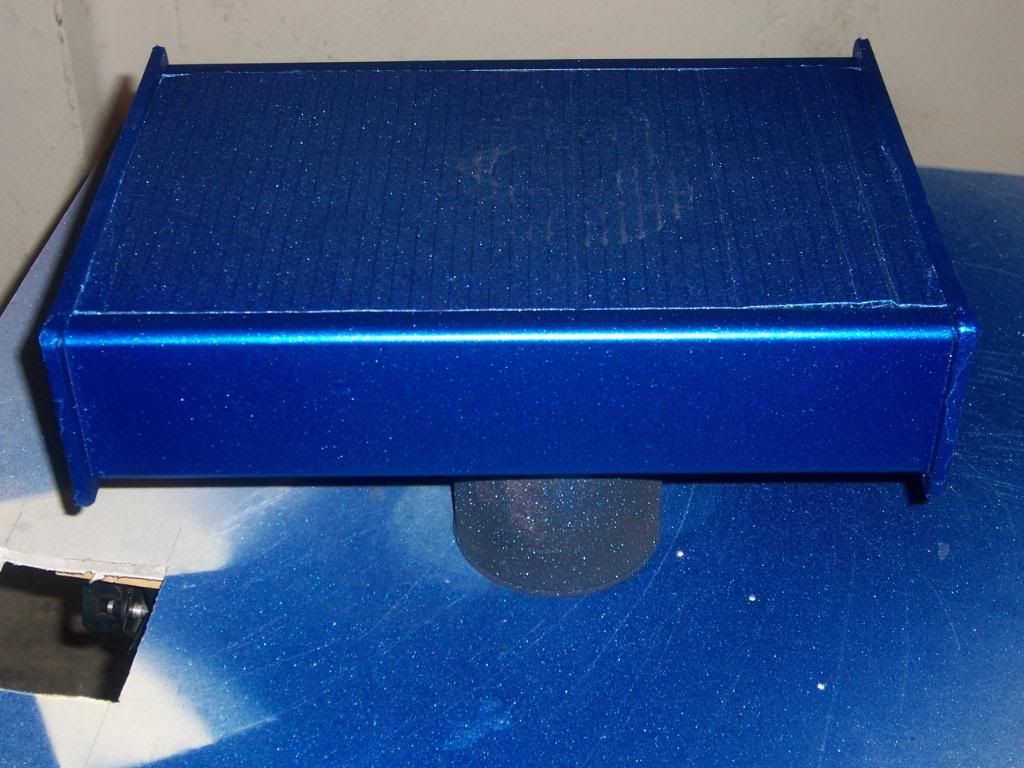
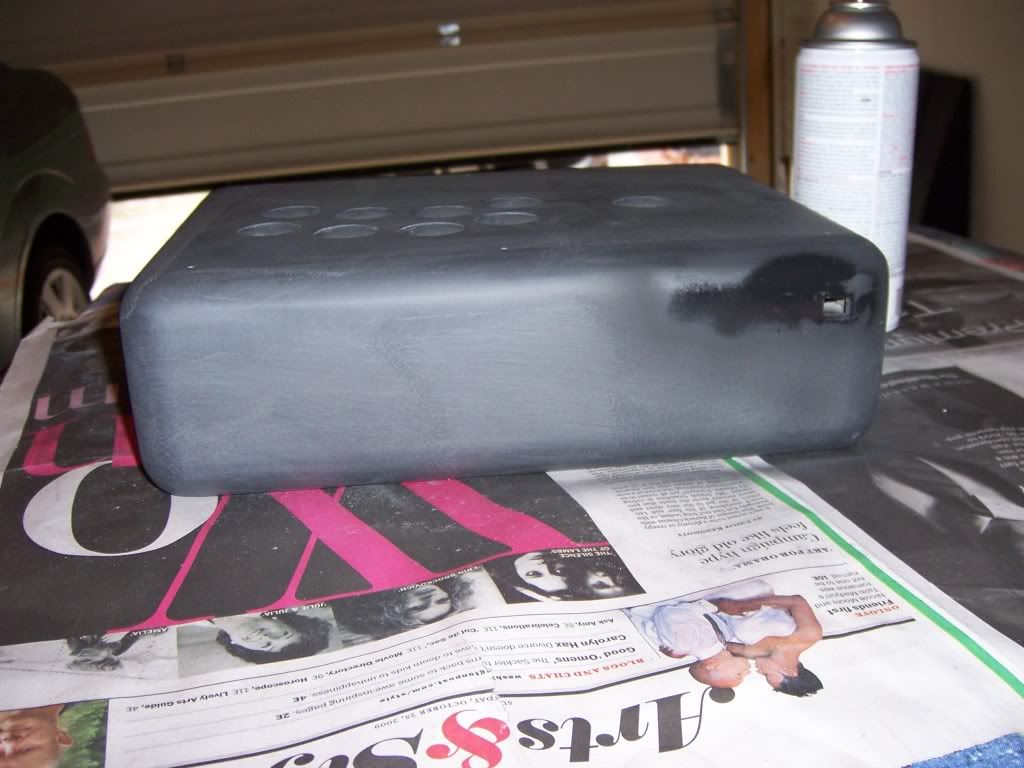
Next up: sanding. We want to sand the primer relatively smooth so the paint has a nice even surface to stick to. Grab some 220 or 320 grit (and your mask!) and sand down the primer. You can use a sanding block or wrap the sandpaper around a small block of wood so you can put even pressure on the paint. Be very careful around the edges of the box! It is extremely easy to sand thru the paint or primer if you’re not careful. I like to use 3M flexible finish sandpaper, which is really good on any rounded edges. The primer also doesn’t seem to build up nearly as much. If you do sand thru the primer, spray the part with a few light coats, let it dry a few hours, then lightly resand and you should be fine. Finish up with a light sanding using 400 grit sandpaper. Once everything looks and feels nice and smooth, wipe with the tack cloth and use the mineral spirits to clean everything. You should look something like this:


Done! Now it’s time for some paint


Bonus Points - Primer

Some have asked whether or not brushable primer would work for this application. To be honest, I haven’t really tried it, although I have some from patching drywall around the house. My first thought would be maybe, but it may be more work than it’s worth. I wouldn’t attempt to use a brush to apply it, as sanding the brush strokes out would be a pain. A small, foam trim roller may well do the trick, but I’m not sure how the primer would set up once it dried. If you choose to go that route, just be sure to sand it smooth and clean it as mentioned above.


A Word on Enamel Paint vs. Lacquer Paint

You may or may not have noticed when you got your paint that you have the choice between enamel paint and lacquer paint. Either will ultimately do the job, but with slightly different handling directions. The biggest difference in the two are the solvent or "carrier" of the paint. Lacquer paint uses lacquer thinner and enamel paint uses paint thinner. One of the advantages of lacquer paint is that it dries more quickly than enamel and does not have a re-coat window (a time when a subsequent coat must be reapplied). With lacquer, you can spray the next coat once it is dry. With an enamel, you generally have a 1-2 hour time period in which you must spray the next coat, or you will need to wait for the paint to cure, which can take 3-5 days, depending on your brand of paint. Check the instructions on your paint can and be sure to follow those. An advantage of enamel over lacquer is that enamel can be used over either enamel or lacquer paint. The paint thinning solvent will not affect the dried layers of paint. Lacquer, on the other hand, can eat thru or wrinkle enamel paint because of the lacquer thinner it uses. It’s also smellier and a bit more toxic than enamel (not that you want to go sniffing either, mind you…). In short, enamel plays nice with anything, but let lacquer stick with lacquer.


Step 3 – Painting and Sanding

Here is where the rubber meets the road, as it were. This will require patience more than anything else. It may seem tedious, but if you get it right your finish will look fantastic. First off, grab your mask and the paint. Just like with the primer, you want 2-3 light coats, wait 2-5 minutes, then 2-3 more light coats. Afterward, put the can down and let it dry 45 minutes to an hour and repeat. How many coats? Hard to say. Once you have a nice, even coverage on the box, you should be good to go. However, I like to add a few more coats on just to give me some padding in case anything goes wrong with the sanding. Again, let it dry at least 24 hours before touching it. Before you turn in for the day, soak the wetsanding paper (the 600-2000 grit stuff) in a bucket of water with a few drops of dishwashing liquid for the same 24 hour period.


Once it’s dry, the sanding can begin. Get your mask and start with the 400 grit like you did with the primer. Careful on the edges, lest you cut thru the paint. Once that’s nice and smooth, clean it with the mineral spirits and let that dry. Now comes the fun part. Get the 600 grit paper out of the bucket and wrap it around your sanding block. Then, very carefully, and with very little pressure, start sanding the paint. Let the sandpaper do the work, making sure to spray down the sandpaper every 30-45 seconds to keep it wet. The soapy water solution keeps the sandpaper lubricated and rinses the paint off the sandpaper, keeping it from loading up. The sandpaper should glide smoothly across the surface of the paint without grabbing. If you start grabbing, stop, spray down the paper, and continue. Sand a small area at a time, making sure to wipe the area dry to check your progress and to keep standing water off the box. Again, be extremely careful around the edges, as one swipe will take the paint off. It may be easier to very lightly go over the edge with your hand, letting the paper do the work. However, if the edges look good, you may be able not to even bother with them too much. Once completed, wipe everything down with mineral spirits. Repeat the process with the 1000, 1500, and 2000 grit sandpaper. At this point, the paint should be even and look white and dull, as if somebody spilled milk or baby powder on it and didn’t quite clean it all up. This is absolutely what you are looking for. The next 2 steps will take care of it. Now, give yourself a break before we continue on.


Bonus Points – Sanding Alternatives


At this point I should point out a few differing opinions on sanding your finish. First off is the wet sanding / dry sanding debate. Some say you can achieve similar (or the same) results by dry sanding with the higher grit sandpaper. Some advantages to dry sanding are you don’t have messy water drips everywhere and it is easier to see what you’re doing and what needs to be sanded more. The disadvantages include the sandpaper loading up with paint, thus reducing it’s effectiveness and requiring the use of more sandpaper. Also, you end up trading a wet mess for a dry, dusty mess. With either technique, be sure to use light, even pressure and be careful around the corners!


Instead of wetsanding with 600 and 1000 paper, some have tried using steel wool. Steel wool is popular in polishing metal and wood. For our application, steel wool can work as well, up to a point . Steel wool is much more malleable than sandpaper, thus easier to go over rounded corners with. It also leaves a very nice, even finish on the paint. You could transition from 000 grade to 0000 grade steel wool, much like transitioning to a higher grit of sandpaper. 0000 grade steel wool is roughly as abrasive as 1000 grit sandpaper. Depending on the level of gloss you are looking for, stopping at either 1000 grit sandpaper or 0000 grade wool is fine. But if you’re looking for a super shiny, almost mirror finish, continue on with the 1500 and 2000 grit sandpaper.
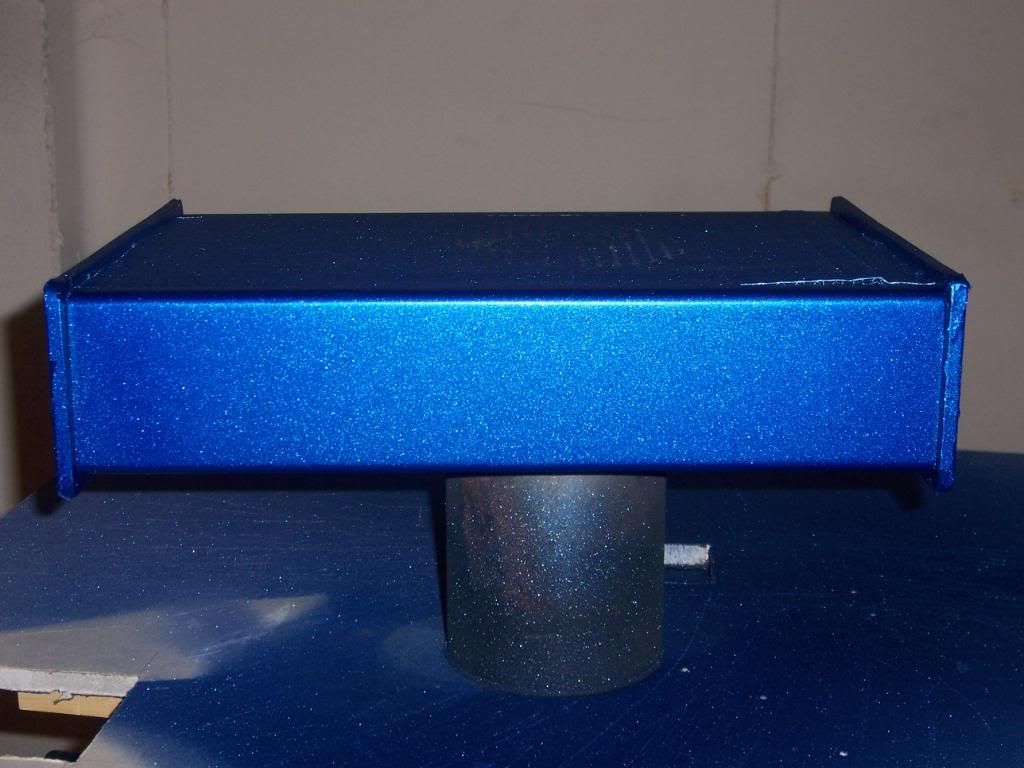

Step 4 – Clearcoat


As Yogi Berra once said, the next step will feel like ‘déjà vu all over again’. Get your mask, grab the clear gloss paint and start spraying the box just like you sprayed the primer and paint before – 2-3 coats nice light, even coats, 2-5 minutes in between each. Let that dry 45 minutes to an hour, and repeat. Once the coats are on, let it dry for 24 hours. As you can see, the milky white finish now looks nice and shiny. Now, if the paint looks nice enough to you already, or you’re tired and ready to move on, have at it. If you want that super glossy, wet mirror finish, repeat the sanding process as above. Whether you wetsand or drysand, use sandpaper or steel wool, make sure to finish with the 2000 grit paper! Again, when you finish, the surface should have the even, dull dry look to it, like a slightly shinier version of the paint after you finished sanding it. The finish should also feel as smooth as glass if you run your fingers across it . Clean it with the mineral spirits and take a break. The last step will require some elbow grease.

Step 5 – Compound and Polish

Have you ever had to wash and wax your car before? If so, this last step should be a piece of cake. If not, just remember what Mr. Miogi told Daniel-san – ‘Wax on, Wax off’. Think of the compounds as liquid sandpaper: a very high grit abrasive that will sand and polish the paint like stones in a rock tumbler. Start with the rubbing compound and a terry cloth. Follow the directions on the bottle. Pour some of the rubbing compound on your rag and work it into the paint. As you do, you should see the color come back in with a pretty high shine. Wipe off the residue with a clean terry cloth per the directions. When you’re done, you should have a pretty deep, rich color, albeit with a bunch of swirl marks. That’s what the polishing compound is for. Follow the instructions on the package and do the same thing. Now you should have a very shiny, almost streak and swirl free finish that looks like it came from the factory. Hold it up to the light and admire your work. Pat yourself on the back, good man (or woman) for a job well done.

Bonus Tip – Polish and Wax

If you really want to go all out, or just like the whole wax on, wax off deal, you can add a coat of polish and wax. Polish is less abrasive than either the rubbing or polishing compounds, which are mainly used for finishing the paint finish. A polish or glaze will provide that extra sheen and smoothness. Your local auto parts store has a pretty good selection. I like Meguiars Deep Crystal System Polish or their Mirror Glaze line of products. Mothers and Eagle One also work well. Now, wax and polish are two different things for two different purposes. Polish adds shine, wax adds protection. So for that added layer of protection for your shiny new finish, you may want to add a wax. However, you need to wait 30 days for the paint to fully cure (curing is different from drying!) before waxing your paint. You may need to disassemble your pride and joy unless you want to get was residue off the buttons, but if you wish to go all out, that’s your choice. The added bonus: you now have products to shine your car to a finish as nice as your stick!


That’s it people. Hopefully this guide will help you achieve a finish you can be proud of while you show off your latest creation. Remember, these are just suggestions, not rules. As they say, your mileage may vary. Thanks goes to the guys at QCF (Lucky Day and Satek), Digital717 for the original worklog and the inspiration for this guide, Toodles, ShinJ, Purplearms, Beneco74, Gummouned, Lizard Lick, GamingNow, and everybody else on he SRK forums that pushed me to building my first stick in the first place. If you have any questions, comments, or things I should chance, feel free to contact me at spenzalii@att.net

Enjoy!

Spenzalii

Tuesday, December 8, 2009

El Kabong2 (or making my first arcade stick) Part 4 – Painting for Dummies 101

It was now time for the most labor intensive part of the build: painting. A good paint job can make a piece of wood look like polished onyx. A bad paint job would look like your 5 year old got a hold of a spray can and some tempura paint. Since I wasn't making a piano for Steinway, I was shooting for something somewhere in between. I had read through a worklog on the SRK forums on how to get a mirror finish on mdf (Check it out here if you like). It looked like it would be more time consuming than anything. But, since I wasn't on any deadline, time wasn't going to be an issue. Doing it right the first time, however, would prove a little more difficult.

The first thing I did was seal up the edges of the case. I grabbed some joint compound that I had from a drywall repair project I did a while back and spread a thin later around the edges where the pieces of the mdf were joined and on some of the rougher edges where the case was rounded with a router. If the edges weren't sealed, the paint would just seep into the pores of the mdf like a sponge. Spackle would have done the trick as well (and if I had saw the spray-on spackle on one of my many trips to Home Depot I would have bought some), but I already had the joint compound. After it dried, I sanded the compound down with a foam sanding pad I had (probably around 300 grit) until it was smooth.. If only I had sanded until it was level...

Next I had to transform my garage into a makeshift paint booth. In a perfect worls, my garage would be nice and clean, with HEPA air filtration and temperature controlled to help the paint dry. In the real world, I had to make do with parking my car outside, setting up a makeshift stand out of my recycle bin, a slab of drywall, a tarp, newspaper and an old tin can. Ventilation came from opening the garage door. The temperature was controlled by however warm or cold it was that given late autumn day. Not exactly ideal, but it got the job done. After setting the box on the can so I can get all the edges and the bottom painted at the same time, I shook up the can of primer and got to work. spraying in long even strokes 10 to 12 inches from the case, I sprayed 3 light coats 5 minutes between each coat. I let it sit for 45 minutes, then repeated the process. With about 9 coates down, I quit for the evening to let it dry overnight, keeping the garage door cracked a bit to air out the garage lest my wife pass out when she goes to her car in her morning.

Once everything was dry the next day I started sanding the primer smooth. I started out with 2 general purpose foam sanding blocks I had around the house. One was 200 grit, he other was 320 grit. Once they were (what I thought was) smooth, I wiped everything down with mineral spirits to clean the surface of any paint dust. When I took a look at my handiwork, I realized the joint compound I put on the case wasn’t level at all. With the primer covering it, you could clearly see where the compound was applied and where it stopped. The edges weren’t feathered very well, and there were plenty of high spots. I started muttering to myself again, mad because I didn’t get it right the first time. While doing this, I realized an even bigger mistake I made: I never drilled the hole for the USB adapter. I was going to kick myself again, but thought, ‘Well, this makes the sanding issue easier…’. May as well take care of both issues at the same time. Hi-Ho, Hi-Ho, it’s off to Lowes I go…..

At the store I picked up a small wood file, some wood filler, and a few odds and ends I don’t even remember anymore. To make the space for the adapter, I traced the outline of the adapter on the case. I then drilled holes in the outline until I had a nice little space, using a screwdriver to help open up the space between the drilled holes. In retrospect, using a sharpened chisel might have been easier. Live and learn, right? Once the space was big enough I used the file to widen and shape the space until the adapter could fit. This took a LOT of elbow grease and cramped fingers, but it got the job done. Since the adapter had a slight taper on one end, when the connector was flush with the edge of the case, there was a gap. That’s where the wood filler came in. I placed a piece of plastic wrap on the end of the adapter and slid it in place from inside the case. Next, I filled both sides of the gap with the wood filler, making sure not to get ant filler on the plastic that was directly over the connector. Once it was half dry, I removed the adapter to make sure the filler didn’t accidentally seep thru and get the adapter stuck. When it was fully dry, I removed the plastic wrap from inside the case. After lightly sanding it down, I now had a nice, smoothed, shaped opening that looked like I used some real tools to pull off.


All that work for that little hole?!? Eh, it will be worth it...

After patting myself on the back for a half days work, I sanded down the places where the joint compound looked terrible. Look in that above picture. See how the left corner looks like someone smeared some old gum under a desk? Yeah, that just wasn’t going to cut it, and it would only look worse once the black lacquer paint was sprayed on. Another half day’s work and it looked ready for primetime


It looks like I dipped it in chalk now, but it's all part of the plan


At least, that’s what I thought when I went to bed that night…