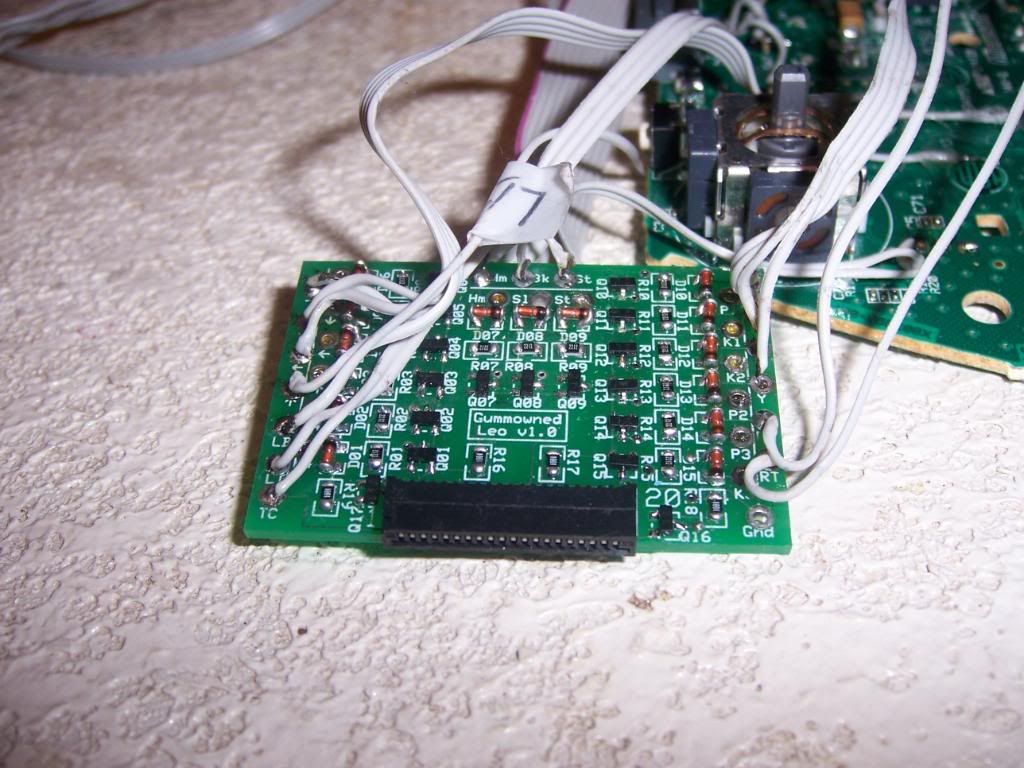
About 30+ points all on one board. Get comfy with your iron...
A smaller tip iron would have made this MUCH easier
The next task was to solder leads from the leo to the buttons and joystick. I pulled 2 sections of wire from my IDE cable – one 12 wire section for the button and joystick row and a 3 wire section for the home/start/select row. Since I didn’t wan to take a chance on any of the wires touching or accidentally desoldering one of the 360 leads, I soldered the button leads from the bottom of the leo board. Before I started, I wrote down the order of the holes for the leo board on a sheet of paper, then wrote down which wire from the IDE cable section went with each one, starting with the #1 wire (marked with a red line). Then, I soldered the 15 leads just as before. I trimmed the button and joystick leads to length to fit a bit neater on the backside of the leo board (something I failed to do for the 360 leads, but I was learning as I went along, so sue me…)
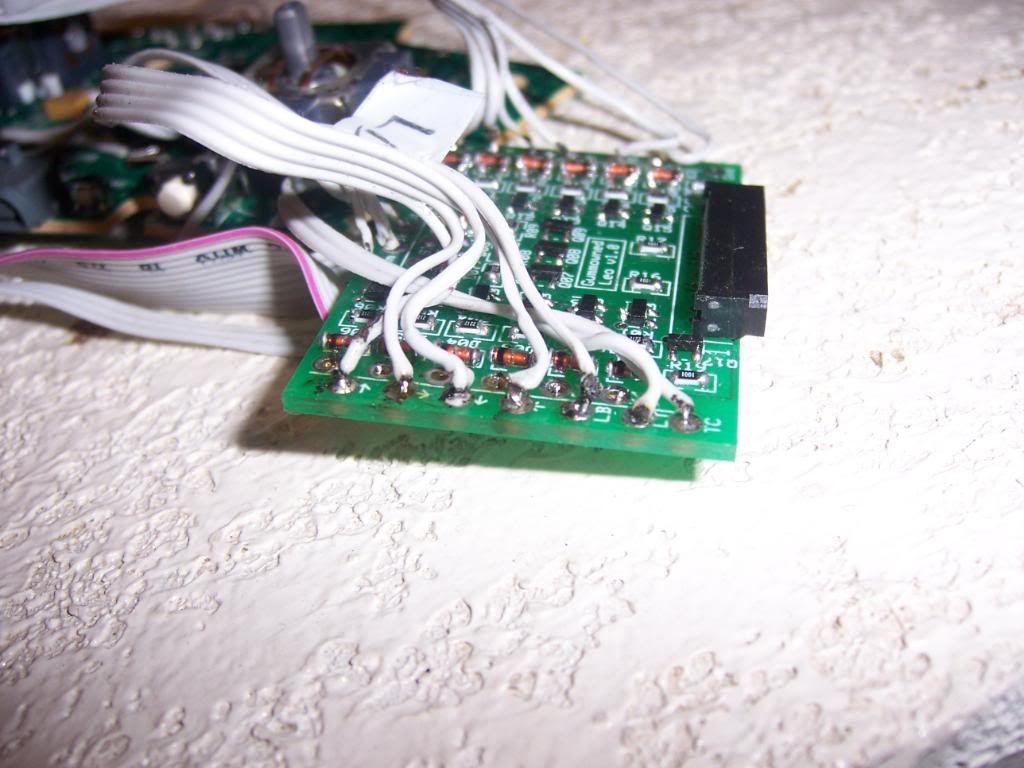
Much neater, but took much more time to do it
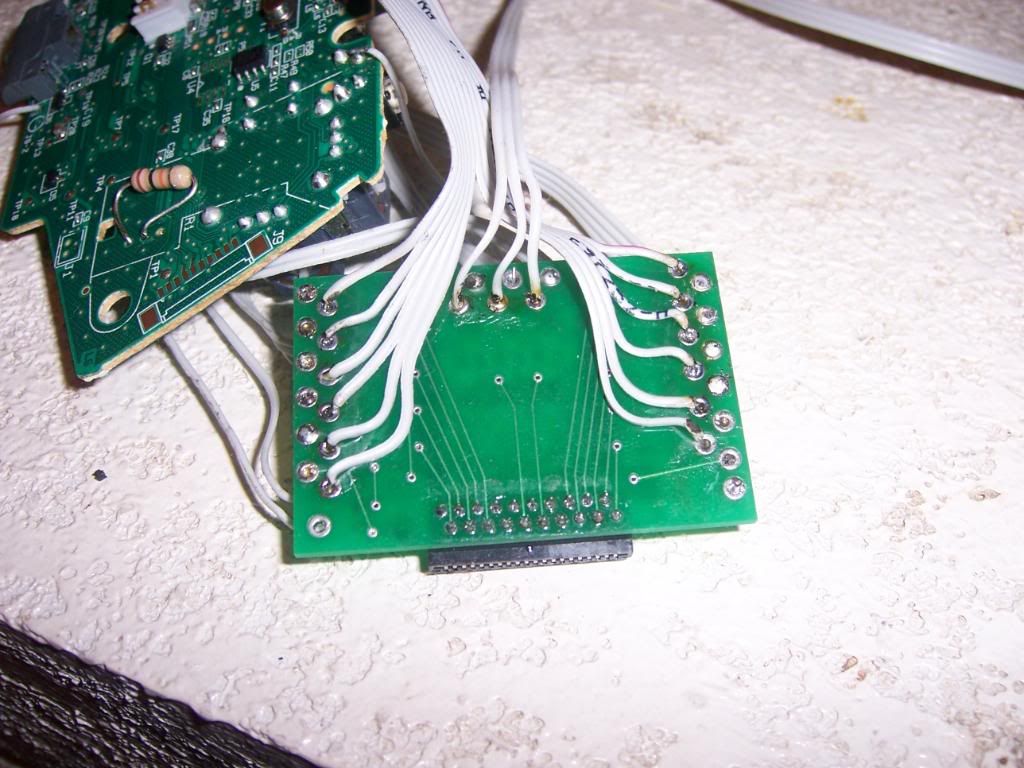
The whole enchilada soldered together.
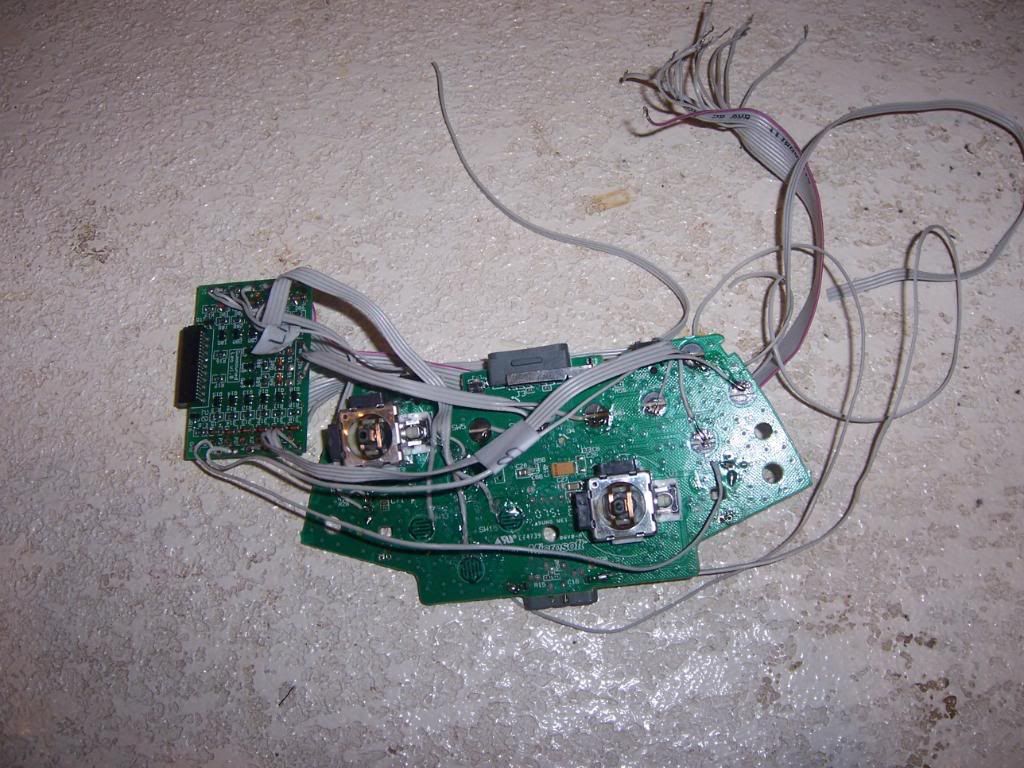
Instead of running the leads directly to the button and joystick switches, I decided to run them to a junction block. This would ease installation as I could vary the length of the leads I needed from the switches and make swapping out parts easier in the event anything needed to be replaced. The junction block would be secured to the right side of the case with 2 screws. But before I could worry about that, I had a few more wiring harness to make.
The first harness I decided to tackle would be for the joystick switches. I cut 4 pieces of wire, soldered on the QDs and snaked them through some cable sleeving. The harness would wrap around the base of the JLW and the exposed leads would go to the appropriate place on the junction block. Next up was the harness for the start/home/select buttons on the front of the case, which I did the same way as the joystick harness. After that, I had to make one long ground harness to tie the joystick, start/select/home buttons and the USB cable grounds together and run them to the power junction block on the other side of the case. By time I was finished that harness I didn’t want to solder anything for a while. Before calling it quits for the day, I wanted to see whether my soldering job on the leo worked. So I connected the harnesses to all the buttons and the joystick and ran them to the junction block, and connected the corresponding wires from the leo board to the junction block. I was smart enough to write down the order of the wires from the button harness so I didn't make a mistake and connect the jab button with the 3rd kick lead on the leo...

The wiring can't stop, won't stop...
Even though I didn’t have everything fully wired, I could still plug the battery to the sixaxis PCB and see if the buttons and stick connections were correct. Sure enough, the PS3 fired right up just it was supposed to. I did realize I had misread the labels on the leo board, so my up and down inputs were reversed. Since the iron was still plugged up, I made a quick swap of the wires on the leo board and called it a night.
No comments:
Post a Comment