
Why is it so hard to find these things?
Once I figured out where I could put the adaptor inside the case where is wouldn’t interfere with anything, I traced the outline on the outside of the case. I then had a few options on how to proceed. I could have drilled a number of holes in the space I drew and used the chisel to clean away the rest of the waste, slowly shaping the hole to the correct size. Or, I could have whipped out the dremel, screwed on the cutting attachment and gone to town.

I have to justify buying this Dremel in the first place, so....
I put the case back in my project vice and set up the dremel. The multicutting bit made relatively quick work of cutting through the material. The only thing is, you really need a steady hand with this thing, which I didn’t have. The lines I cut were nowhere near straight. Had I clamped a straight edge guide to the case beforehand I probably would have fared a little better. No matter. A few more minutes with the wood file and the USB adaptor fit nice and snug. I made sure the adaptor was flush with the case then used some wood putty to make sure the edges were smooth and to fill in the little gaps I saw. Once the putty was dried, I taped up the adaptor plug and sanded it smooth, making sure to feather the edges and make the putty areas as level as possible. Once that was done I set up my paint area in the garage and sprayed on the primer. Once I had enough coats done, I sanded with 200 and 400 grit sandpaper, and wet sanded with 600 and 1000 grit sandpaper to make the primer nice and smooth. So far so good.
With the primer out of the way, it was time to mask off the case for painting. The front and back of the case were going to be painted metallic blue, while the sides were going to be painted yellow. In addition to the Rustoleom yellow that I was using (and failing) with the bat top, I had picked up a can of Duplicolor Metal Flake spray paint.

I used some 3M blue painter’s tape and masked the sides of the case and the edges that would be painted yellow.

Painter's tape is your friend. Believe it...
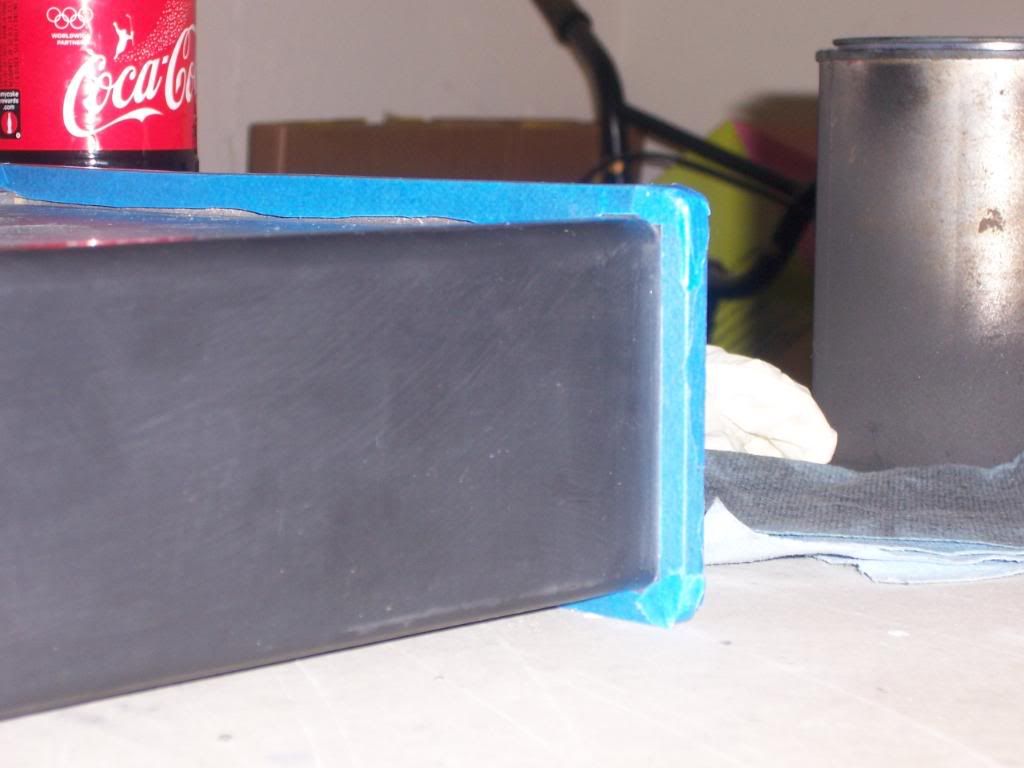
Very important to get the corners right. A Xacto knife helps
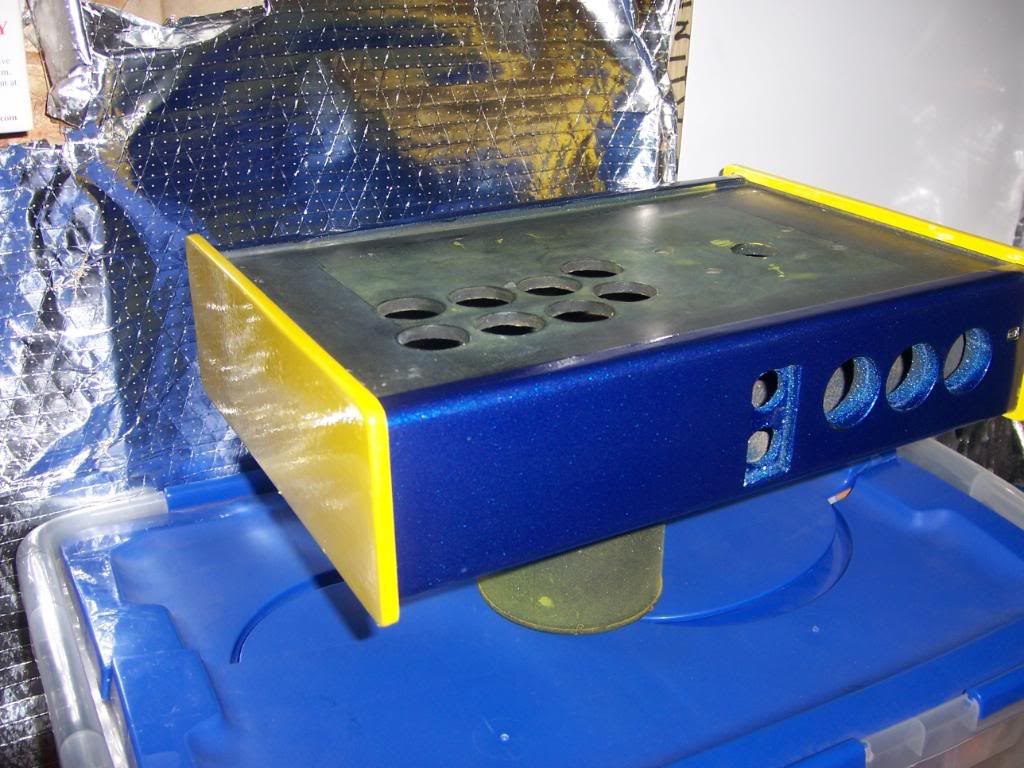
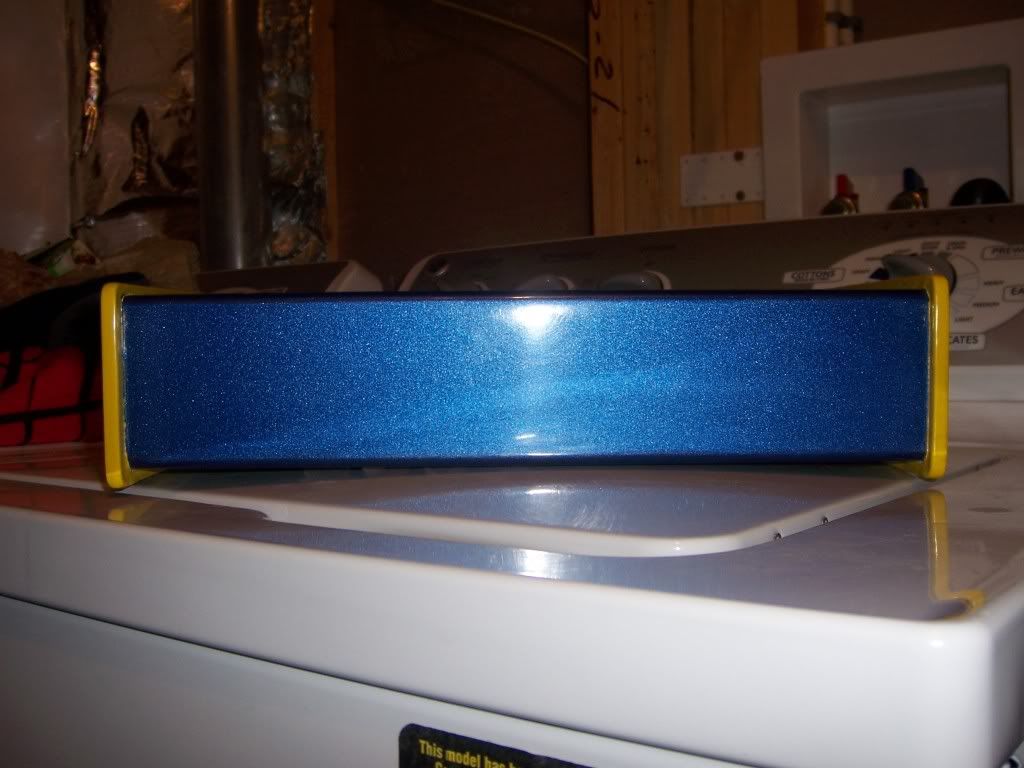
Afterward I wiped everything down with mineral spirits, set up the paint area in the garage and sprayed on about 4 coats of the metal flake, making sure to wear my respirator so as not to breathe in too many noxious chemicals. As the name suggests, the finish had a nice metallic look to it, without looking like someone tossed some glitter into a can of blue paint. Once the paint dried, I sanded it down with 200 and 400 grit sandpaper, cleaned it with the mineral spirits, and sprayed 4 more coats of paint. Once that was dry I repeated the sanding, but this time followed up by wet sanding the paint with 600, 1000, and 1500 grit sandpaper. I started to worry a bit when I noticed the blue was getting duller and duller. However, when I cleaned the paint off with mineral spirits, I noticed that the blue was nice and shiny before the spirits evaporated. So, I was pretty confident that once the clearcoat was applied that all would be alright. Once that was done, I let the case sit for a few days to make sure the paint was fully dry before proceeding.
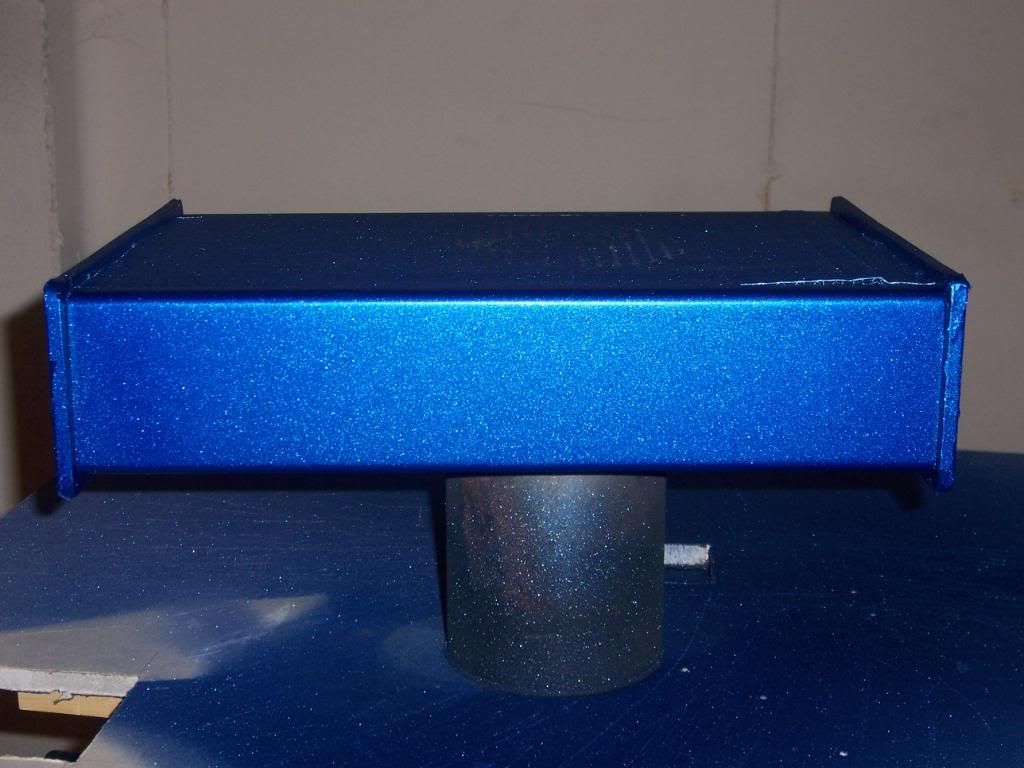
Sparkly!
See why the tape was necessary?
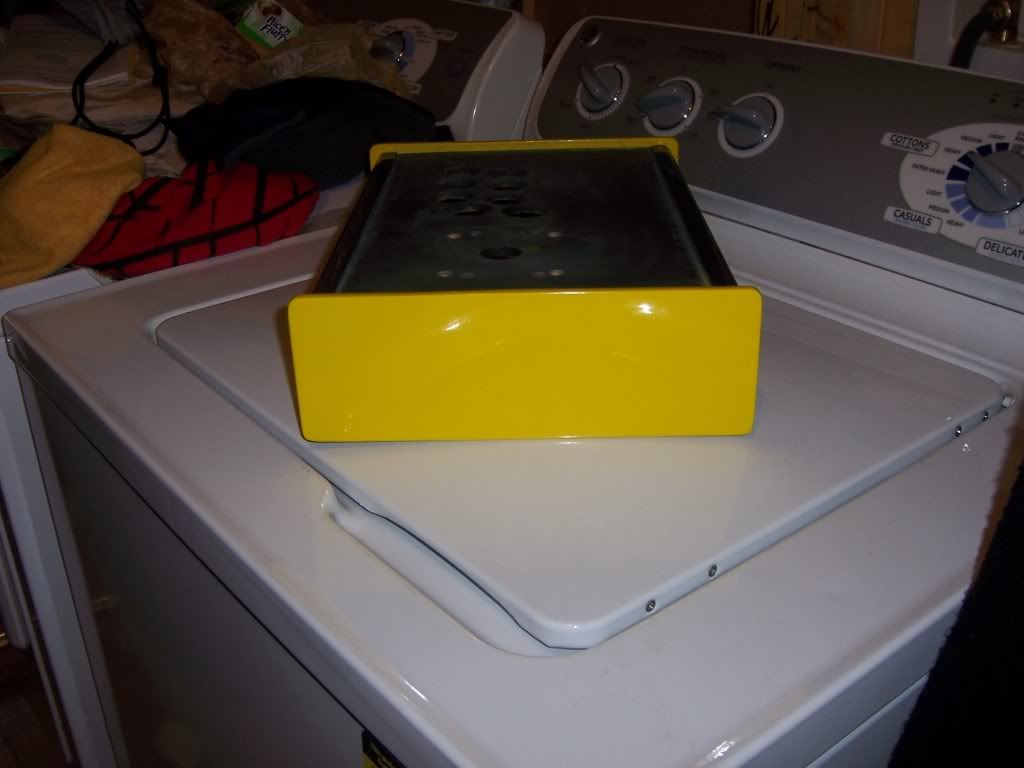
Once I felt the paint was dry I removed the tape from the sides and applied it to the front and back of the case that had been painted. After I cleaned the sides with mineral spirits to make sure there was no paint residue, I sprayed on a few coats of the yellow paint and let it dry overnight. The next day, I sanded it down with 200 and 400 grit sandpaper, just as I did with the metallic flake. After giving it another mineral spirit wipe, I sprayed on another two light coats. When I went back to apply the next few light coats, to my bemusement the paint had started to wrinkle, just as it had with the bat top. This was becoming insane. So, once that paint dried, I sanded all the wrinkled paint off (which stated to come off in little balls of paint), and sanded the underlying finish smooth again. At this point I had just about run out of the Rustoleum, and really didn’t feel like getting another can, since it appeared I could only get one layer of paint on any given surface before wrinkling started to occur. So, against all recommendations and common sense, I grabbed the can of Krylon Fusion and sprayed that on top of the Rustoleum layer I managed to save (it’s usually suggested not to mix brands of paint, as they may react differently with each other). Less than 10 minutes later, I had a runny, wrinkled and ugly mess. So much FAIL, so little time…
I decided to leave the whole spray paint thing alone and go down another path. The weather was colder, the paint smell hung around in the garage longer than I wanted, I still had overspray I had to clean off my wife’s car, and so far the majority of my attempts at using spray paint had ended in failure. So, I started to look for a pint of yellow paint to brush on the case. I figured since I was going to wet sand the paint anyway, I wouldn’t really have to worry about brush marks showing up in the paint finish. Besides, I would be using a foam roller to minimize any applicator marks. Before I went to the store I went online to try to figure out what was going wrong with the spray paint. It worked fine when I sprayed the lacquer for my first case. This time, not so much. In the FAQ section on the Duplicolor site I came across this little nugget:
Q. What is a re-coat window?
A. Re-coat windows apply to enamel paints and refers to the time period during which a second coat maybe applied. After spraying the first coat of an enamel, a second coat must be applied with in 1 – 2 hours or wait 5 days for the coating to cure. The paint may wrinkle or lift when resprayed during this curing period. Lacquers do not have a “re-coat window.” Subsequent coats of Lacquer can be applied over a Lacquer finish without wrinkling or lifting due to a “re-coat window”.
This sounded vaguely familiar. Could it be because I used the same information when I wrote my mirror finish paint guide on my first build?
One of the advantages of lacquer paint is that it dries more quickly than enamel and does not have a re-coat window (a time when a subsequent coat must be reapplied). With lacquer, you can spray the next coat once it is dry. With an enamel, you generally have a 1-2 hour time period in which you must spray the next coat, or you will need to wait for the paint to cure, which can take 3-5 days, depending on your brand of paint. Check the instructions on your paint can and be sure to follow those.

I could have worn this around for a week...
This is what I get for not following what I wrote. All that fail could have been avoided. I wasted about a month trying to get the bat top painted, at least a week on the case, all because I didn’t read. Sometimes, I’m not so bright, I tell you…
In any event, the case had to get finished, and I was determined to get it right, come hell or high water. So, back to Lowes I went. This time I picked up a pint of Rustoleum Safety Yellow enamel paint, a foam touch up roller kit (no need for a 4 inch roller on such a small case), a can of paint thinner and some 3M stripping pads. When I got home, I poured a little paint thinner on the stripping pad and started sanding down the yellow paint. My goal was to remove as much of the yellow enamel spray paint as I could, then use some more primer as a base for the new can of paint. With a bit of elbow grease, I was actually able to sand down to the original coat of primer, which looked just fine. I went over the primer with some 400 grit sandpaper to remove any possible residue and wiped it down with mineral spirits. Then, I cracked open the can of paint. The instructions said the paint would be dry to the touch within 3-4 hours, could be handled in 9 hours, and could be recoated in 24 hours. I poured some paint in the roller tray then rolled the paint on the case, making sure to get a nice even layer of paint down. There were a few small air bubbles on the surface, which I went back over after about 15 minutes, but I knew when the paint dried they would go away. Sure enough, the next day had a nice, smooth glossy finish. I sanded the paint down with the 220 and 400 grit paper, cleaned with the mineral spirits, and put rolled on a second of paint. Same results the next day – a nice glossy finish with NO WRINKLES!!! Amazing what happens when you read. Over the next 2 days I put 2 more coats of paint on to make sure I had a nice layer of paint. After the 4th coat, I sanded with 220 and 400 grit paper, then wet sanded with 600, 1000 and 1500 grit sandpaper.
That took soooooo much longer than it should have
I now had to make a decision on the clearcoat for the case. Since my results with spray anything had been less than stellar, to put it mildly, I did not want to use the clear enamel I had originally bought. Instead, I opted to buy a can of Minwax Polycrylic, which is a water based polyurethane top coat. Poly is often used as a protective clearcoat on wood, giving the finish a nice shine. Since the polycrylic is water based, there would be less chance of it reacting with the painted case, and easier cleanup.Of course, nothing had gone according to plan on painting the case, and this would be no exception. The first coat of poly I put on the yellow paint caused the same wrinkling that had occurred with everything else. Sadly, part of me wasn't even surprised. I had actually come to expect it by now. This time, I couldn’t quite understand why. Being water based, it shouldn’t have reacted as badly with the finish (the poly over the blue sparkle paint would have no problem). Plus, the can of Rustoleum said you could recoat within 24 hours. Apparently, that didn’t apply to top coating with another product. After all, I was still was an enamel paint, which requires a cure time. I was determined to lick this once and for all. So, I wiped off the poly as best I could before it completely dried, sanded out the wrinkles once again and painted the yellow sides one last time. Once it dried, I sanded everything up to 1500 grit again and set the box aside for a week. I wanted to make sure the paint had enough time to cure before I attempted to do anything else.
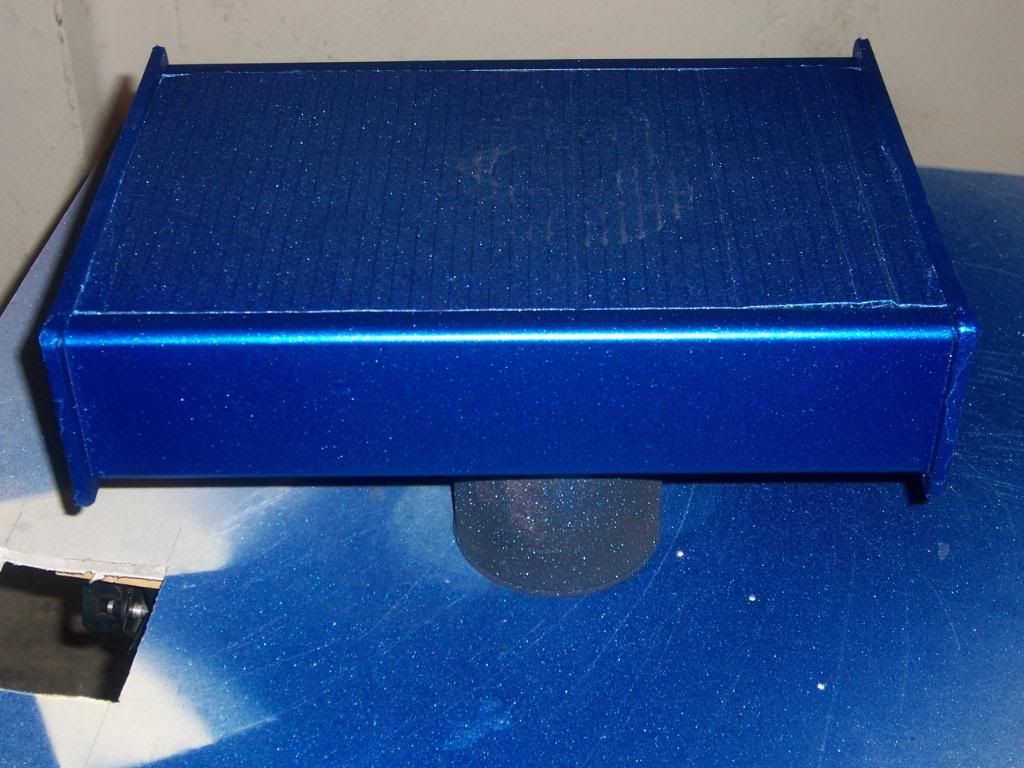
After 7 days it was time to get back to work. Using a natural bristle brush, I went back over the case with the polycrylic. This time it went on with no problems at all. The poly looks like thin milk when brushed on, but once it sets up it dries crystal clear in about 2 hours. After it was dry, I sanded the poly down with 220 grit sandpaper, wiped it clean with mineral spirits, and recoat. It’s recommended to put on at least 3 coats of polycrylic to your project. I decided to go with 6. Since I was going to wet sand the poly to a mirror shine, I wanted to make sure I had enough layers down to make sure I didn’t sand all the way down to the paint by accident.
Glossy!
Just wait 'till the hard work is done...
After all the coats of poly were applied, I went thru my sanding and wet sanding routine all the way up to 2000 grit sandpaper. With each successive grit of paper the surface got smoother and smoother, while the finish looked duller and duller. After the rubbing compound went on, all was right with the world, as both the blue sparkle paint and the yellow paint had that nice, glassy mirror finish. I followed up with the polishing compound and a coat of glaze for that extra bit of shine. After weeks of failure, finally I had the sweet taste of victory. But my celebration couldn’t last too long, as I had to get back to soldering. And there was a WHOLE lot of soldering to be done. Time to get to it…
No comments:
Post a Comment