Friday, January 29, 2010

Berserker Barrage: the Marvel Vs. Capcom Stick Saga Part 3 - Mock Up Time

Around the middle of December, the parts for the stick started to roll in. The biggest piece of the puzzle was the case. It had been partially primed, but it looked like the primer was either dripped on or applied with an old paint roller. No matter; I needed to prime and sand it before painting anyway. The bottom of the case was simple particleboard, with 4 rubber feet screwed to them, which in turn screwed to the mounting blocks inside the case. The bottom also had a cutout for any cables that needed to run from the case. The easy thing would be to just paint the bottom blue, yellow or even black. But since I like to show off, I planned on cutting some plexiglass down to size to replace the back, much like I did with El Kabong. Flipping the case over, I took a look at the plexiglass on the top. The plexiglass is actually a fraction longer than the control panel, extending slightly into slots that were milled the sides of the case. To install, I would slightly bend the plexiglass upward, place it over the control panel, then let the plexiglass straighten out and slide into the slots. This captures the plexiglass, making it more stable. Since I had the buttons and stick, I decided to see how everything fit. The case was originally set for a JLF stick, which has a slightly different mounting plate than a JLW. Fortunately, everything still managed to line up and drop into place.

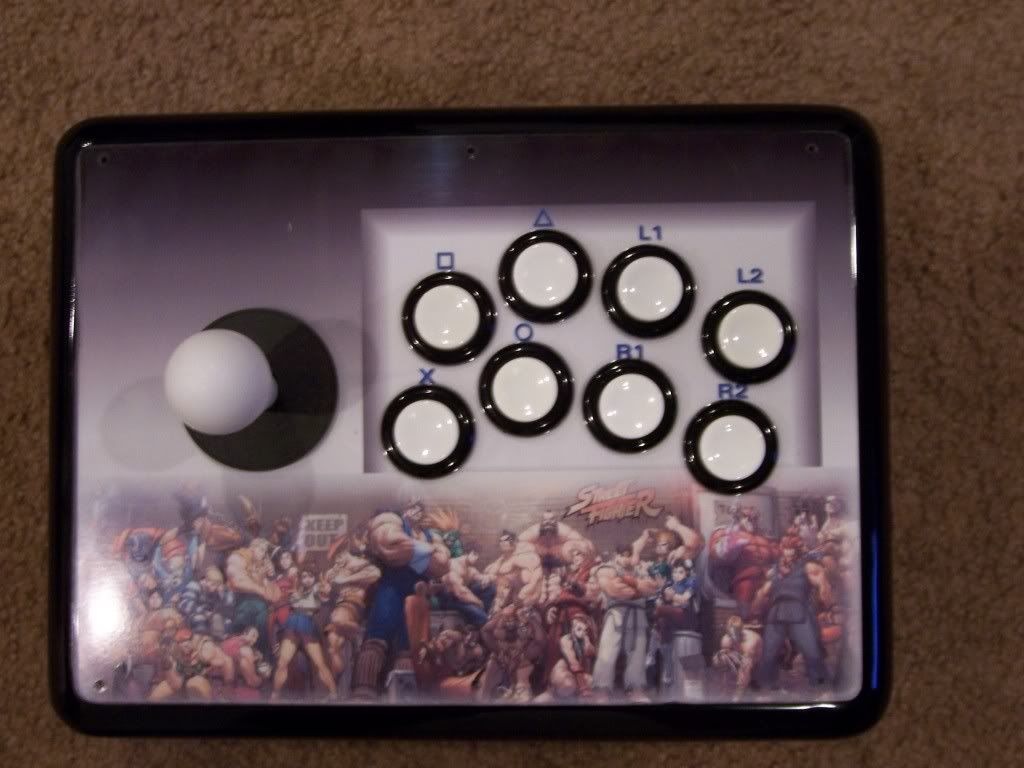
Something's missing from those buttons....

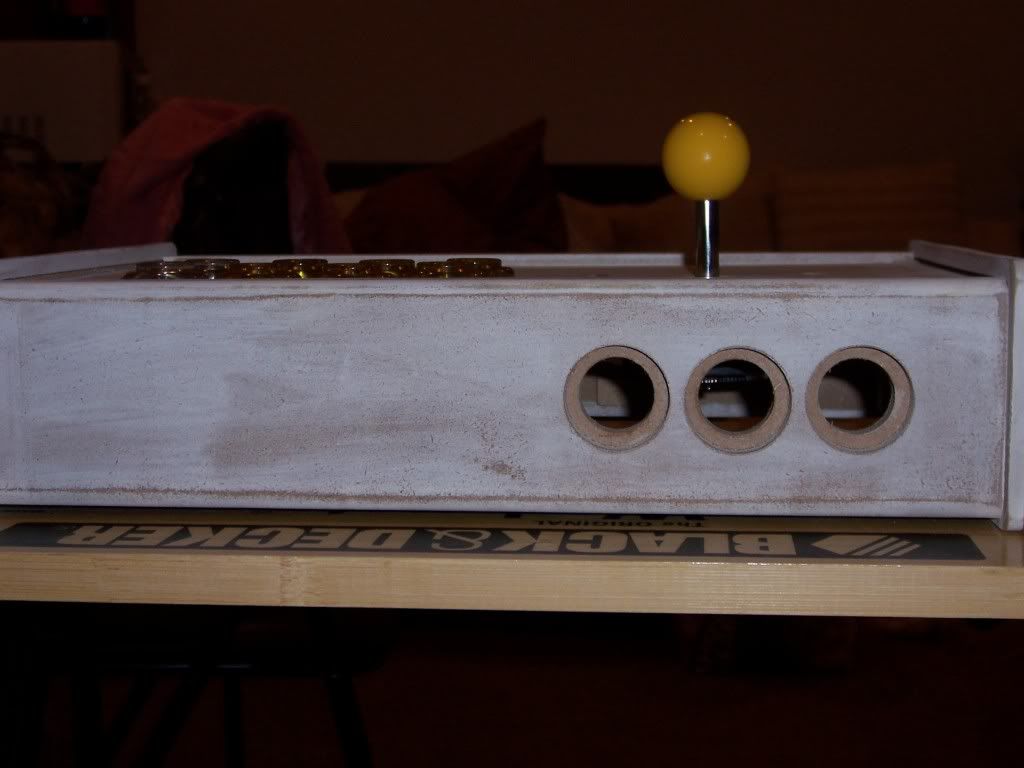
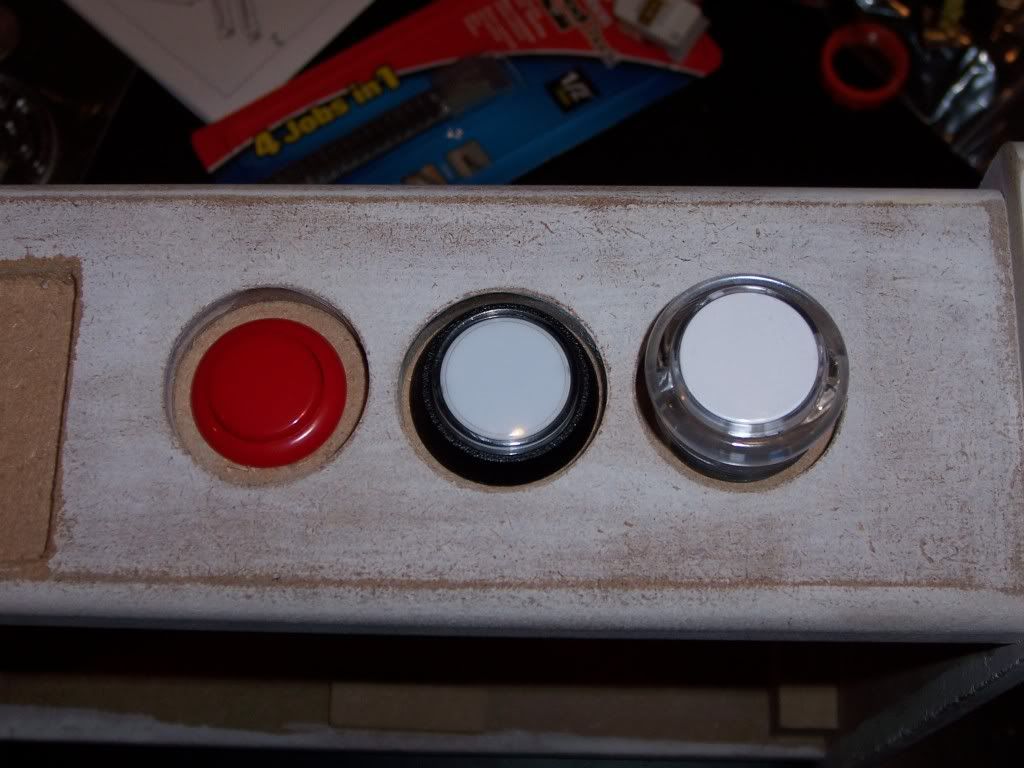
The buttons for the start, select, and home were on the rear of the case. While it’s easier to hit them on the side of the case, like El Kabong’s setup, it does make more sense from a layout standpoint when you start wiring up the buttons and pcbs. Since you have to reach to the back of the case, it also makes sure that you only hit any of those buttons when you really mean to.

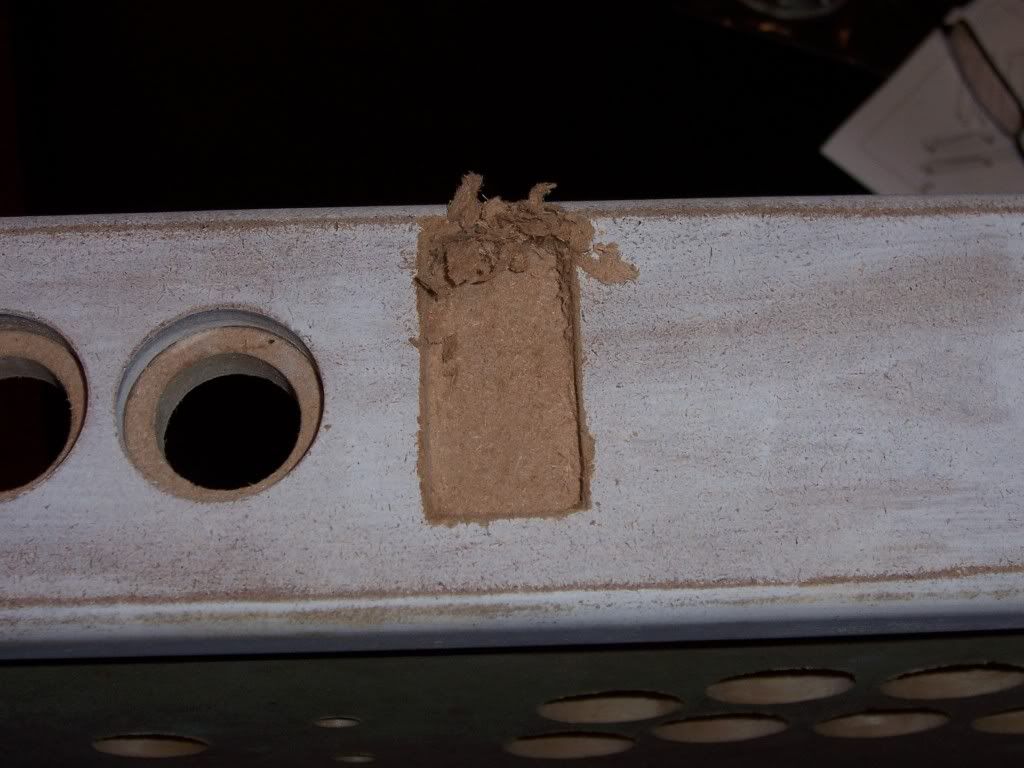
That primer makes the case look ashy...

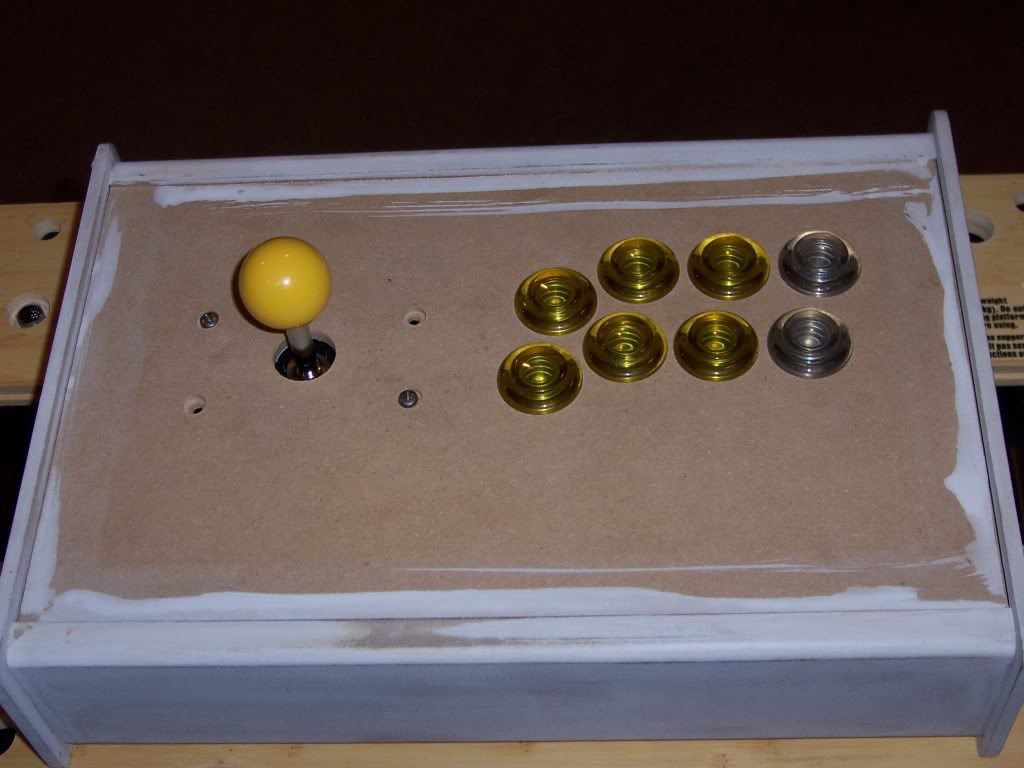
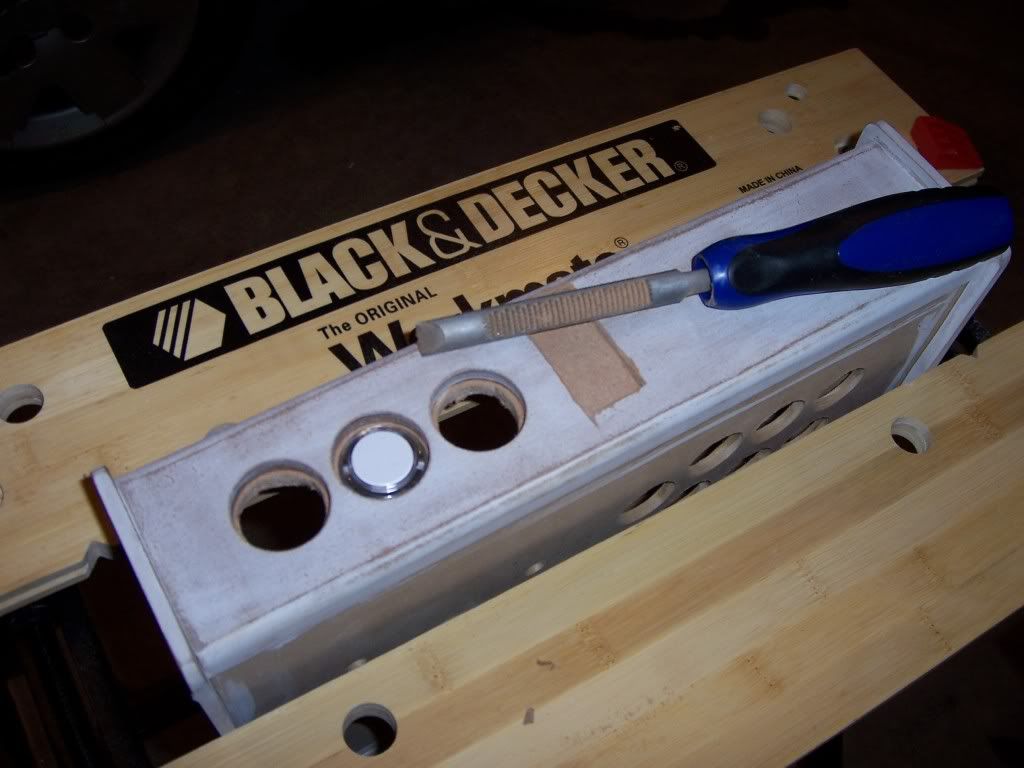
The holes were drilled out for Sanwa or Semeitsu 24mm buttons (Happ/iL doesn’t make any that size). However, when I put one of them in the hole to see how it fit, I didn’t like it. There was too much wood exposed around the rim of the button, and the holes themselves seemed too deep for such a small button. So I rummaged thru my assortment of spare parts from my last project to see what I could use as an alternative. I had picked up a lighted Happ button designed to be used in video poker games and the like just to see how it felt and if it were feasible to use as buttons on another project. It dropped in the hole without too much fuss, and didn’t have as much exposed wood around the rim. However, the button protruded much farther into the case than the Sanwa button I had, which would complicate routing the wires once everything was installed. I then grabbed the 30mm Semeitsu button I never used to get an idea how that would look. It looked like the 30mm would have the least amount of exposed wood, if any. However, I would have to widen the holes to make the buttons fit.

Like Goldilocks and the 3 bears...


That's a pretty big difference

So, it was time to break out the tools. First, I put the case in my mini workbench/vise to hold the case steady. Next, I grabbed my round wood rasp, which is like an aggressive, heavy duty file. Rasps are great if you need to quickly remove or shape a piece of wood. Unlike a file, however, you only use the rasp in one direction, pushing it down or forward thru the material, instead of back and forth like a file, which would ruin the rasp. I made a few passes all the way around the hole, testing to see if it were wide enough every few passes (remember, you can take the material off, but you can’t put it back!). After about 15 minutes, I had the clearance I needed. The 30mm button filled the hole nicely and still remained below the surface of the case, making it harder to accidentally brush against it and hit the button.

Hand tools are great!

The bad thing, however, is now I had to figure out what color 30mm buttons I needed to buy. Oh well. Such is the nature of a custom stick. You could start out in one direction and end up with something completely different by time you are done.

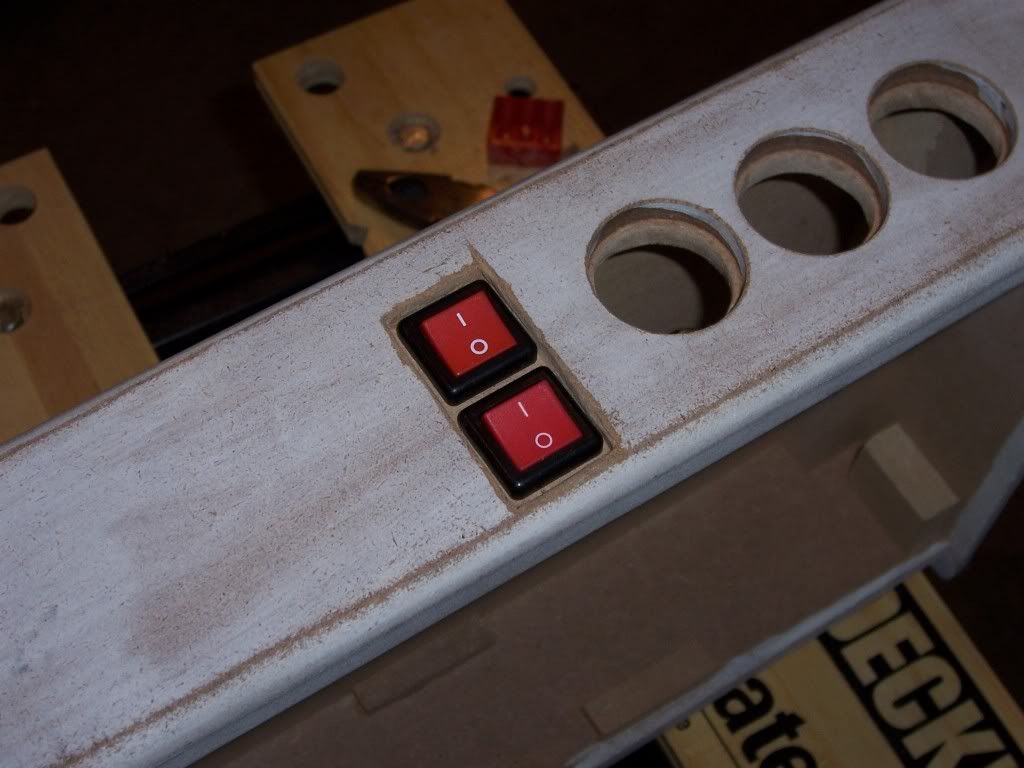
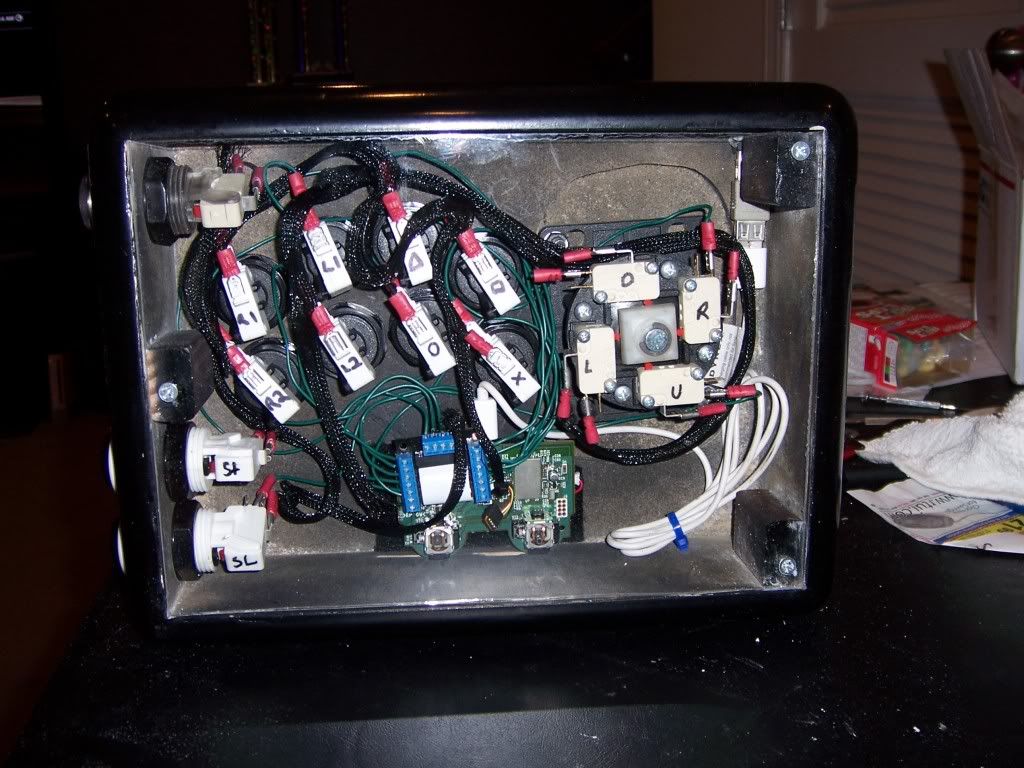
After getting the buttons sorted out, it was time to figure out what I was going to do with the switches. At first glance, the slide switches looked like they would be easier to install. But the more I looked at the case, the less likely they would work the way I wanted. The simple solution would be to mount them on an edge of the case, with the switch just slightly protruding from the bottom. Somehow that didn’t really appeal to me that much, as I feared the wiring to the switches would be a bit messy and I didn’t want the switch to be accidentally moved while playing with the case in your lap. Mounting it to the back of the case along with the start button was an option, but there wasn’t a clear way to mount the switches anywhere near flush to the back of the case. So, I put those to the side and got the rocker switches. While much bigger than the slide switches, if I mounted them on the back of the case they would have a more integrated look, whereas the exposed slide switches would look like the back of an old Atari 2600. In order to have the switches recessed similar to the buttons, I would need to chisel out a portion of the case. So, I traced a template for the two switches in a stacked position and placed it on the case. Next, I took my chisel and cut out the space. Since I’m no carpenter, you can watch this video to see how to use a chisel (a useful tool to have, I must say…)


Since I was working with what appeared to be MDF and not poplar or maple, it wasn’t very hard to cut the space out. In fact, I didn’t really need a mallet or hammer on anything other than outlining the edges. After about 20 minutes, I had the rough cut done.

It will look much neater once primed and painted

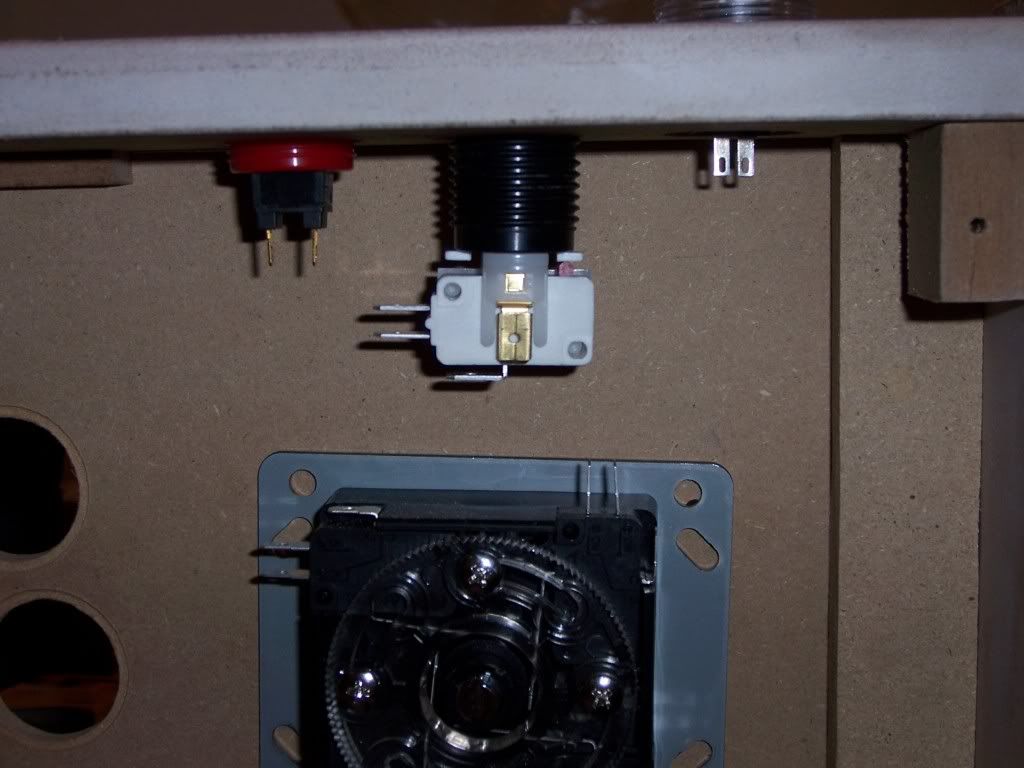
Once I had the space deep enough to my liking, I put the case back in the vise and made the holes for the body of the switch to go inside the case. I used a combination of a drill bit, my dremel and the rasp to widen and shape the holes. Afterward, I dropped the switches in to see how they looked. Success…


I wonder if I can paint them yellow...

…at least until I flipped the case over, that is. Like the buttons, the switches have a locking nut that holds the switch to the case. While I had chiseled the space for the top of the switches to fit, the body of the switch didn’t protrude deep enough into the case for the locking nuts to screw on. No wonder I’ve seen the underside of other cases routed around the button holes, I thought. Ah well, more time with the chisel. Since I was working inside the case, I had limited room to position the chisel and cut out the space. But with some effort, I managed. It wasn’t as neat as the outside, but it wasn’t bad and nobody would see it anyway!


Not exactly even, but it gets the job done

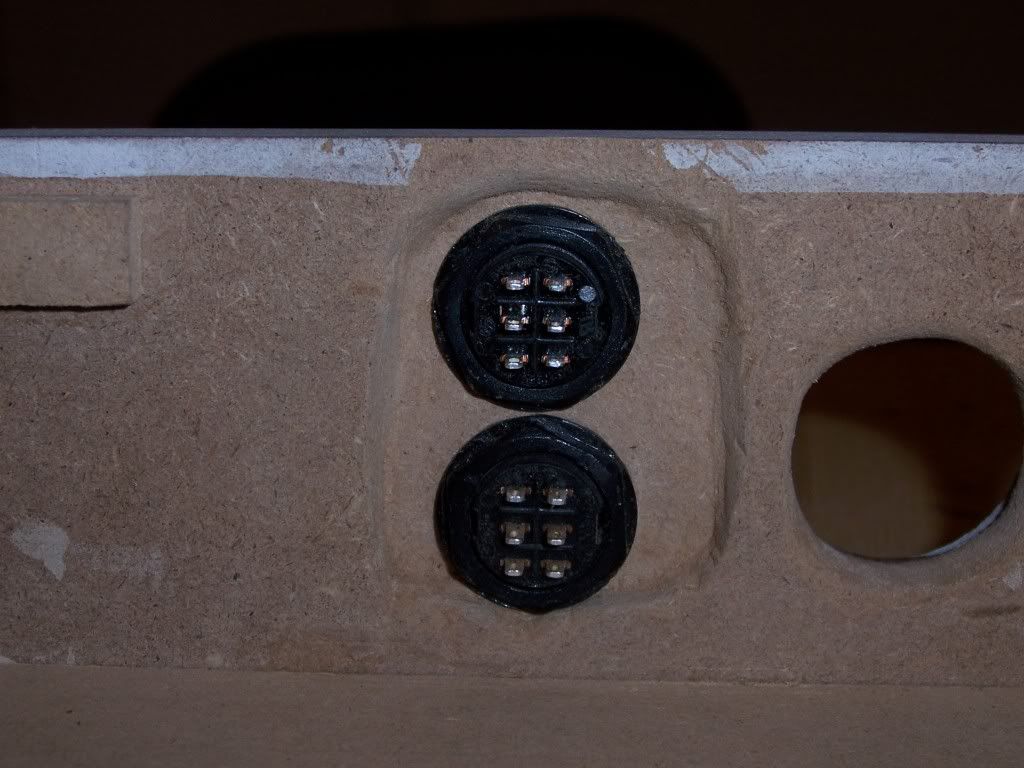
In retrospect, I probably could have chiseled the front side of the case a little deeper, so that the switches were recessed more, which may have givin the needed clearance for the retaining nuts without having to work on the inside of the case. But, what's done is done. I still needed to cut the space for the USB adaptor, but at this point it hadn't come in the mail yet. Who's have thought it took so long to ship something that small from Hong Kong? No matter. The next stage of the project would take up more time than I ever expected.

Tuesday, January 19, 2010

Berserker Barrage: the Marvel Vs. Capcom Stick Saga Part 2 - The Set Up

My buddy ‘Nick Nova’ comes over the house a few times a month. He was a big fan of MvC2 when it was in the arcade. So when it was finally released for home consoles, he was understandably exited. He came over after work the day I downloaded it and we played for a few hours. Since I had just finished EL Kabong2 I let him give it a spin. He loved it, and proceeded to try to beat me senseless with a combination of Wolverine, Cyclops and Akuma (Scratchy and Scott, I called him). Although I never got into MvC 2 in the arcade, I managed to hold my own with Guile and Juggernaut. Fun was had by all, but it did seem as if the person that was using the pad (mostly me) was at a disadvantage. Arcade game, arcade stick and so forth. Since Nick is like family, I figured I’d build him his own stick. But I didn’t want to do a carbon copy of El Kabong, for a number of reasons.

First, while I’m firmly in the PS3 camp, Nick is a Microsoft fanboy, even after his 360 Elite got the RRoD (I still laugh at him about that). If he were to take the stick home and play, I’d need to set his stick up as a dual mod, so he could play at both houses. I had also wanted to try out some Japanese parts just to see how they felt and if I could get used to them. The original plan was to build myself another box later on with Sanwa parts, but this project gave me the opportunity to try them sooner. Plus, if I didn’t like it, it wouldn’t me mine anyway! My first thought for his stick was to use the Cthulhu board, buy a MadCatz 360 pad and padhack it. I’d also have to buy him a long USB cable. While I was in the planning process, Gummowned actually finished the first run of Leo boards. This opened the possibility of doing a wireless dual mod setup. Since I had been in contact with Gummowned during his initial design process, he agreed to sell me one of the first run boards. I was going to use the Leo in my next stick, but again, the project for Nick was already on the table. So, Nick now becomes a guinea pig AND a beta tester with this one stick! Since he’s a MvC2 fan, I decided to put my own spin on the MadCatz MvC stick, going with yellow and white buttons, a yellow bat top, and a blue and yellow paint scheme ala the X-Men. With the general plan in mind, it was time to start ordering parts.

First up was figuring out what to do about a case. While I plan on making my own cases for a project or two, I’m not quite ready yet. I still need to gather more tools and find the time to do it. Besides, I’d end up doing a lot of work in my garage, and it’s not exactly warm this time of year. The plan was to have a case that could work with a Sanwa stick but still use Happ/iL buttons (Happanese? Japerican?), so a slim stick wouldn’t really work. After some searching, I came across these cases made by a cat named Physh in Canada:


How 'bout that wood grain...

The case looked like it had everything I was looking for: 8 button layout, precut plexiglass for the artwork, tall enough for Happ/iL buttons, and wide enough to have space for the 3 boards that would be needed for this to work. While the joystick holes were drilled for a Sanwa joystick, with a little modification, there would be enough room to install a Happ Competition joystick just in case the Sanwa experiment didn’t work out. The price of the case was pretty good, all things considered: $75 shipped to the US. Physh even agreed to print out the artwork and send it with the stick so I wouldn’t have to work on setting up a template in Photoshop (I would, however, need to figure out how to label the buttons, since all Physh would do is resize the art and print it on his color printer at work). I Paypaled the money and waited for Canadian Express to deliver it.

Next on the hitlist were the buttons and joystick. Sanwa makes two different joysticks: a JLF, which is used in arcade cabinets, the MadCatz stick and most custom sticks, and a JLW, which isn’t as popular but still has it’s supporters in the fightstick community. Slagcoin has a very detailed breakdown of the two sticks here. One of the biggest differences is the tension of the two sticks. The JLW is stiff and tight, compared to the looser feel of the JLF. If you’re used to the feel of American styled (Happ) sticks, it’s believed the JLW is as close as you can get with a Japanese style stick. Sanwa sticks generally come with a ball top, which gives you options of a solid colored ball , a transparent colored ball, or a meshtop ball , (which looks a bit like carbon fiber). But since I wanted it to be similar to the American arcade style, I needed to order a small adapter and the bat top. I also had to consider which restrictor gate to use for the JLW (for a detailed explanation, read this. Unlike the Happ Competition, which doesn’t use a gate at all and has a even, circular feel as you move the joystick around, the JLW comes stock with a square/rhombus gate, which you can feel the corners when you move the stick in a diagonal direction. If you grew up on Japanese sticks, you’re used to it. If you grew up on American sticks, you’ll have a learning curve ahead of you. Fortunately, Sanwa also offers a circular gate which mimics the feel of the Happ, so I picked that up as well. For the buttons, I wanted to stick with concave Happ buttons. I wanted a little more style than the Madcatz MvC stick, so I picked up set of 6 yellow buttons and 2 clear buttons from GroovyGameGear.com. The case was set up to use 24mm buttons for the start, select and home buttons, so I picked up 3 of those as well.

Last were the prerequisite odds and ends needed to complete the stick. I picked up a bunch of .187 quick disconnect terminals for the Happ buttons and some .110 female disconnects for the 24mm buttons. Since I still didn’t want to use a Neutrick connector for the USB connection, I found a Female USB a to Female USB b adaptor and ordered 2 of those for a future project (amazingly, you can only find these things online. No store in the area even knows what I’m talking about…). I went to Lowes and picked up some metallic blue spray paint, Sunburst Yellow paint and some clearcoat. Since the setup would require 2 dual pole dual throw switches,  I went to Radio Shack and picked up a few slide switches and a few rocker switches. I still wasn’t sure where and how I was going to set them up, so I figured it would be good to have both kinds. Since I had to do a lot of soldering, I also picked up some soldering flux (essential for a soldering so many tiny places) and some 10k resistors for the Xbox stick. Now with everything either on hand or on order, I could read up on how involved it would be to actually pull this off and start getting some things put together in my head.

Thursday, January 14, 2010

Berserker Barrage: the Marvel Vs. Capcom Stick Saga Part 1 - What Have I Got Myself Into?!?


Much like a steering wheel or flight controller, fightsticks are pretty specialized tools. Their main purpose is to replicate the arcade setup for a given fighting game. Because of the parts involved, they tend to be pretty sizable, heavy, and not exactly cheap. But if you’re serious about your fighting games, at some point you’re going to have to get one. At least you only have to pay for it once. Unless, of course, you want to play on more than one system, that is. With the advent of XBL and PSN, you no longer have to have someone over your house to show off your fighting prowess. With a high speed internet connection, you can issue beat downs to your buddy down in Pennsylvania or in Prague. But what if one of your friends only has it on PS3, and another for the 360? Well, you could play one friend with your awesome fightstick and the other with your crappy (j/k) controller. Or, you could buy another fightstick, which, unless you have deep pockets, seems a bit frivolous. There is a third option, but it’s not for the faint at heart.


As explained in my last build, people have been ‘padhacking’ for years, taking the guts of a perfectly fine pad and soldering buttons to them. That basic concept has extended to a ‘dual mod’, whereby two different pcbs are wired together then wired to the buttons. When the appropriate plugs wired to the pcb, it’s possible to use one stick for, say, a Playstation 2 and a Xbox. Of course, it’s much more involved than it sounds. Over the years, people with much more electronic experience have made custom boards that make it easier (relatively, anyway) to use your fightstick with more than one console. One of the more popular boards is Toodle’s Cthulhu board (which you can read extensively about here). The board interfaces directly with a PS3 or a PC, allowing you to use your custom fightstick on either machine. It also has software coded in its chip to allow you to use the stick with a Playstation, Xbox, Gamecube, etc, provided you solder the appropriate machine’s controller cable to the board. Alternately, you could wire up a RJ45 jack and use RJ45 connectors for each system you wanted to use , like so:


(for more info, you can go here). In order to use the stick in conjunction with an Xbox 360, however, you still need to padhack an actual Xbox pad. Microsoft has seen fit to install some special coding that will not allow a third party controller to work without it (even though it still hooks up to an USB cable. So much for the universal part). Many people have used the Cthulhu board along with a pcb from a 360 pad (the MadCatz 4716 is pretty popular) for their custom projects, and there are also plenty of people that have modified their MadCatz TE and SE fightsticks to be used on both PS3 and 360. However, those solutions still involve running a USB cable to the console to use it. If you want a factory wireless fightstick, you’re choices are pretty slim (recently, Hori released a wireless stick to coincide with Tekken 6, but the stock parts are the Hori stuff, not the genuine arcade parts. Plus, the PS3 version needs a stupid dongle, and I really hate dongles….). Granted, most tournament players prefer using a stick connected via USB, to ensure there’s no chance of lag, interference, dead battery at the wrong time, etc. Still, having a wireless stick eliminates carrying around a 10-15 foot USB cable and negates the possibility of your little brother tripping over the cable and pulling your console off the shelf (remember those SNES days? I know I’m not the only one…). And, as I mentioned before, if I have a wireless pad, why not a wireless fightstick?


So, why haven’t there been many wireless dual mod setups? Mainly because of how the boards are wired. For a dual mod to work, both pcbs must be ‘common ground’, and all the ground lines of each board, along with the buttons, joystick, battery, etc, need to be wired together. While it is possible to find a common ground 360 pad, as discussed in the last build, the PS3 pcb is not common ground. To get a wireless dual mod setup to work, you would need some extraordinary soldering skills, a pretty good knowledge of electronics, a handful of transistors, resisters, inverters, breadboards, very thin gauge wire and the patience of a saint. If so, you could produce something that looked like this:


Told you, not for the faint of heart...

Needless to say, this isn’t something that lot of people would bother with. However, Gummowned, the same SRK member (or mad man, depending on your outlook) that created the above monstrosity decided there was a market for this sort of setup and set out to make it easier for others to do the same thing. After a few months, the Leo board was born:


All those parts were soldered BY HAND. Gummowned is the man!

The Leo, through electronic wizardry, converts the PS3 pcb into a common ground pcb, allowing the user to wire up a PS3 pcb and a wireless 360 pcb for dual system wireless goodness (along with another added benefit which we’ll get to soon enough). That said, there’s still a good deal of work that needs to be done to make it all work. Unlike the axisadaptor, there are no screw terminals, so everything will need to be soldered to the Leo board. In addition, the contacts the wires need to be soldered to on the 360 pcb are quite small, and some pieces need to be desoldered and connected to a resistor before it will work. For a detailed look at what needs to be done to modify the above mentioned Hori Tekken stick, have a look here. In short, I have my work cut out for me on this one. But the possibilities this opens up are too great to ignore. Plus, the building bug bit me not long after I finished El Kabong2 . So, with the winter chill getting ready to set in over the east coast, I started planning my next stick. Such a shame I’m not going to keep it!

Tuesday, January 12, 2010

Berserker Barrage: the Marvel Vs. Capcom Stick Saga - Prologue

Ah MadCatz. I must give credit where credit is due. While there have been other arcade sticks before you from other companies (respect to the Sega Virtua Stick High Grade, the classic Namco Arcade Stick, and Hori’s countless Real Arcade Pro Sticks, etc), when you ‘came in the door (© Rakim)’ with the release of your Tournament Edition SFIV fightsticks, you set the bar quite high. Not only did you give the public genuine Sanwa arcade parts (not knockoff buttons), arcade layouts and a relatively easy way to buy them (a lot of earlier sticks were imports or you needed the hookup from your out of the way gaming store), but you also restored some much needed goodwill in your name (and you did pump out some craptacular accessories over the years, don’t lie). The Street Fighter tie in was pretty much a home run, since Capcom was out to jump start the fighting genre, which had been languishing for some time for a variety of reasons. Seeing how the original batch of TE fightsticks sold out, the many months you couldn’t find a decent fightstick ANYWHERE, custom, import or otherwise, and the ridiculous markup these sticks saw on eBay once the first run dried up, it’s safe to say job well done. Throughout the year, we’ve seen a few different ‘Collector’s Edition’ sticks come out: The Femme Fatal stick Femme Fatal stick, the Comic-Con special, Comic-Con and recently the 'Round 2' SFIV sticks. ‘Round 2’ But one in particular stood out for plenty of other fighting fans.


Marvel vs. Capcom 2 (MvC2, for those that are lazy) had a huge following during its arcade and console run. In fact, it’s one of the games that’s played at many official Street Fighter tournaments worldwide (along with SFIII: Third Strike and some form of Street Fighter II, most recently the HD Remix version). With the re-release of MvC2 on consoles, Madcatz decided to celebrate with a new special edition stick:


Looks like a comic book, doesn't it...

Available exclusively through GameStop or Madcatz online, it’s a very impressive looking stick, even if the mechanicals and electronics are the same as all the other TE sticks. However, some were slightly disappointed. While it definitely looks killer, it’s not anything an original TE owner couldn’t do with 6 yellow Sanwa buttons, a yellow balltop and some custom art. Plus, more than a few people were used to playing MvC2 on a Happ/iL setup because of the heavy button mashing done in game (well, heavy as opposed to the more skilled or nuanced movements from Street Fighter, anyway). Realistically, Madcatz wouldn’t have been able to make a Happ based stick without some serious development time and money, as Happ parts wouldn’t fit in the TE cases they already had. That, friendly readers, is where I come in…


Over the next few weeks (or months, seeing how I procrastinate and how COLD it is out here…) I’ll document the trials and tribulations in making my own custom Happ based MvC stick. Hopefully I would have learned a thing or two from my first custom build. Then again, I never once said I was smart. Let’s get to it!

Friday, January 8, 2010

Awesome Video Of The Day : Forza Drifting

Now, I'm a diehard Gran Turismo fan, but this video is just too good to argue with. Enjoy!


Monday, January 4, 2010

El Kabong2 (or making my first arcade stick) - Epilogue

The journey is over. I now am the owner of my first fightstick. It's been an interesting experience. I'm proud to say that I am the owner of a (semi) custom stick that I built myself. I love the fact it feels exactly like the arcade sticks I came up with, since it uses the same parts. I like the look on my friends faces when, after clowning me at the beginning, they click the buttons and move the bat top around for the first time and get that instant look of nostalgia in their eyes. I'm already working on another for a friend of mine and have 2 more planned for myself! Of course, that's not to say everything came up roses, mind you.

First, I can't say everything worked perfectly from day 1. After a few days 2 of my cherry switches on my stick failed. Now, I'm not sure if they were old switches, or if the fables lack of reliability with Happ styled parts was starting to creep up, but I replaced them both and haven't had a problem since. From time to time I seem to have problems inputting a down/diagonal command, but that may be chalked up to still getting acclimated to using a stick. The usb cable I was using in the case failed, causing the battery not to charge for a while. And until the paint fully 'cures', the inside of my case reeks of paint fumes if I have to take the bottom off to make an adjustment.

Then there's the matter of cost. Without even adding everything up, I can easily say I probably could have bought a TE AND a SE  by time everything was factored in (parts, paint, tools, various incidentals, etc). With better planning, or if I had some of the materials already, I could have cut some of the costs down, but not all of them. Economies of scale being what they are it would be cheaper in the end to buy a mass produced product, that's been designed, tested, and built hundred times over. And if you're an instant gratification guy, you could pop down to your local Gamestop, plunk down your $150, get home and start playing that day rather than waiting for your paint to dry. Still, some like tinkering and building, so if you're in no rush time isn't really a factor. And there still is something priceless about a stick that you created, regardless on the end cost. At least there is to me...

In the end, I enjoyed the process of building my fightstick and would recommend it to anyone that has the time and wants to play a fighting game like it was meant to be played: with a joystick and real buttons. It took longer than I thought, but for me it was time well spent. There are so many options for design, parts, art, color, leds, etc that time, money and imagination are your only limits. Have at it!


Stick Update:

I decided to make a change to the art on my stick after a month or so. I always liked this abstract piece of fan art:

Who's kicking who? 
 
So I managed to get a copy of Photoshop for my computer at home. Which, I may add, I STILL don't really know how to use. But with some tinkering, I managed to pull something together. I tried printing on semi-gloss paper and matte stock. I dind't want full gloss as it may have made a reflection under the plexiglass. The result:


This really makes the white on black stand out

Personally, I love it. And, as it turns out, I seem to have another fan of teh art and the stick in general. Either that or it's just something else for her to bite...


Teach them while they're young, I say...

The only problem I had with Sophia occurred when I was off to work. Apparently, Grandma let Sophia eat downstairs with daddy's toys. When I went to play a few rounds of SFIV, I had dried up crusty pieces of zwiebeck cookie all between the buttons and on the case. She's about to be in the same boat as Germaine in a minute!

El Kabong2 (or making my first arcade stick) Part 7 - End Game

Paint is done. Buttons are done. Wiring is done. The last thing I needed was some art. And a graphic designer. Not only did I not have any version of Photoshop, but I am not artistically inclined AT ALL. So, I gave my buddy Laz a call. He does all the signage and graphics for my wife’s job, so this would be right in his wheelhouse. I had searched online for some nice high resolution art (a must, since it’s a good chance any art chosen will need to be resized for the dimensions of the particular control panel). After a gin and tonic or two, we set to work.


First thing we needed to do was get the template set up for where the buttons and stick would be. I traced the lexan panel onto a sheet of paper with all the button cutouts, then scanned them into the computer. Afterward, we opened the scanned image in Photoshop. Using the scanned image Laz then drew the panel and circles for the cutouts, allowing us to manipulate things a little better. That way, we could create the button lables, have them spaced the right distance from where the buttons would be, and lock those together so changing the artwork would be as easy as overlaying a new picture. My first idea was to use The World According to Street Fighter:


They weren't kidding about World Warriors...

However, once we resized it to the dimensions of the panel, it didn’t work so well. The image wound up being too small to read a lot of the names of the characters, and a lot would be covered up by the buttons. Since I wasn’t using clear buttons where the art could be places inside, it just didn’t seem worth it. My next idea was to use this layered over some diamond plate:


Not quite everyone, but you get the idea

Looks like a dirty truck mudflap right now...

Since the picture would be too big to fit the panel as is, my idea was to resize the picture to fit widthwise, then crop the picture lengthwise to leave a 1 ½” to 2” strip at the bottom of the diamond plate. I wasn’t really worried if the bodies got cut off; as long as the faces all showed and were scaled correctly, I could live with it. Unfortunately, we couldn’t get that layout to work right either. Either I wasn’t explaining myself correctly, or we had too many tonics at that point. So that idea was tossed as well (in retrospect, I think I know how we could have done it and got it to look right, so I might try it again later). Next up, we tried this one:


UDon for the win!

This time we actually managed to pull something together that looked semi-decent. Laz resized the image to fit below the buttons without having to cut anything off. He softened the border of the picture, then made a gradient for the background. He also created a nice gradient effect box around the buttons to make them stand out. Once done, we printed everything out on photo paper. After it was dry we laid the lexan on top of the picture and cut out the button holes. When I got home, I was able to put everything together at last:


Everything looks so much better now that it's all together, doesn't it?


White buttons, black rim, good choice...


The inconspicuous USB connector. I'm still most proud of that


The money shot. I must admit, the wire cabling looks nice...

After taking photos, waking up the misses to see the end product, doing a victory dance in the basement and having a victory drink, I hit the PS button on the stick, pulled up Street Fighter IV and was happily trounced in online play. Had it really been 15 years since using a stick? Felt like 20….