NOTE: As mentioned in the prologue, many things in BBQ are variations on a theme. This applies not only in a micro sense (what ingredients are in the rub or sauce, etc) but on a macro level as well (what steps almost everyone takes, and what steps vary from situation and pitmaster). Those steps, and the discussion on those steps, will appear in italics.
- I cook either spare ribs, cur 'St. Louis Style' (whereby the spare ribs are squared up with the rib tips removed, leaving a flat, rectangular slab) or loin back (baby back) ribs, which don't have quite as much meat on them as the spare ribs, but seem to be more tender. The cooking time changes a bit (Baby backs cook a little quicker than spares), but the prep and cooking technique doesn't really change. Since I haven't found a butcher shop just yet, I head to the local grocery store and see what they have in the case (or if their butcher is out, I can ask then). While you can choose to save some money and trim your spare ribs yourself (for a good breakdown of that, look HERE), it's easier for me to just find them already cut for you. In my area, either Whole Foods or Wegman's is a solid choice.

- Once the cryovac bag is opened I rinse the ribs in the sink then pant the slabs dry and lay them on the cutting board (if I'm cooking a number of ribs, I'll place them in a plastic container to work on them one by one).

- There are two things that need to be done to the backside of these ribs. First, the diagonal flap of meat that's attached needs to be removed. You can cook it separately if you like or use it in a stew, or toss it if you don't mind being a little wasteful. There's nothing wrong with the meat at all; it just gets in the way of the ribs:

The next step is removing the membrane from the rib, the shiny looking skin that you see in the picture above. The vast majority of pitmasters, from novice to professional, remove the membrane. It's a rubbery, chewy 'skin' that won't render off when the ribs are cooked and keeps any rubs from sticking to that side of the meat. There are a few people that say it doesn't matter, or at the bare minimum will score the membrane with a knife to let some of the rub get through. However, it's not hard to remove at all, so I suggest just pulling it off. Here's how: Start with a bone near the end of the slab. Using a butter knife, spoon, or other flat utensil, slide between the membrane and the slab, and pry the membrane away from the slab. Then, just grab a paper towel and pull the rest of the membrane down the length of the slab, removing it in one piece. The membrane may tear, which is fine. Just go back and remove it separately. After a few times doing this you may not even need to utensil to get the removal started. Here's a video showing how it's done as well:
When your finished, the backs should look like this:

- Next, we flip the ribs over and inspect the front for any trimming that needs to be done. Some pitmasters will trim off any large pockets of fat that may be on the ribs. Others leave the fat alone, figuring the fat will render off during the long cook and impart some level of flavor to the meat as it does. For me, it depends on the slab and how much time I have. Most of the time the ribs look fine, but cutting back some of the large pockets of fat never hurt. Use your knife to square up the ribs as needed (sometimes there may be a bone sliver or really loose piece of meat at one of the ends that could stand to be cleaned up).
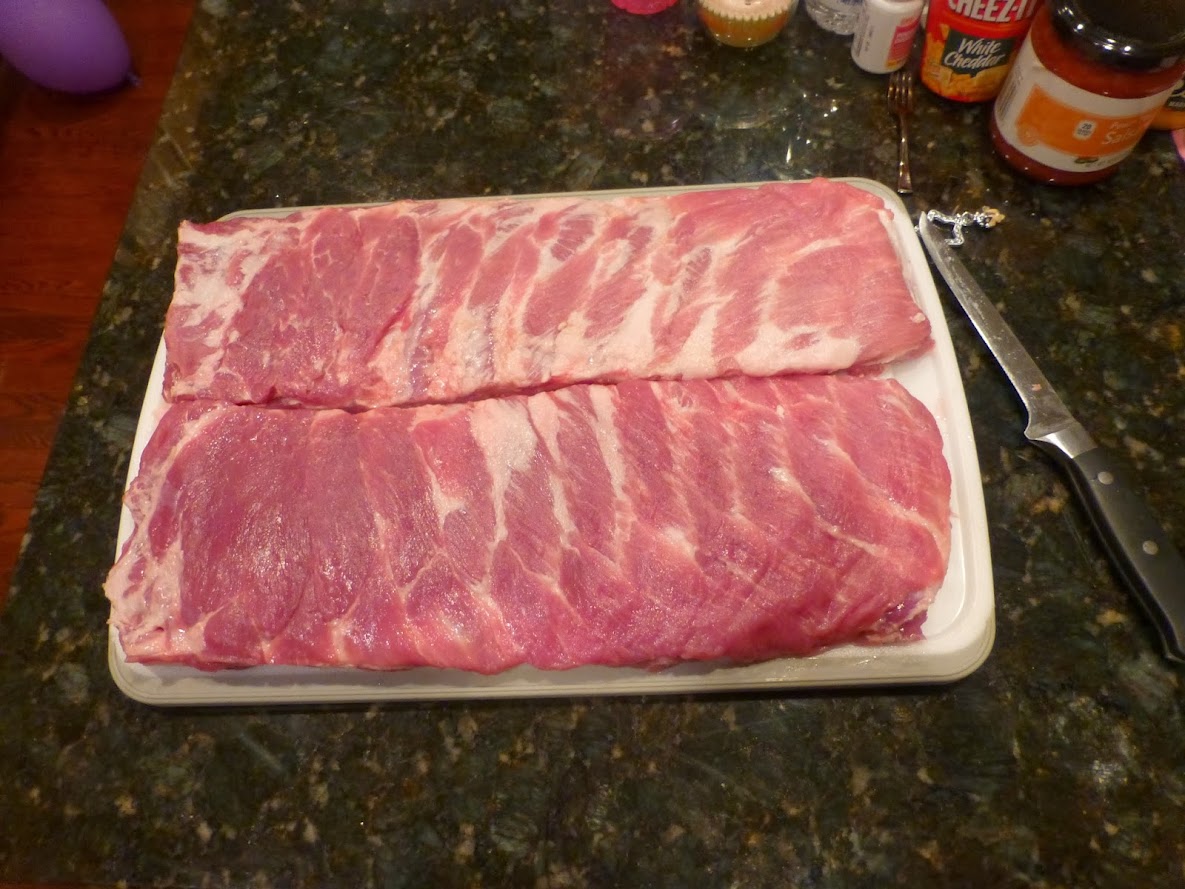
- There are some pitmasters that will use a 'pre-rub' at this stage. The pre-rub is usually a light rub with some salt, pepper, garlic, onion, and a few other spices. Some have used packets of ranch seasoning. Some have used a dry marinade like THIS to add to the meat. And some don't even bother with using a pre-rub in the first place. One thing to note: If a pre-rub is being used, be mindful of the salt content. If there's a good deal of salt in the pre-rub, reduce the salt in the main rub. I'm on the fence on a pre-rub for ribs, so there's a 50/50 chance I will use one or not. For this particular cook, I used a pre-rub.

One of the rubs was a store bought rub (Texas T-Bone seasoning), which went on the top rack of ribs. The bottom rack of ribs were pre-rubbed with a homemade mix of salt, pepper, onion powder, garlic powder, sage, and cumin. The pre-rub went on both sides of the ribs

- Next up is the rub. Which rub you ask? There's really no wrong answer. Almost every rubs have some combination of salt, sugar. pepper, and various spices (paprika, cumin, some chilies, mustard, onion and garlic powder, etc). Some rubs may be spicier than another, some sweeter, some earthier than another. Some recipes may have 10 or more ingredients, some may only have 3 or 4. One pitmaster won an event with a simple salt, pepper and garlic rub. At some BBQ competitions, some pitmasters have secret homemade recipes that have supposedly been handed down for generations. Johnnie Trigg, a well known and successful pitmaster from Texas, has said he has no time to mix up batches of rubs and will buy one particular rub that has the flavor he likes that has given him success. The main takeaway here? In my opinion, there isn't one specific rub that's better or worse than another. You may prefer ribs that have a bit of a spicy kick. Your friends or customers may like their ribs with a sweeter note. If you're in a BBQ competition, they may be looking for a balance. So there may not be one specific rub for your target audience. More importantly, if your preparation and cooking techniques aren't sound, it doesn't matter what you put on the meat. A tender, juicy rack of ribs that only used a few spices is going to be worlds better than a tough, dry rack of ribs that used your great great granddaddy's super secret spice rub.
Now that I got that out of my system, we can get back to the cook. Usually I will use a rub that I make myself, which leans a bit to the spicy side of things thanks to the homemade chili powder that I use, which varied depending on which dried chilies I have on hand (I will say if I have the choice of a store bought chili powder and a homemade one, go with the homemade powder every time. I've had really good results with my man Alton Brown's chili powder recipe found HERE. The chili peppers can usually be found in the Hispanic aisle of your local grocery store) . For this cook, however, I was fresh out of homemade rub, and didn't feel up to mixing a batch. No matter. I had 2 other rubs I got from the store that would work just fine.

I had used Lambert's Sweet Rub o' Mine before. It's got a nice sweet flavor with just a bit of heat from the spices in the rub. It also has a nice reddish hue (likely from the paprika) that makes the ribs look good too. The Booty Rib seasoning is similar to a rib I had used before (Three Little Pigs Memphis Style BBQ Rub), which doesn't have a lot of sugar, but a nice balance of peppers and a hint of Worcestershire powder. Even though it doesn't have the color of the Lambert's, at the end the ribs will still look (and taste) great.
- Once you decide on what rub is going to be used, it's time to figure out if you are going to use a 'binding agent'. Some pitmasters will simply shake the rub on the meat, making sure there's good coverage, maybe even pressing the rub into the meat as well. Others will rub a coat of oil on the ribs first, then apply the rub. Still others swear by using regular yellow mustard then applying the rub. The reasoning behind using mustard or oil is that it will help the rub stick to the meat moreso than if it was put on without it. Oil has the additional benefit of helping dissolve some of the spices that wouldn't dissolve in water.

My take? It really doesn't matter that much either way. If mustard is used, it will NOT impart any mustard flavor to your ribs. Will either help the rub dissolve into the meat any better than not using anything at all? Hard to say. Does the rub stick better with a binder on the ribs? It seems like it, but it's far from a requirement. So, if you have some on hand, feel free to use it. If not, don't sweat it. The ribs will rest for a bit anyway while you get the grill going, so the spices will have a chance to set in the ribs. For this cook, I used mustard on one slab of ribs and olive oil on the other.

- Now grab your rub and liberally sprinkle on both sides of the slab, making sure to get good coverage.

The top slab of ribs has the Lambert's rub over mustard, the bottom has the Booty Rub over olive oil. Once done, put them in a container and set aside, or cover with foil or wax paper until it's time to go on the grill.
How long the ribs should rest with the rub on (pre-rub or the main rub) varies depending on who you ask. Some pitmasters apply the rub and let it sit long enough to get the grill or smoker heated up. Others will let rubbed ribs sit in the fridge or cooler for a few hours before starting the cook. The extra time does allow the spices to act as a dry marinade of sorts. That being said I haven't found that it will make or break your ribs. If you have time, go for it (provided the rub isn't too salty). If not, I wouldn't sweat it.
Paper and pen in hand...taking notes...good info
ReplyDelete