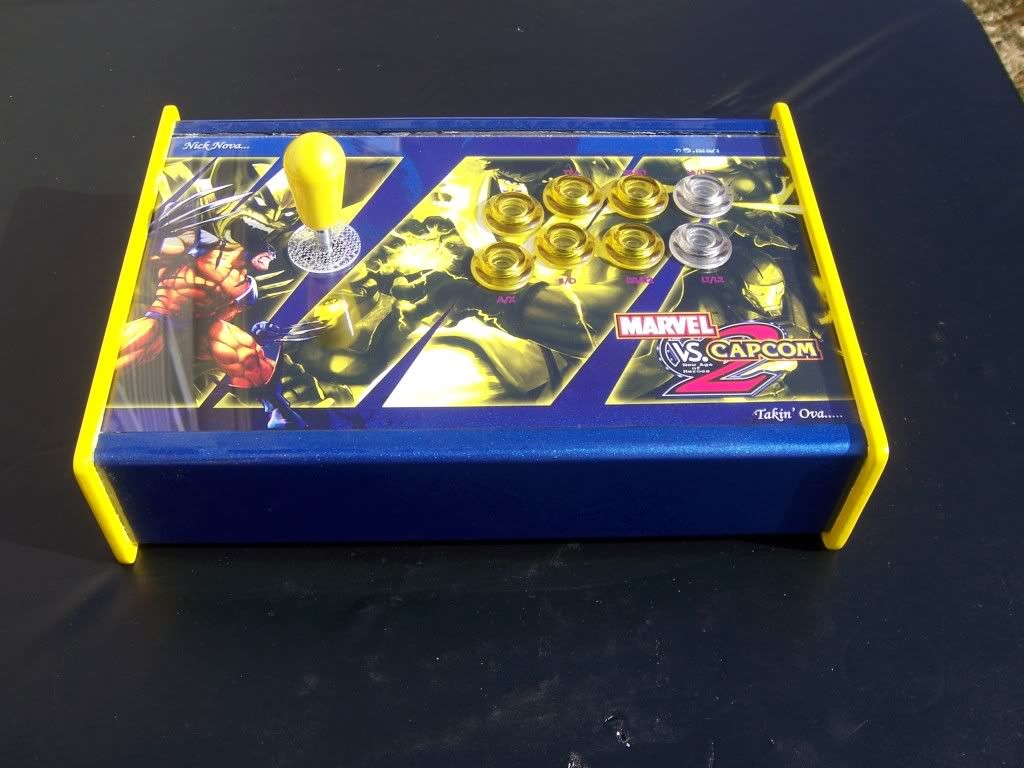
And build a stick with Happ/iL based parts with the same theme:
I say: Mission Accomplished! Then again, I did put it together, so I may be a little bit biased. I definitely learned a few things with this build. First, a wireless dual mod is not for the faint of heart. While it's not the most complicated thing in the world, it does involve a lot of wire, a lot of soldernig, a lot of planning and a lot of time. If you want lights, you're looking at even more soldering and more time. You want it to look neat? Add to the time. Will it take as long as my project took? Probably not. Being a family man, I wasn't able to devote hours at a time to cutting, crimping, soldering, and sheething that would be needed to finish faster. That said, unless you work with electronics as a job, or have done a lot of soldering work in the past, don't expect to knock something like this out in 2 hours.
That's to say nothing of the work I had to do on the case. I'll admit, if I wasn't as dumb I probably could have shaved at least a month off the paint and prep time getting the case to look like I wanted. Not paying attention to whether I was using enamel or lacquer paint, and not ordering the vinyl dye sooner, really slowed things down. The wet sanding, while providing a fantastic finish, is very tedious and time consuming no matter how you look at it. Modifying the case itseld to accept the switches and larger buttons was childs play in comparison. I did have to order some different parts than I planned, but the end result was worth it.
If I had to give some advice to anyone trying a similar project, I'd tell them 3 things. First, Don't be afraid to screw up. Most likely, something is going to go wrong with a custom project like this. Sometimes it's a small thing, like soldering a lead tothe wrong spot. Sometimes it can be major, like inadvertantly frying your PCB. Whatever, it can usually be fixed or replaced. Second, don't be afraid to ask for suggestions or help. Since I still don't have access to the tools needed to make my own case, I had to outsource that. I had to ask a myriad of questions to make sure I was wiring everything correctly. Some questions were intelligent, others, not so much. And there is no way the art would have come out like it did if I didn't ask. Third, get your Bo Jackson on and Just Do It. Roll up your sleeves, heat up the soldering iron, and get to work. It may take a while, and it may not look like other projects you've seen that other more skilled people have done, but with some determination and effort, you can do this. As I said with my first build, nothing quite feels like using a stick you put together yourself.
I must give a shout out to a few people that helped get this project done. I need to thank Physh for building ans shipping the case. The design was wide and tall enough for everything to fit, and the design gave it some flair, making the color choice really work. A huge shout and thanks goes to Gummowmed for designing the leo board in the first place and answering the many questions I had during the course of the build. I actually got a chance to meet him at a tournament in Ashburn, VA and I brought the stick, I should have had him autograph it! And a big, BIG shout to d3v for all the help with the artwork. Everyone that's seen the stick online and in person has been extremely impressed. While I can take the credit for the paint finish, without that custom art it would not have been complete. In fact, d3v and I have collaborated on two other sticks, which I'll probably get around to posting in a year from now, knowing my schedule...

Dope!
ReplyDelete